Check the Gas Supply Pressure

1.Slowly turn on main gas shut-off valve.

2.Read the gas supply pressure from the manome- ter; minimum supply pressure is 4 in. WC, recommended supply is 7 in. WC for natural gas (minimum 11.0 in. WC for LP gas).

3.If pressure is > 14 in. WC, turn off the valve.

4.Check if the service regulator is installed and/or adjust the service regulator.

Start-Up

Blower Adjustment

1.Connect manometer to the plugged side of the tee.

2.Close manual firing valve.

3.Turn power on.

4.Check manometers attached to fan pressure switch. This (LO) speed pressure reading should be:

–0.2 in. WC for models HD101 and HD151. –0.3 in. WC for models HD201–HD401.

If not, adjust the air shutter on the blower to attain the correct value. (See air shutter adjustment page 7).

5.Turn power off.

6.Reinstall rubber plug on tee.

Main Burner Adjustment

1.Turn off unit.

2.Open manual firing valve.

3.Turn on the unit, wait 15 seconds, and the igniter should glow. There’s a sight glass to check igniter at both ends of the heater. Gas valve should be open after 45 seconds.

4.If burner does not light on first trial. It will retry, up to 3 times.

5.Main burner ignition – check manifold gas pres- sure at gas valve manifold pressure tap. (See gas valve details on page 7) This should read 3.0 in. ±

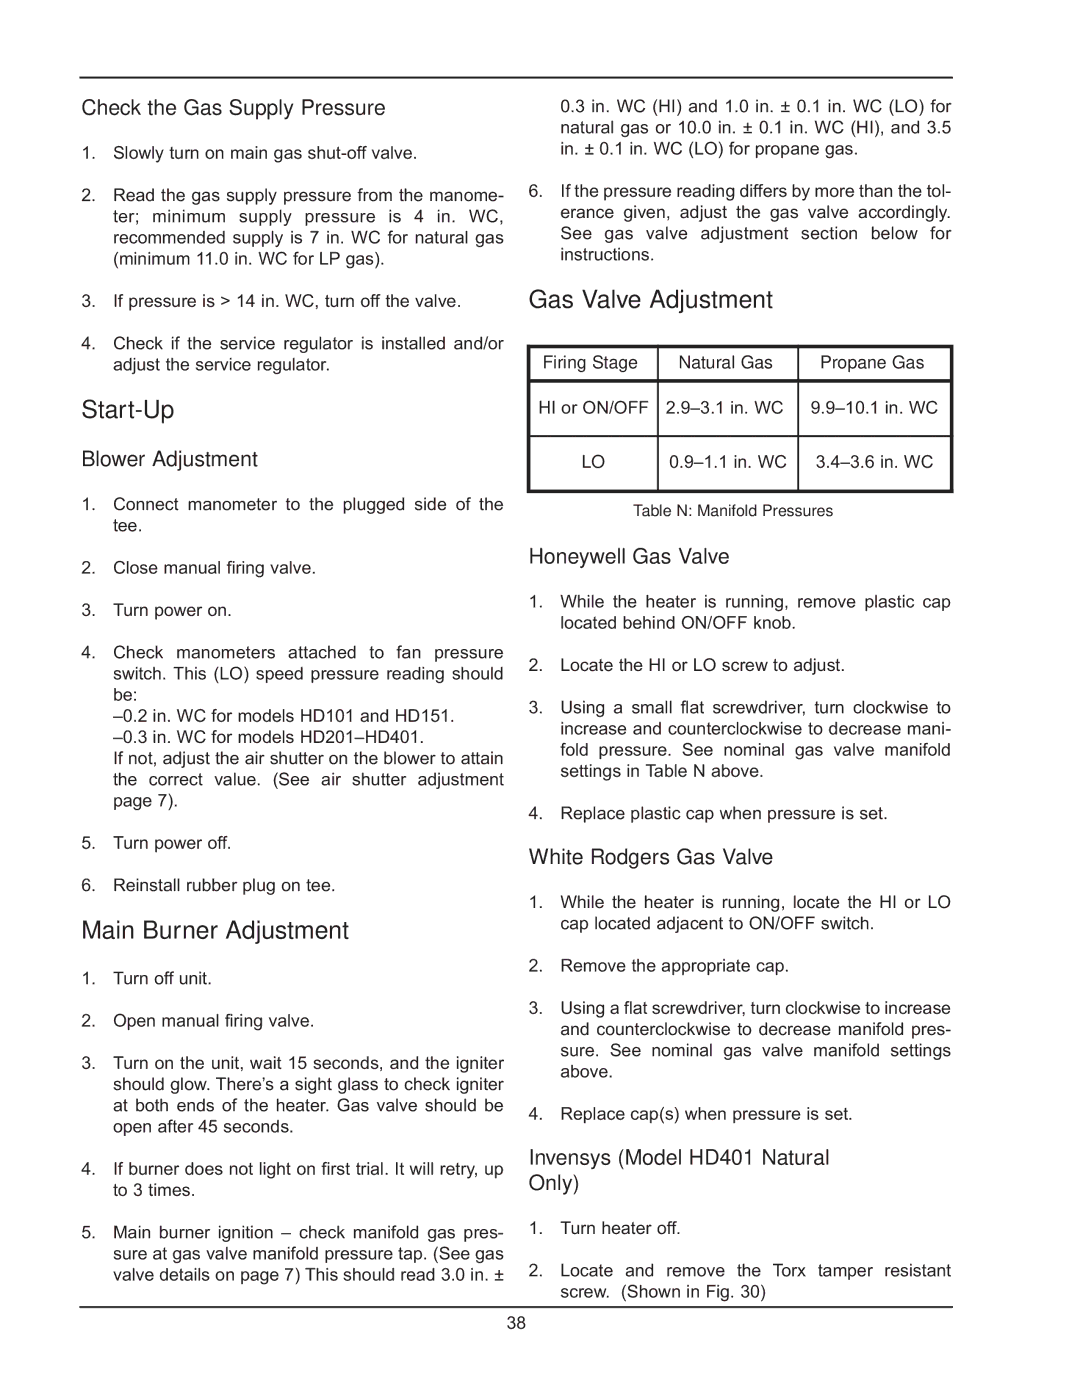
0.3 in. WC (HI) and 1.0 in. ± 0.1 in. WC (LO) for natural gas or 10.0 in. ± 0.1 in. WC (HI), and 3.5 in. ± 0.1 in. WC (LO) for propane gas.

6.If the pressure reading differs by more than the tol- erance given, adjust the gas valve accordingly. See gas valve adjustment section below for instructions.

Gas Valve Adjustment

Firing Stage

Natural Gas

Propane Gas


HI or ON/OFF

2.9–3.1 in. WC

9.9–10.1 in. WC


LO

0.9–1.1 in. WC

3.4–3.6 in. WC


Table N: Manifold Pressures

Honeywell Gas Valve

1.While the heater is running, remove plastic cap located behind ON/OFF knob.

2.Locate the HI or LO screw to adjust.

3.Using a small flat screwdriver, turn clockwise to increase and counterclockwise to decrease mani- fold pressure. See nominal gas valve manifold settings in Table N above.

4.Replace plastic cap when pressure is set.

White Rodgers Gas Valve

1.While the heater is running, locate the HI or LO cap located adjacent to ON/OFF switch.

2.Remove the appropriate cap.

3.Using a flat screwdriver, turn clockwise to increase and counterclockwise to decrease manifold pres- sure. See nominal gas valve manifold settings above.

4.Replace cap(s) when pressure is set.

Invensys (Model HD401 Natural Only)

1.Turn heater off.

2.Locate and remove the Torx tamper resistant screw. (Shown in Fig. 30)

38

Page 38
Image 38
Raypak HD401, HD101 manual Start-Up, Main Burner Adjustment, Gas Valve Adjustment

HD101, HD401 specifications

Raypak is renowned for its commitment to high-quality heating solutions, with the HD101 and HD401 models standing out in their product range. These units are designed specifically for commercial applications, providing reliable and efficient hydronic heating systems. The HD series embodies innovation while addressing the unique demands of larger spaces.

One of the main features of the HD101 and HD401 is their stainless steel construction, which ensures increased durability and resistance to corrosion. This design choice enhances the longevity of the units, making them ideal for various installations in commercial or industrial settings.

Both models are equipped with a high-efficiency heat exchanger that maximizes heat transfer while minimizing energy consumption. This feature is particularly significant in today’s environmentally conscious market, as it contributes to lower operating costs and reduced carbon footprints. The heat exchangers are engineered for easy maintenance, offering simplicity when service is required.

In terms of technology, the HD101 and HD401 include advanced digital controls that allow for precise temperature regulation. This user-friendly interface enables operators to easily manage and monitor heating parameters, facilitating optimal performance and energy management.

The models also feature modulating burners that adjust their output according to the heating demand. This capacity for modulation results in smoother operation and an overall increase in efficiency, as the burners can maintain consistent temperatures without excessive energy use.

Another noteworthy characteristic is their compatibility with various control systems, including BMS (Building Management Systems). This adaptability allows for seamless integration into existing infrastructure, providing users with greater versatility and control over their heating environments.

Both the HD101 and HD401 come with advanced safety features, including flame rollback protection and pressure monitoring, ensuring safe operation even in demanding conditions. Additionally, their compact design allows for easy installation in limited spaces while still providing powerful heating capabilities.

Ultimately, the Raypak HD101 and HD401 are exceptional choices for those in need of high-efficiency commercial heating solutions. With their robust construction, advanced technology, and user-friendly features, these models promise to deliver reliable performance and energy savings for years to come. Whether for a large facility or a specific industrial application, they stand ready to meet the heating challenges of today’s commercial landscape.