Getting Started
CHANNEL
![]() 1 Channel Guide
1 Channel Guide
2 Channel Selection
3 Signal Source
4 Auto Channel Search
5 List and Labels
6 Auto Tuning
0 Exit
ACCESS & POWER OPTIONS
Remote Config. TV1
^
Press ^v to change, MENU to exit.
Remote Config. | TV1 |
Basic Menu Access | Enabled |
TV Power Config. | Always |
Front Panel | Enabled |
Energy Saver | Disabled |
Parental Controls | NoBasic |
Channel Menu
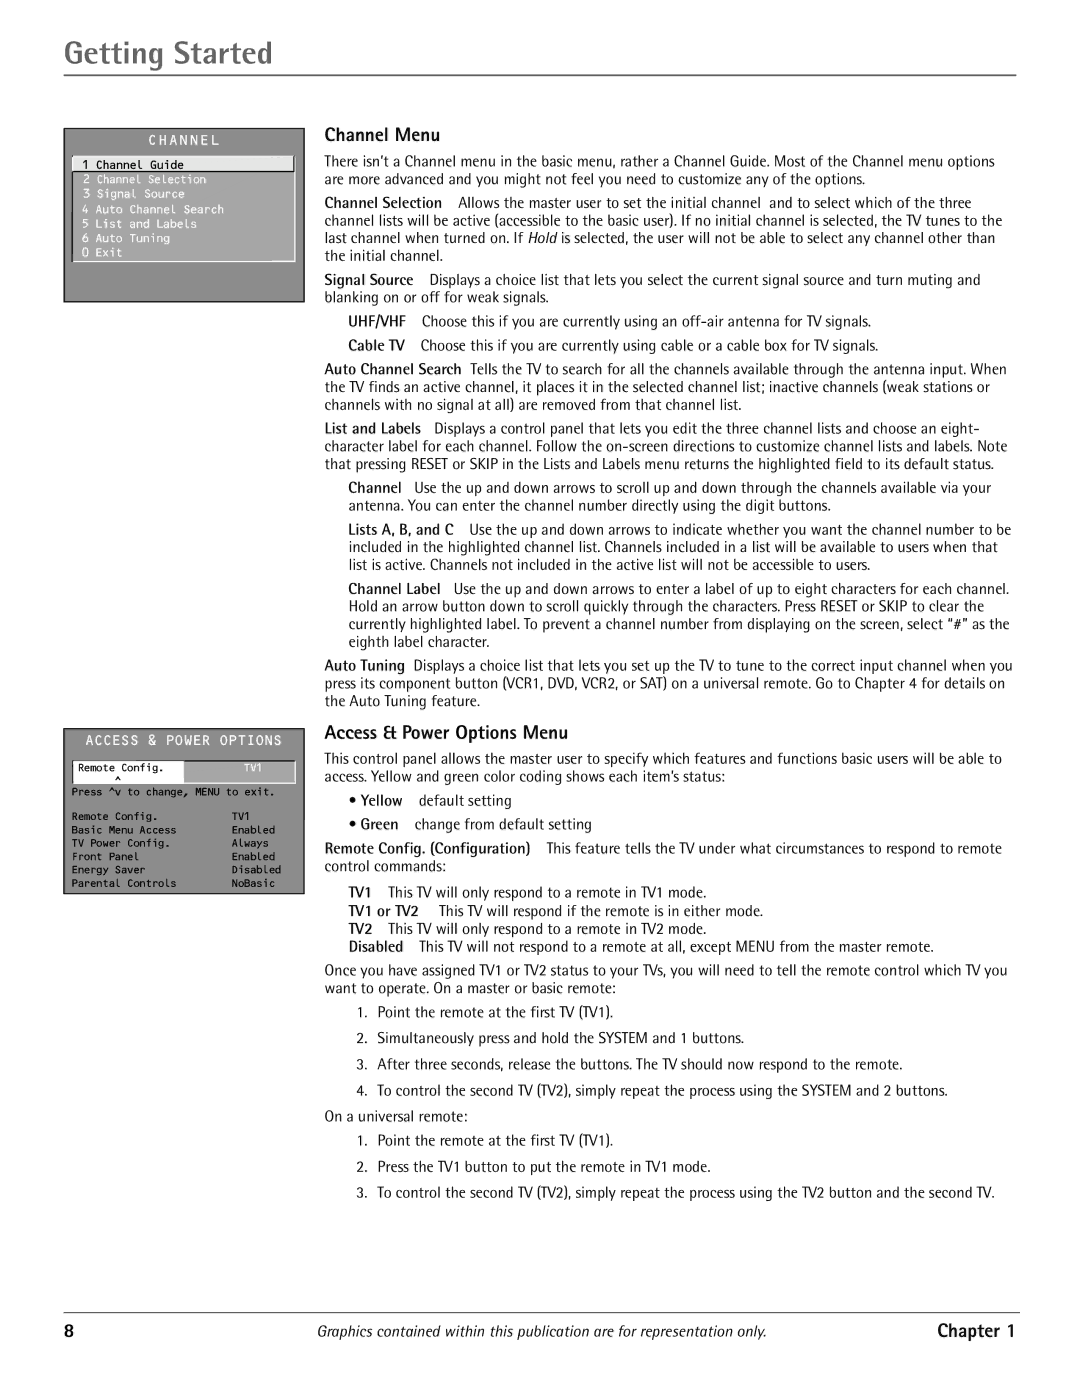
There isn’t a Channel menu in the basic menu, rather a Channel Guide. Most of the Channel menu options are more advanced and you might not feel you need to customize any of the options.
Channel Selection Allows the master user to set the initial channel and to select which of the three channel lists will be active (accessible to the basic user). If no initial channel is selected, the TV tunes to the last channel when turned on. If Hold is selected, the user will not be able to select any channel other than the initial channel.
Signal Source Displays a choice list that lets you select the current signal source and turn muting and blanking on or off for weak signals.
UHF/VHF Choose this if you are currently using an
Cable TV Choose this if you are currently using cable or a cable box for TV signals.
Auto Channel Search Tells the TV to search for all the channels available through the antenna input. When the TV finds an active channel, it places it in the selected channel list; inactive channels (weak stations or channels with no signal at all) are removed from that channel list.
List and Labels Displays a control panel that lets you edit the three channel lists and choose an eight- character label for each channel. Follow the
Channel Use the up and down arrows to scroll up and down through the channels available via your antenna. You can enter the channel number directly using the digit buttons.
Lists A, B, and C Use the up and down arrows to indicate whether you want the channel number to be included in the highlighted channel list. Channels included in a list will be available to users when that list is active. Channels not included in the active list will not be accessible to users.
Channel Label Use the up and down arrows to enter a label of up to eight characters for each channel. Hold an arrow button down to scroll quickly through the characters. Press RESET or SKIP to clear the currently highlighted label. To prevent a channel number from displaying on the screen, select “#” as the eighth label character.
Auto Tuning Displays a choice list that lets you set up the TV to tune to the correct input channel when you press its component button (VCR1, DVD, VCR2, or SAT) on a universal remote. Go to Chapter 4 for details on the Auto Tuning feature.
Access & Power Options Menu
This control panel allows the master user to specify which features and functions basic users will be able to access. Yellow and green color coding shows each item’s status:
•Yellow default setting
•Green change from default setting
Remote Config. (Configuration) This feature tells the TV under what circumstances to respond to remote control commands:
TV1 This TV will only respond to a remote in TV1 mode.
TV1 or TV2 This TV will respond if the remote is in either mode. TV2 This TV will only respond to a remote in TV2 mode.
Disabled This TV will not respond to a remote at all, except MENU from the master remote.
Once you have assigned TV1 or TV2 status to your TVs, you will need to tell the remote control which TV you want to operate. On a master or basic remote:
1.Point the remote at the first TV (TV1).
2.Simultaneously press and hold the SYSTEM and 1 buttons.
3.After three seconds, release the buttons. The TV should now respond to the remote.
4.To control the second TV (TV2), simply repeat the process using the SYSTEM and 2 buttons. On a universal remote:
1.Point the remote at the first TV (TV1).
2.Press the TV1 button to put the remote in TV1 mode.
3.To control the second TV (TV2), simply repeat the process using the TV2 button and the second TV.
8 | Graphics contained within this publication are for representation only. | Chapter 1 |
