FIRST THINGS FIRST
STEP 1: WHAT’S IN THE BOX?
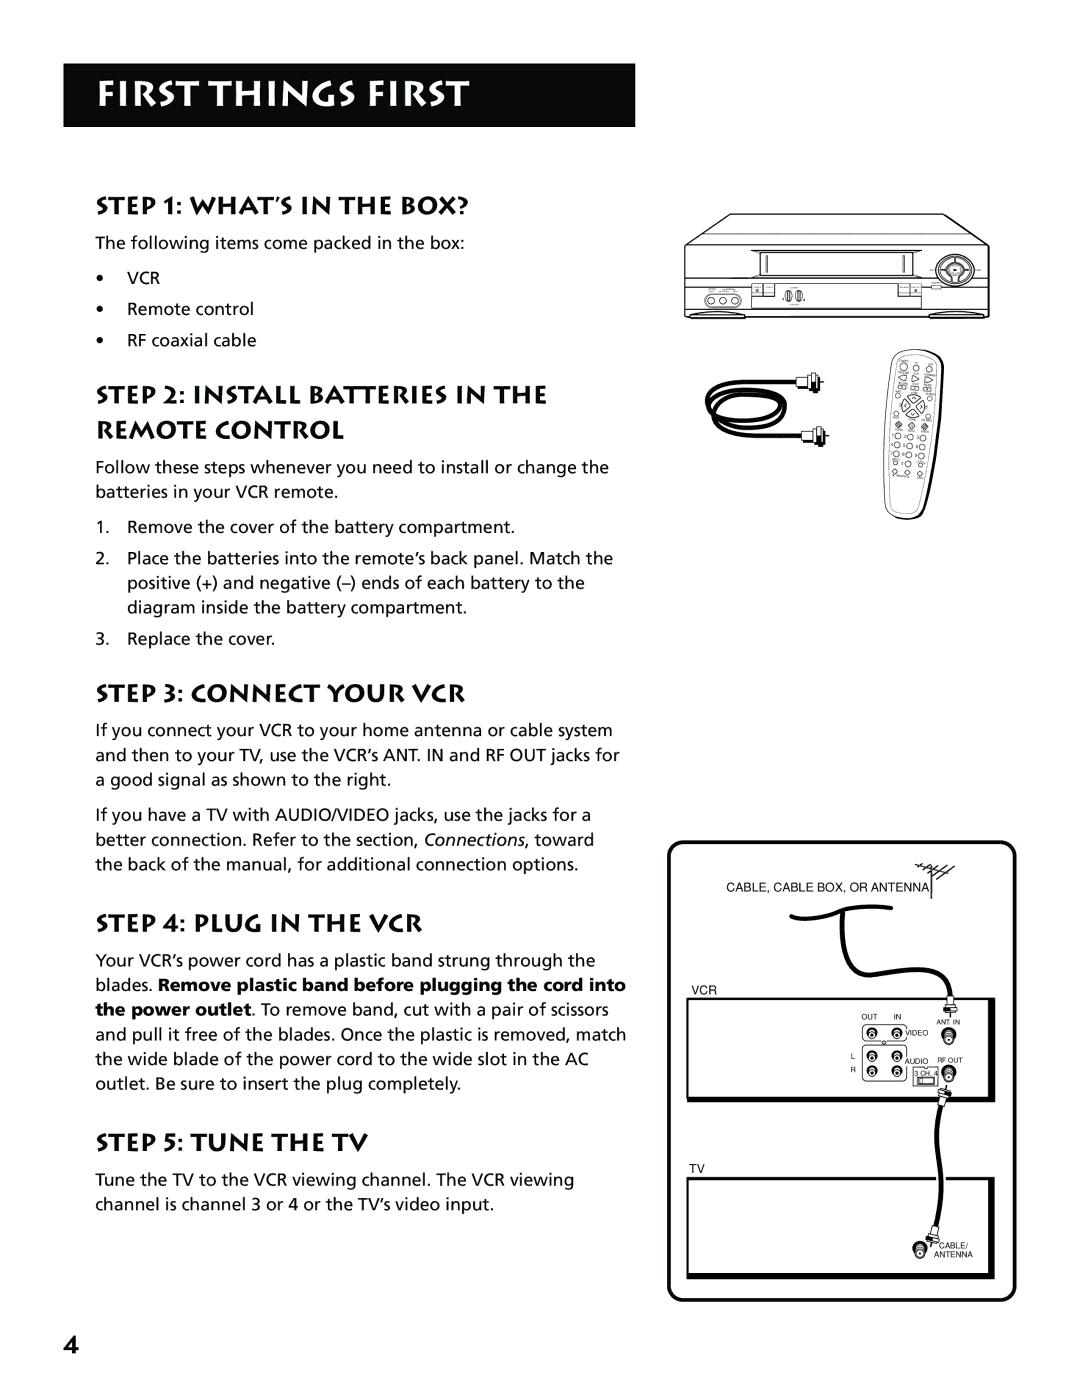
The following items come packed in the box:
•VCR
•Remote control
•RF coaxial cable
STEP 2: INSTALL BATTERIES IN THE
REMOTE CONTROL
Follow these steps whenever you need to install or change the batteries in your VCR remote.
1.Remove the cover of the battery compartment.
2.Place the batteries into the remote’s back panel. Match the positive (+) and negative
3.Replace the cover.
STEP 3: CONNECT YOUR VCR
If you connect your VCR to your home antenna or cable system and then to your TV, use the VCR’s ANT. IN and RF OUT jacks for a good signal as shown to the right.
If you have a TV with AUDIO/VIDEO jacks, use the jacks for a better connection. Refer to the section, Connections, toward the back of the manual, for additional connection options.
STEP 4: PLUG IN THE VCR
Your VCR’s power cord has a plastic band strung through the
| PLAY |
REV | FWD |
| P A USE |
RECORD |
|
VIDEO AUDIO
| ON OFF |
| TV | VCR |
|
|
| ||
| REVERSE | PLAY | FORWARD | |
|
|
| ||
| RECORD |
| STOP | PAUSE |
| INFO |
| CHAN | SEARCH |
|
|
| ||
| OLV |
|
| V |
|
|
|
| LO |
| MUTE | CHAN | GO BACK | |
|
| |||
| CLEAR | MENU | SPEED | |
1 |
| |||
2 |
| 3 |
| |
4 | 5 |
| 6 |
|
7 | 8 |
| 9 |
|
| P |
|
| |
N UT |
| V•VC | ||
I | 0 |
| ||
|
| T | R | |
| TRACKIN |
| F.ADV | |
|
|
| ||
CABLE, CABLE BOX, OR ANTENNA
blades. Remove plastic band before plugging the cord into
the power outlet. To remove band, cut with a pair of scissors and pull it free of the blades. Once the plastic is removed, match
VCR
OUT IN
![]() VIDEO
VIDEO
ANT. IN
the wide blade of the power cord to the wide slot in the AC outlet. Be sure to insert the plug completely.
L
AUDIO RF OUT
R | 3 CH. 4 |
STEP 5: TUNE THE TV
Tune the TV to the VCR viewing channel. The VCR viewing channel is channel 3 or 4 or the TV’s video input.
TV
CABLE/
ANTENNA
4