OPERATING INSTRUCTIONS
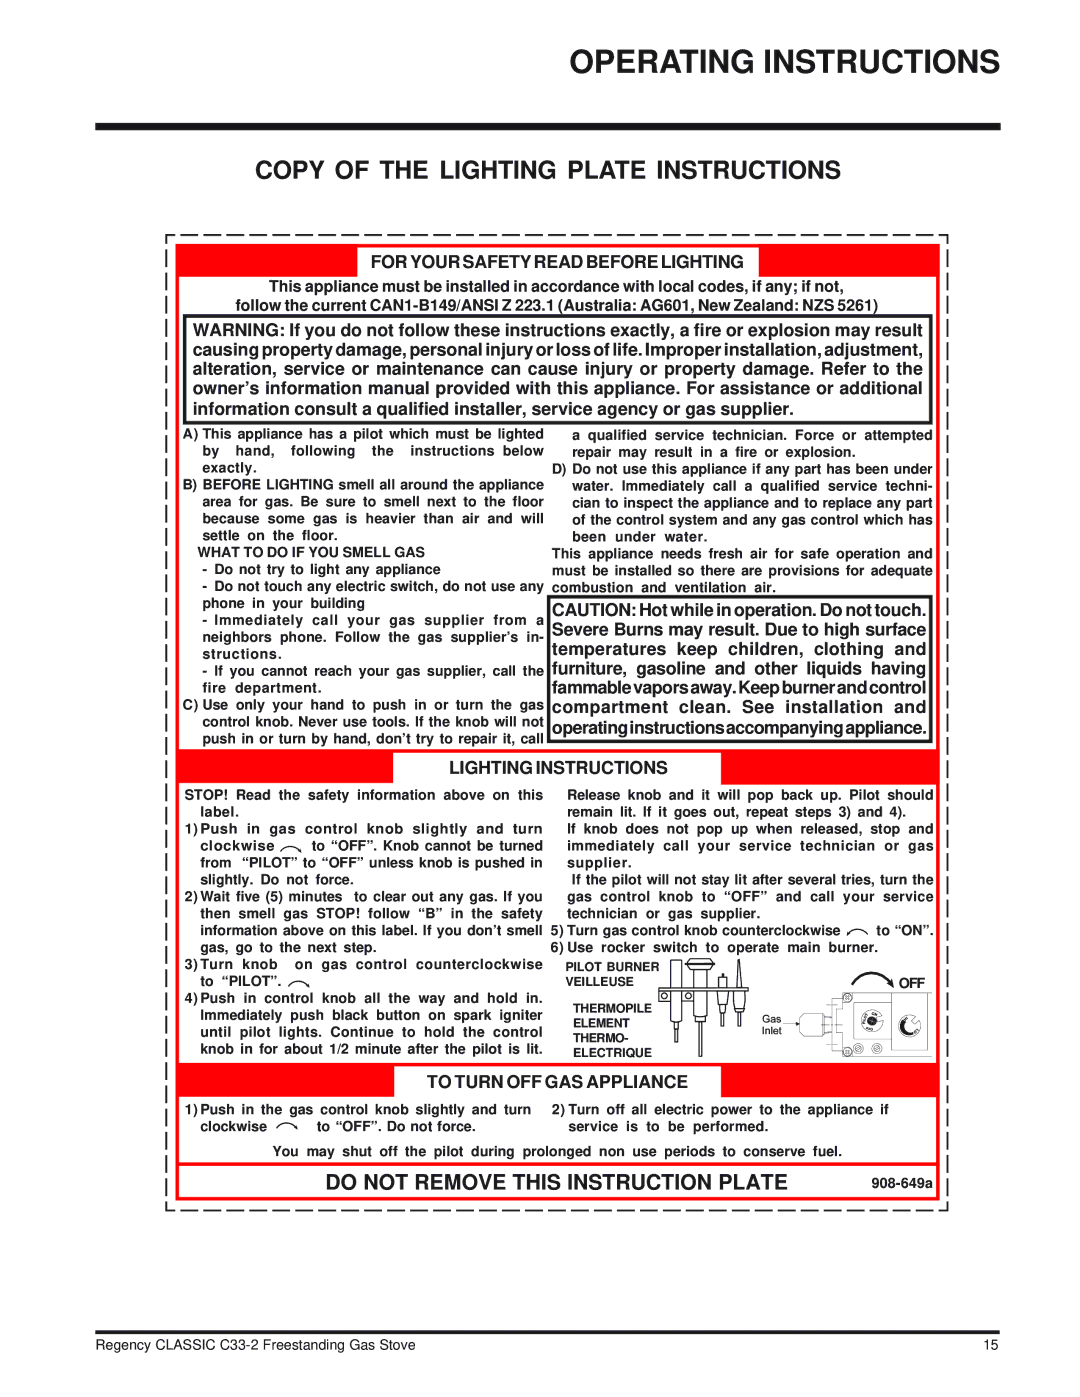
COPY OF THE LIGHTING PLATE INSTRUCTIONS
FOR YOUR SAFETY READ BEFORE LIGHTING
This appliance must be installed in accordance with local codes, if any; if not,
follow the current
WARNING: If you do not follow these instructions exactly, a fire or explosion may result causing property damage, personal injury or loss of life. Improper installation, adjustment, alteration, service or maintenance can cause injury or property damage. Refer to the owner’s information manual provided with this appliance. For assistance or additional information consult a qualified installer, service agency or gas supplier.
A) This appliance has a pilot which must be lighted | a qualified service technician. Force or attempted | ||||||
by hand, following the instructions below | repair may result in a fire or explosion. |
| |||||
exactly. |
|
|
|
| D) Do not use this appliance if any part has been under | ||
B) BEFORE LIGHTING smell all around the appliance | water. Immediately call a qualified service techni- | ||||||
area for gas. Be sure to smell next to the floor | cian to inspect the appliance and to replace any part | ||||||
because some gas is heavier than air and will | of the control system and any gas control which has | ||||||
settle on the floor. |
|
| been under water. |
| |||
WHAT TO DO IF YOU SMELL GAS | This appliance needs fresh air for safe operation and | ||||||
- Do not try to light any appliance | must be installed so there are provisions for adequate | ||||||
- Do not touch any electric switch, do not use any | combustion and | ventilation air. |
| ||||
phone in your building |
| CAUTION: Hot while in operation. Do not touch. | |||||
- Immediately call your gas supplier from a | |||||||
neighbors phone. Follow the gas supplier’s in- | Severe Burns may result. Due to high surface | ||||||
structions. |
|
|
|
| temperatures keep children, clothing and | ||
- If you cannot reach your gas supplier, call the furniture, gasoline and other liquids having | |||||||
fire department. |
|
| fammablevaporsaway.Keepburnerandcontrol | ||||
C) Use only your hand to push in or turn the gas compartment | clean. See installation and | ||||||
control knob. Never use tools. If the knob will not | operatinginstructionsaccompanyingappliance. | ||||||
push in or turn by hand, don’t try to repair it, call |
|
|
| ||||
|
|
|
| LIGHTING INSTRUCTIONS |
|
| |
STOP! Read the safety information above on this | Release knob and it will pop back up. Pilot should | ||||||
label. |
|
|
|
| remain lit. If it goes out, repeat steps 3) and 4). | ||
1) Push in gas control knob slightly and turn | If knob does not pop up when released, stop and | ||||||
clockwise | to “OFF”. Knob cannot be turned | immediately call your service technician or gas | |||||
from “PILOT” to “OFF” unless knob is pushed in | supplier. |
|
| ||||
slightly. Do | not | force. |
|
| If the pilot will not stay lit after several tries, turn the | ||
2) Wait five (5) minutes to clear out any gas. If you | gas control knob to “OFF” and call your service | ||||||
then smell gas STOP! follow “B” in the safety | technician or gas supplier. |
| |||||
information above on this label. If you don’t smell | 5) Turn gas control knob counterclockwise | to “ON”. | |||||
gas, go to the next step. |
| 6) Use rocker switch to operate main burner. | |||||
3) Turn knob | on | gas | control | counterclockwise | PILOT BURNER |
|
|
to “PILOT”. |
|
|
|
| VEILLEUSE |
| OFF |
4) Push in control | knob | all the | way and hold in. | THERMOPILE |
|
| |
Immediately push black button on spark igniter |
|
| |||||
ELEMENT |
|
| |||||
until pilot lights. Continue to | hold the control |
|
| ||||
THERMO- |
|
| |||||
knob in for about 1/2 minute after the pilot is lit. |
|
| |||||
ELECTRIQUE |
|
| |||||
TO TURN OFF GAS APPLIANCE
1)Push in the gas control knob slightly and turn
clockwise ![]() to “OFF”. Do not force.
to “OFF”. Do not force.
2)Turn off all electric power to the appliance if service is to be performed.
You may shut off the pilot during prolonged non use periods to conserve fuel.
DO NOT REMOVE THIS INSTRUCTION PLATE | ||||||||||||||||||||||||||||||||||||||||||||||||||||
|
|
|
|
|
|
|
|
|
|
|
|
|
|
|
|
|
|
|
|
|
|
|
|
|
|
|
|
|
|
|
|
|
|
|
|
|
|
|
|
|
|
|
|
|
|
|
|
|
|
|
|
|
Regency CLASSIC | 15 |
