OPERATING INSTRUCTIONS

crease in volume depending on the speed setting of your fan speed control.

Burner Tray:

The burner tray is positioned directly under the burner tube(s) and logs and is made of a different gauge material from the rest of the firebox and body. Therefore, the varying thick- nesses of steel will expand and contract at slightly different rates which can cause "tick- ing" and "cracking" sounds. You should also be aware that as there are temperature changes within the unit these sounds will likely re-occur. Again, this is normal for steel fireboxes.

Blower Thermodisc:

When this thermally activated switch turns ON it will create a small "clicking" sound. This is the switch contacts closing and is normal.

Pilot Flame:

While the pilot flame is on it can make a very slight "whisper" sound.

Gas Control Valve:

As the gas control valve turns ON and OFF, a dull clicking sound may be audible, this is normal operation of a gas regulator or valve.

Unit Body/Firebox:

Different types and thicknesses of steel will expand and contract at different rates resulting in some "cracking" and "ticking" sounds will be heard throughout the cycling process.

MAINTENANCE

INSTRUCTIONS

1)Always turn the gas valve to off before cleaning. For relighting, refer to lighting instructions. Keep the burner and control compartment clean by brushing and vacu- uming at least once a year. When cleaning the logs, use a clean soft paint brush as the logs are fragile and easily damaged.

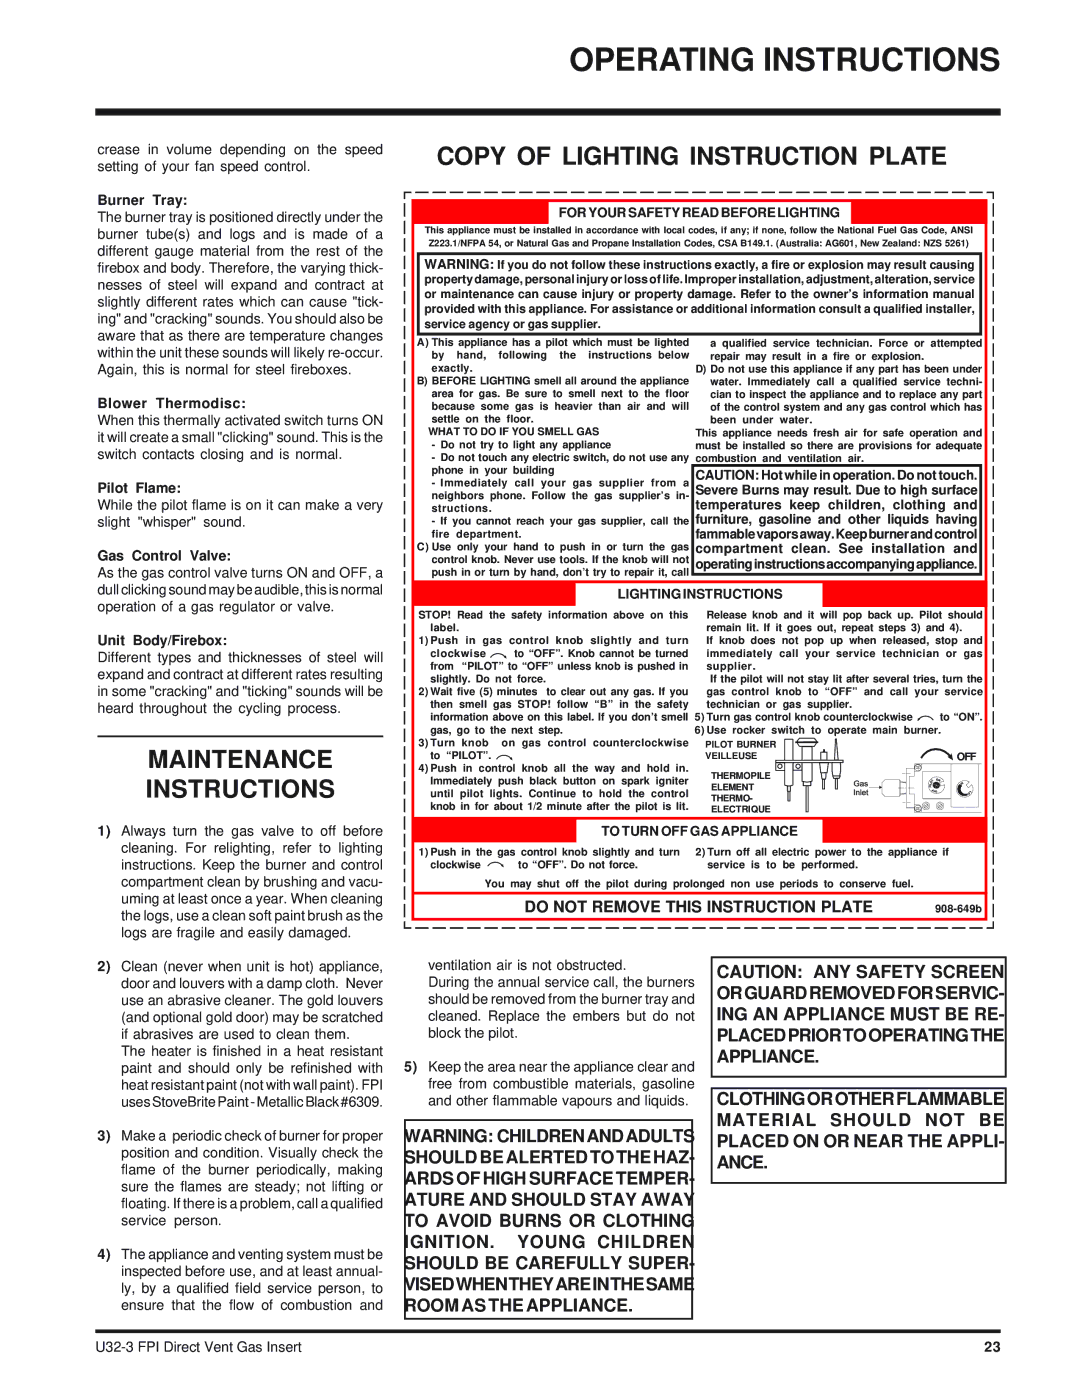
COPY OF LIGHTING INSTRUCTION PLATE

FOR YOUR SAFETY READ BEFORE LIGHTING

This appliance must be installed in accordance with local codes, if any; if none, follow the National Fuel Gas Code, ANSI Z223.1/NFPA 54, or Natural Gas and Propane Installation Codes, CSA B149.1. (Australia: AG601, New Zealand: NZS 5261)

WARNING: If you do not follow these instructions exactly, a fire or explosion may result causing property damage, personal injury or loss of life. Improper installation, adjustment, alteration, service or maintenance can cause injury or property damage. Refer to the owner’s information manual provided with this appliance. For assistance or additional information consult a qualified installer, service agency or gas supplier.

A) This appliance has a pilot which must be lighted

a qualified service technician. Force or attempted

by hand, following the instructions below

repair may result in a fire or explosion.


exactly.


D) Do not use this appliance if any part has been under

B) BEFORE LIGHTING smell all around the appliance

water. Immediately call a qualified service techni-

area for gas. Be sure to smell next to the floor

cian to inspect the appliance and to replace any part

because some gas is heavier than air and will

of the control system and any gas control which has

settle on the floor.


been under water.


WHAT TO DO IF YOU SMELL GAS

This appliance needs fresh air for safe operation and

- Do not try to light any appliance

must be installed so there are provisions for adequate

- Do not touch any electric switch, do not use any

combustion and

ventilation air.


phone in your building


CAUTION: Hot while in operation. Do not touch.

- Immediately call your gas supplier from a

neighbors phone. Follow the gas supplier’s in-

Severe Burns may result. Due to high surface

structions.


temperatures keep children, clothing and

- If you cannot reach your gas supplier, call the furniture, gasoline and other liquids having

fire department.


fammablevaporsaway.Keepburnerandcontrol

C) Use only your hand to push in or turn the gas compartment

clean. See installation and

control knob. Never use tools. If the knob will not

operatinginstructionsaccompanyingappliance.

push in or turn by hand, don’t try to repair it, call


LIGHTING INSTRUCTIONS


STOP! Read the safety information above on this

Release knob and it will pop back up. Pilot should

label.


remain lit. If it goes out, repeat steps 3) and 4).

1) Push in gas control knob slightly and turn

If knob does not pop up when released, stop and

clockwise

to “OFF”. Knob cannot be turned

immediately call your service technician or gas

from “PILOT” to “OFF” unless knob is pushed in

supplier.


slightly. Do

not

force.


If the pilot will not stay lit after several tries, turn the

2) Wait five (5) minutes to clear out any gas. If you

gas control knob to “OFF” and call your service

then smell gas STOP! follow “B” in the safety

technician or gas supplier.


information above on this label. If you don’t smell 5) Turn gas control knob counterclockwise

to “ON”.

gas, go to the next step.


6) Use rocker switch to operate main burner.

3) Turn knob

on

gas

control

counterclockwise

PILOT BURNER


to “PILOT”.


VEILLEUSE


OFF

4) Push in control

knob

all the

way and hold in.

THERMOPILE


Immediately push black button on spark igniter


ELEMENT


until pilot lights. Continue to

hold the control


THERMO-


knob in for about 1/2 minute after the pilot is lit.


ELECTRIQUE


TO TURN OFF GAS APPLIANCE


1) Push in the gas control knob slightly and turn

2) Turn off all electric power to the appliance if

clockwise


to “OFF”. Do not force.

service is to be performed.


You may shut off the pilot during prolonged non use periods to conserve fuel.

DO NOT REMOVE THIS INSTRUCTION PLATE

908-649b


2)Clean (never when unit is hot) appliance, door and louvers with a damp cloth. Never use an abrasive cleaner. The gold louvers (and optional gold door) may be scratched if abrasives are used to clean them.

The heater is finished in a heat resistant paint and should only be refinished with heat resistant paint (not with wall paint). FPI uses StoveBrite Paint - Metallic Black #6309.

3)Make a periodic check of burner for proper position and condition. Visually check the flame of the burner periodically, making sure the flames are steady; not lifting or floating. If there is a problem, call a qualified service person.

4)The appliance and venting system must be inspected before use, and at least annual- ly, by a qualified field service person, to ensure that the flow of combustion and

ventilation air is not obstructed.

CAUTION: ANY SAFETY SCREEN

During the annual service call, the burners

ORGUARDREMOVEDFORSERVIC-

should be removed from the burner tray and

cleaned. Replace the embers but do not

ING AN APPLIANCE MUST BE RE-

block the pilot.

PLACEDPRIORTOOPERATINGTHE

5) Keep the area near the appliance clear and

APPLIANCE.


free from combustible materials, gasoline


and other flammable vapours and liquids.

CLOTHINGOROTHERFLAMMABLE


MATERIAL SHOULD NOT BE

WARNING: CHILDRENANDADULTS


PLACED ON OR NEAR THE APPLI-

SHOULD BE ALERTED TO THE HAZ-

ANCE.

ARDS OF HIGH SURFACE TEMPER-


ATURE AND SHOULD STAY AWAY


TO AVOID BURNS OR CLOTHING


IGNITION. YOUNG CHILDREN


SHOULD BE CAREFULLY SUPER-


VISEDWHENTHEYAREINTHESAME


ROOM AS THE APPLIANCE.


U32-3 FPI Direct Vent Gas Insert

23

Page 23
Image 23
Regency U32-NG3 installation manual Maintenance Instructions, Copy of Lighting Instruction Plate

U32-NG3 specifications

The Regency U32-NG3 is an innovative and elegant gas fireplace designed to enhance the ambiance of any living space while providing efficient heating. With its sleek design and modern technology, the U32-NG3 is a prime example of Regency's commitment to quality craftsmanship and customer satisfaction.

One of the main features of the U32-NG3 is its clean, contemporary lines that fit seamlessly into both traditional and modern interiors. The fireplace boasts a large viewing area, thanks to its expansive glass front. This design not only provides an unobstructed view of the flames but also allows for greater heat output, making the U32-NG3 an efficient choice for heating.

The U32-NG3 is designed with a direct vent system, which ensures that combustion gases are vented outside the home, promoting a clean indoor environment. This feature also maximizes the efficiency of the fireplace, as it draws air from outside for combustion, reducing heating costs. The direct vent technology is particularly beneficial for homes in colder climates as it minimizes the draw of warm air from the living space.

In terms of heating capacity, the U32-NG3 is powerful, capable of delivering up to 30,000 BTUs. This output is suitable for medium to large rooms, ensuring a cozy atmosphere on cold winter evenings. Homeowners can also customize the flame height and heat output to suit their comfort needs.

Safety is a top priority with the U32-NG3. It includes advanced safety features such as an automatic shut-off system that activates in case of a malfunction or blockage in the venting system. The fireplace also has a safety screen that prevents unintended contact with the flames while allowing for maximum heat circulation.

The U32-NG3 is equipped with state-of-the-art electronic ignition, which ensures quick and reliable startups at the push of a button. Additionally, the fireplace can be operated remotely with a convenient wall switch or optional remote control, adding further ease of use.

In conclusion, the Regency U32-NG3 is a versatile gas fireplace that combines style, efficiency, and advanced technology. Its focus on safety, ease of use, and impressive heating capabilities make it an ideal choice for homeowners looking to upgrade their living space with a modern heating solution. With the U32-NG3, you can create a warm and inviting atmosphere while enjoying all the benefits of a high-quality gas fireplace.