Unpacking and Checking Contents
1.Remove tool from carton by lifting unit.
2.Place the tool on a secure, stationary work surface and look the tool over carefully.
WARNING: For your own safety, never connect plug to power source outlet, or insert switch key until all assembly steps are complete and until you have read and understood the entire own- ers manual.
WARNING: To reduce the risk of injury, if any parts are missing, do not attempt to assemble the sander, plug in the power cord, or turn the switch on until the missing parts are obtained and installed correctly.
List of Loose Parts
NOTE: Before beginning assembly, check that all parts are included. If you are miss- ing any part, do not assemble the sander. Call
Item | Description | Qty. | |
A | Oscillating Edge Belt/ |
| |
| Spindle Sander | 1 | |
B | Spacer Ring Inserts |
| |
| 1/2" I.D | 1 | |
| 1" I.D | 1 | |
| 1 | ||
| 2" I.D | 1 | |
C Drums |
|
| |
| 3/4" x | 1 | |
| 1" x | 1 | |
| 1 | ||
| 2" x | 1 | |
D | Sandpaper Sleeves |
| |
| 1/2" x | 1 | |
| 3/4" x | 1 | |
| 1" x | 1 | |
| 1 | ||
| 2" x | 1 | |
E | Sanding Belt (Installed) |
| |
| 4" x 24" | 1 | |
F | Insert | 1 | |
G | Operators Manual | 1 | |
H | Bag of Loose Parts |
| |
Containing the following parts: |
| ||
Rubber feet | 4 | ||
Washer, Flat 21/64 x | 1 | ||
Washer, Flat 21/64 x 7/8 x 3/64 | 1 | ||
Washer, Flat 21/64 x 5/8 x 1/32 | 1 | ||
Switch Key | ......................................... | 1 | |
Hex “L” Wrench 3/32 | 1 | ||
Hex “L” Wrench 5/32 | 1 | ||
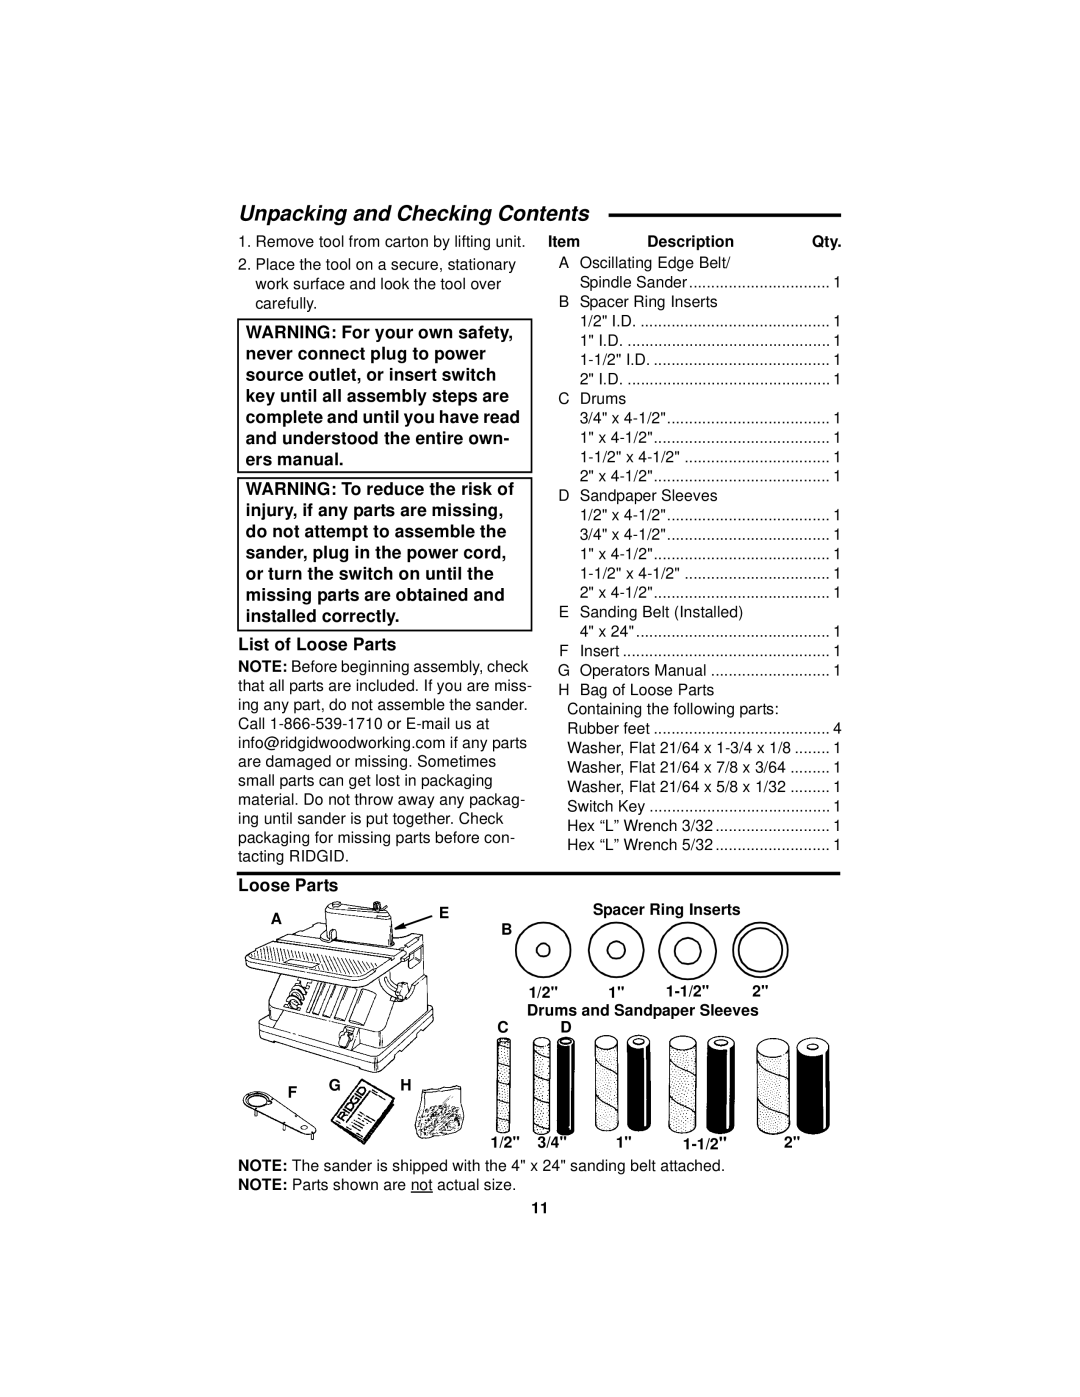
Loose Parts
A | E | Spacer Ring Inserts |
| B | |
|
|
1/2" 1"
C D
F G H
1/2" 3/4" 1"
NOTE: The sander is shipped with the 4" x 24" sanding belt attached.
NOTE: Parts shown are not actual size.
11
