10.
11.Backstop Knob. Loosening knob allows backstop to be pivoted.
12.Dust Collection Port.
13.Table Insert/Sanding Belt Storage. Holds table insert or sanding belt when not being used.
14.Hex “L” Wrench. Use 3/32" wrench to adjust front table and table insert. Use 5/32" wrench to adjust belt to miter gauge slot.
15.Table Insert. Helps to support work- piece when drum sanding.
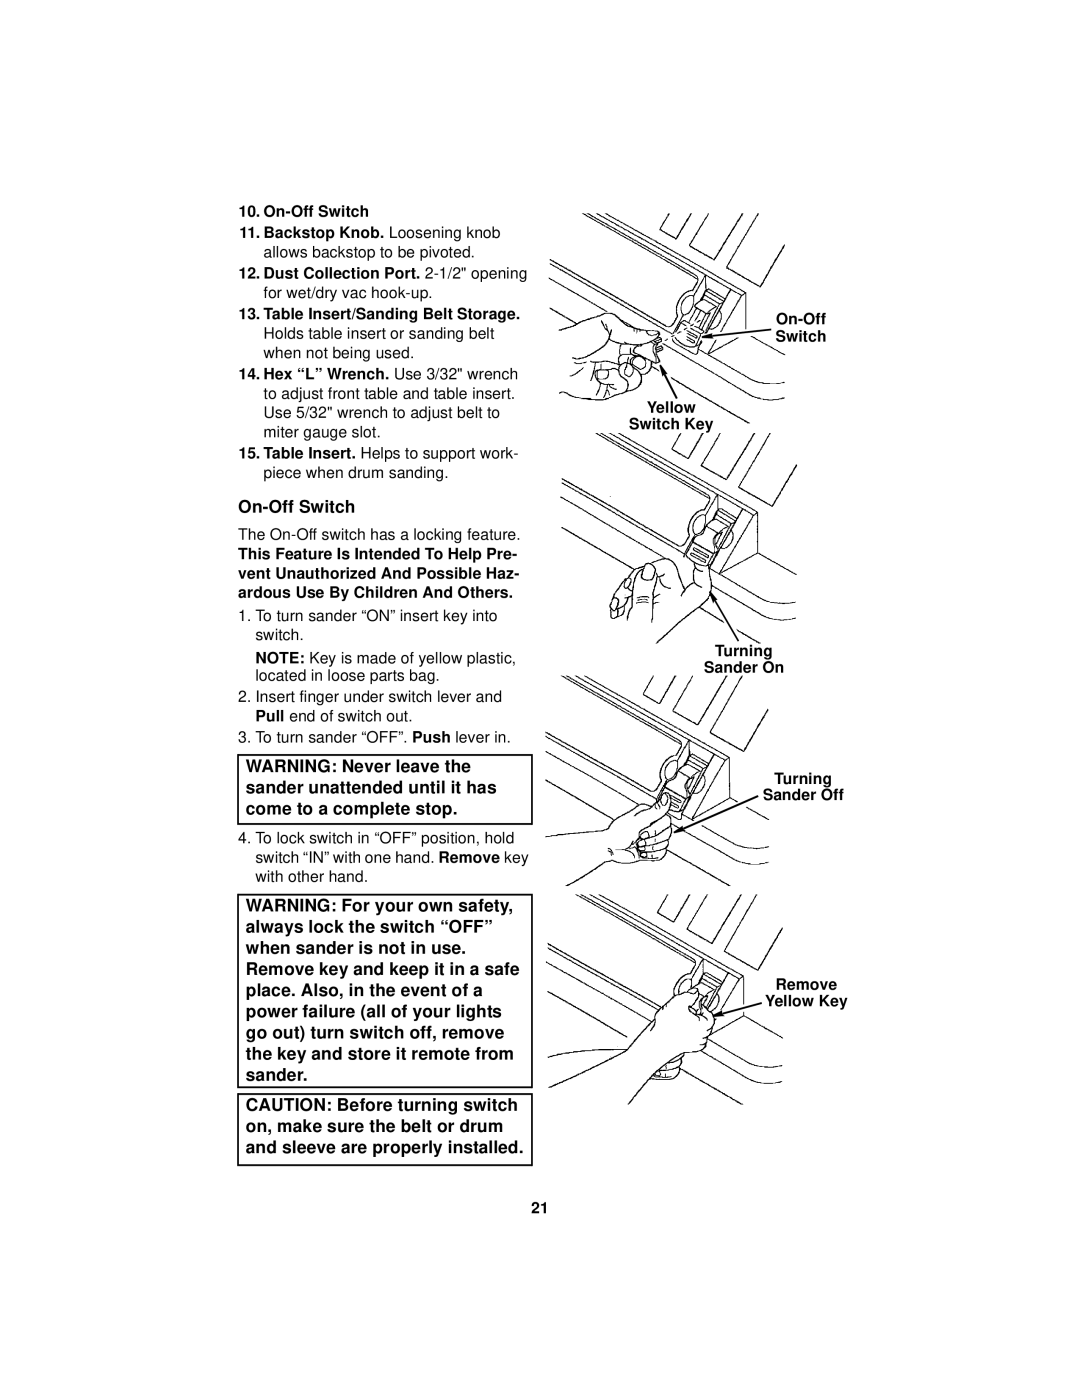
On-Off Switch
The
This Feature Is Intended To Help Pre- vent Unauthorized And Possible Haz- ardous Use By Children And Others.
1.To turn sander “ON” insert key into switch.
NOTE: Key is made of yellow plastic, located in loose parts bag.
2.Insert finger under switch lever and Pull end of switch out.
3.To turn sander “OFF”Push. lever in.
WARNING: Never leave the sander unattended until it has come to a complete stop.
4.To lock switch in “OFF” position, hold
switch “IN” with one handRemove. key with other hand.
WARNING: For your own safety, always lock the switch “OFF” when sander is not in use. Remove key and keep it in a safe place. Also, in the event of a power failure (all of your lights go out) turn switch off, remove the key and store it remote from sander.
CAUTION: Before turning switch on, make sure the belt or drum and sleeve are properly installed.
Switch
Yellow
Switch Key
Turning
Sander On
Turning
![]() Sander Off
Sander Off
Remove
![]() Yellow Key
Yellow Key
21