Bass control panel
Connection panel
M N
LO
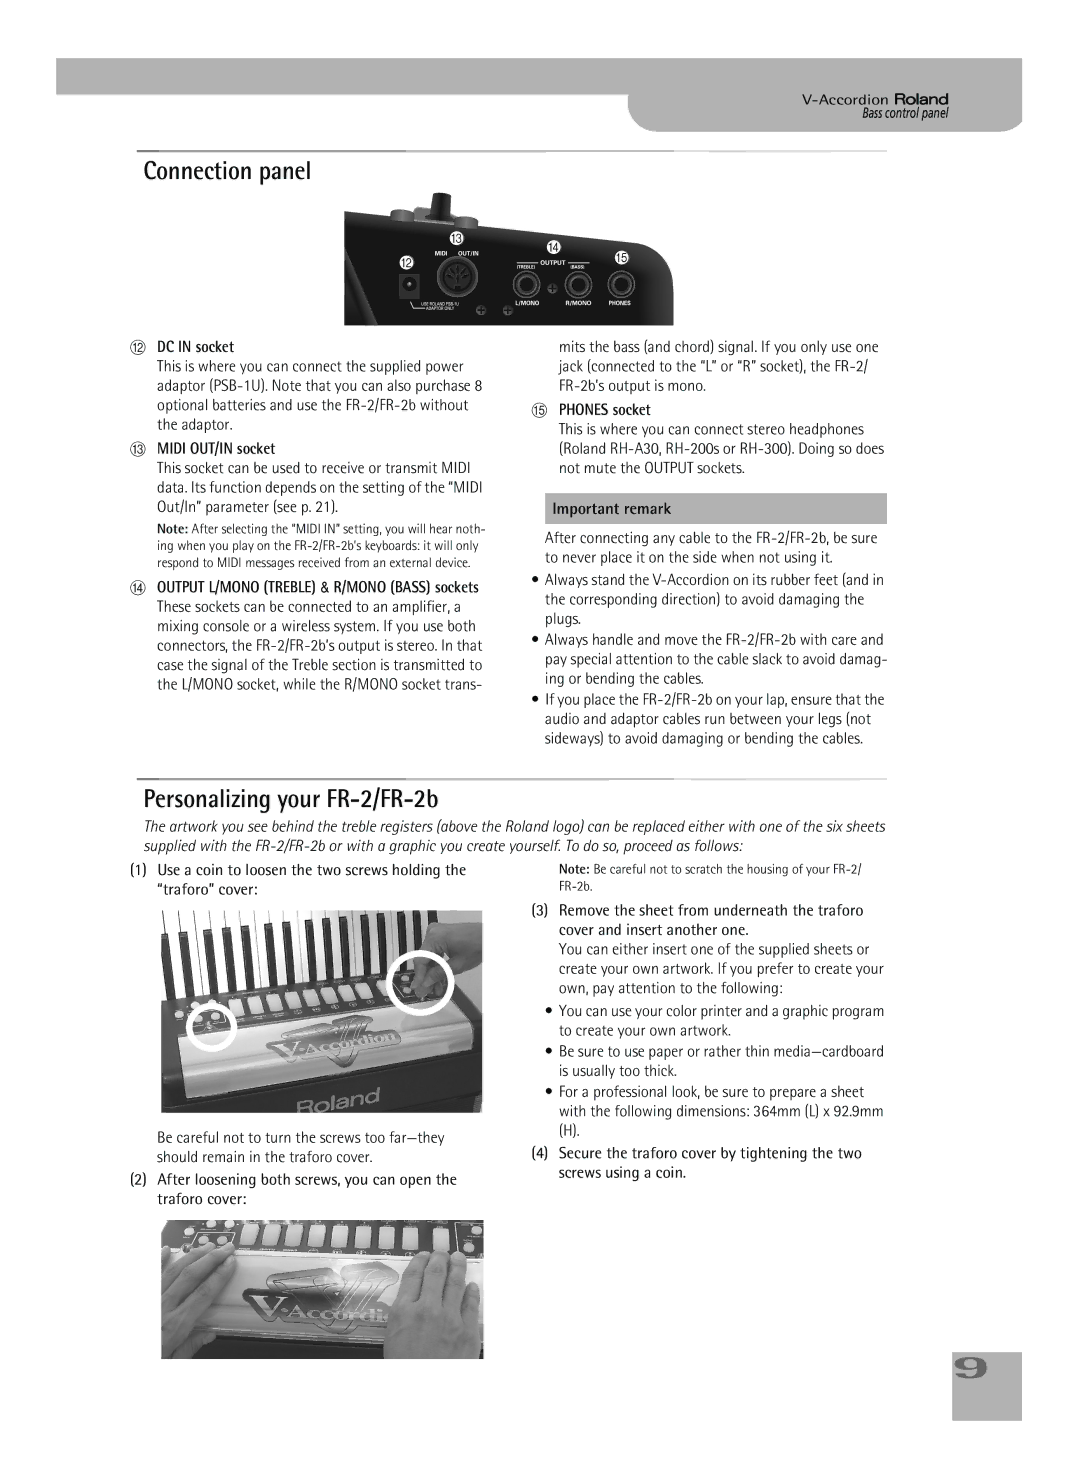
LDC IN socket
This is where you can connect the supplied power adaptor
MMIDI OUT/IN socket
This socket can be used to receive or transmit MIDI data. Its function depends on the setting of the “MIDI Out/In” parameter (see p. 21).
Note: After selecting the “MIDI IN” setting, you will hear noth-
ing when you play on the
NOUTPUT L/MONO (TREBLE) & R/MONO (BASS) sockets These sockets can be connected to an amplifier, a mixing console or a wireless system. If you use both connectors, the
mits the bass (and chord) signal. If you only use one jack (connected to the “L” or “R” socket), the
OPHONES socket
This is where you can connect stereo headphones (Roland
Important remark
After connecting any cable to the
•Always stand the
•Always handle and move the
•If you place the
Personalizing your FR-2/FR-2b
The artwork you see behind the treble registers (above the Roland logo) can be replaced either with one of the six sheets supplied with the
(1) Use a coin to loosen the two screws holding theBe careful not to scratch the housing of your
Be careful not to turn the screws too
(2)After loosening both screws, you can open the traforo cover:
(3)Remove the sheet from underneath the traforo cover and insert another one.
You can either insert one of the supplied sheets or create your own artwork. If you prefer to create your own, pay attention to the following:
•You can use your color printer and a graphic program to create your own artwork.
•Be sure to use paper or rather thin
•For a professional look, be sure to prepare a sheet with the following dimensions: 364mm (L) x 92.9mm
(H).
(4)Secure the traforo cover by tightening the two screws using a coin.
9