Panel Descriptions
Front Panel
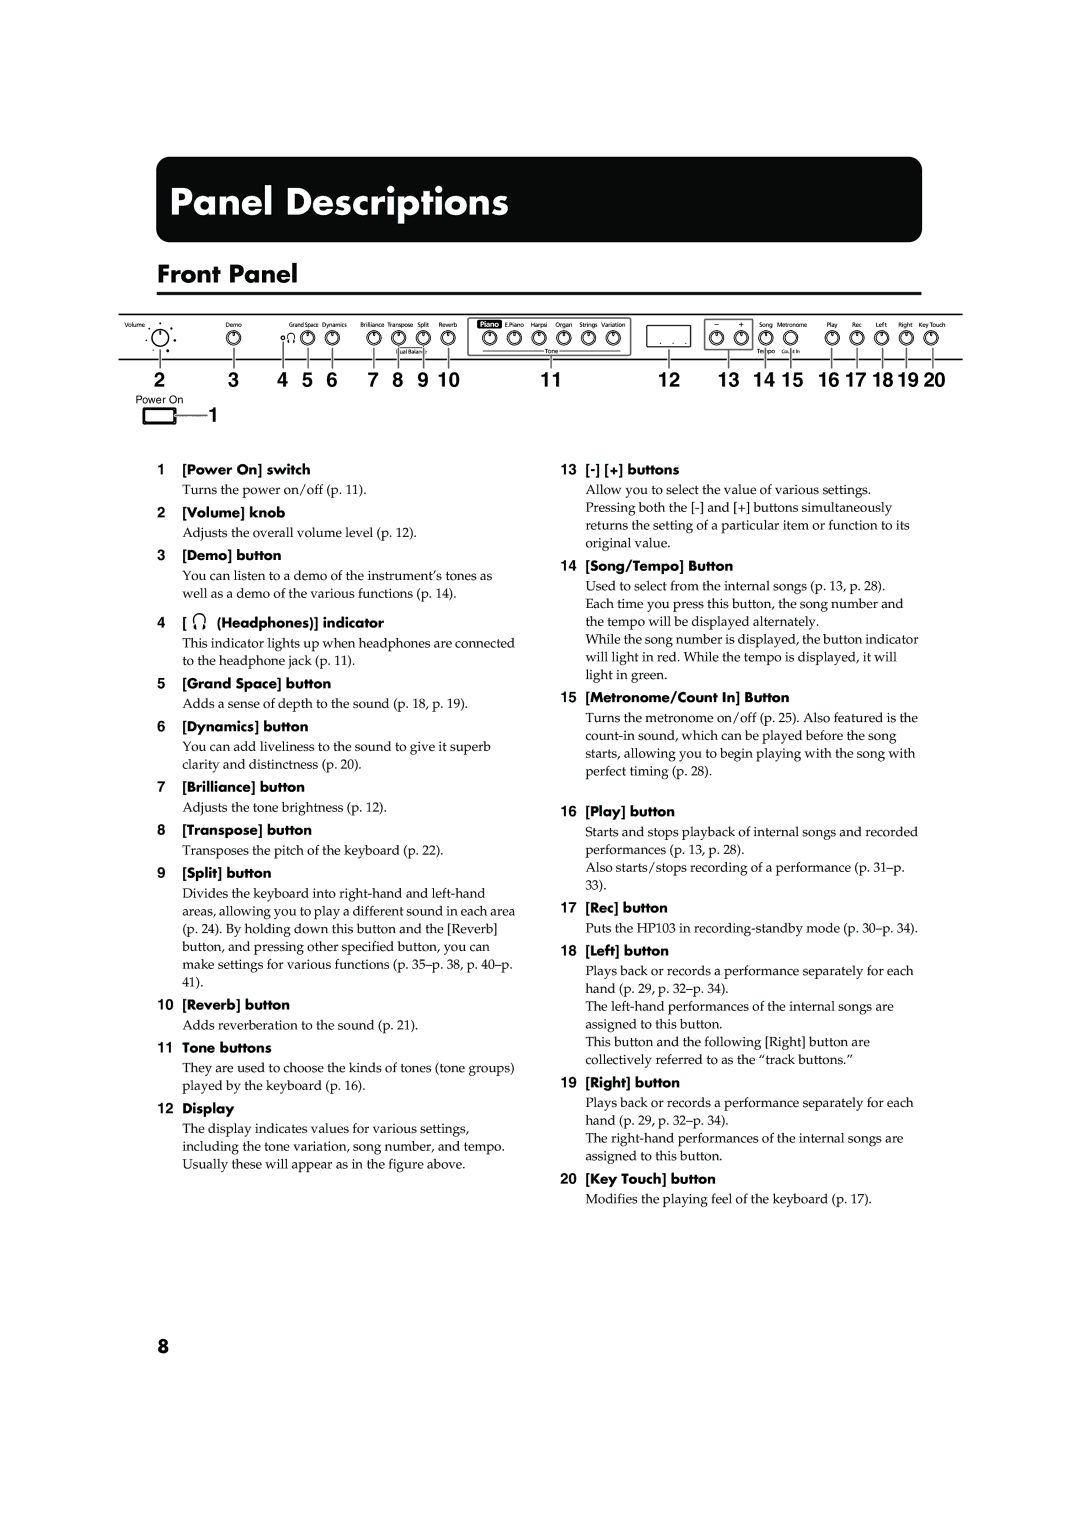
2 3 4 5 6 7 8 9 10
Power On
1
1[Power On] switch
Turns the power on/off (p. 11).
2[Volume] knob
Adjusts the overall volume level (p. 12).
3[Demo] button
You can listen to a demo of the instrument’s tones as well as a demo of the various functions (p. 14).
4[ ![]() (Headphones)] indicator
(Headphones)] indicator
This indicator lights up when headphones are connected to the headphone jack (p. 11).
5[Grand Space] button
Adds a sense of depth to the sound (p. 18, p. 19).
6[Dynamics] button
You can add liveliness to the sound to give it superb clarity and distinctness (p. 20).
7[Brilliance] button
Adjusts the tone brightness (p. 12).
8[Transpose] button
Transposes the pitch of the keyboard (p. 22).
9[Split] button
Divides the keyboard into
10[Reverb] button
Adds reverberation to the sound (p. 21).
11Tone buttons
They are used to choose the kinds of tones (tone groups) played by the keyboard (p. 16).
12Display
The display indicates values for various settings, including the tone variation, song number, and tempo. Usually these will appear as in the figure above.
11 | 12 | 13 | 14 15 | 16 17 18 19 20 |
13[-] [+] buttons
Allow you to select the value of various settings. Pressing both the
14[Song/Tempo] Button
Used to select from the internal songs (p. 13, p. 28). Each time you press this button, the song number and the tempo will be displayed alternately.
While the song number is displayed, the button indicator will light in red. While the tempo is displayed, it will light in green.
15[Metronome/Count In] Button
Turns the metronome on/off (p. 25). Also featured is the
16[Play] button
Starts and stops playback of internal songs and recorded performances (p. 13, p. 28).
Also starts/stops recording of a performance (p.
17[Rec] button
Puts the HP103 in
18[Left] button
Plays back or records a performance separately for each hand (p. 29, p.
The
This button and the following [Right] button are collectively referred to as the “track buttons.”
19[Right] button
Plays back or records a performance separately for each hand (p. 29, p.
The
20[Key Touch] button
Modifies the playing feel of the keyboard (p. 17).
8