Panel Descriptions
Front Panel
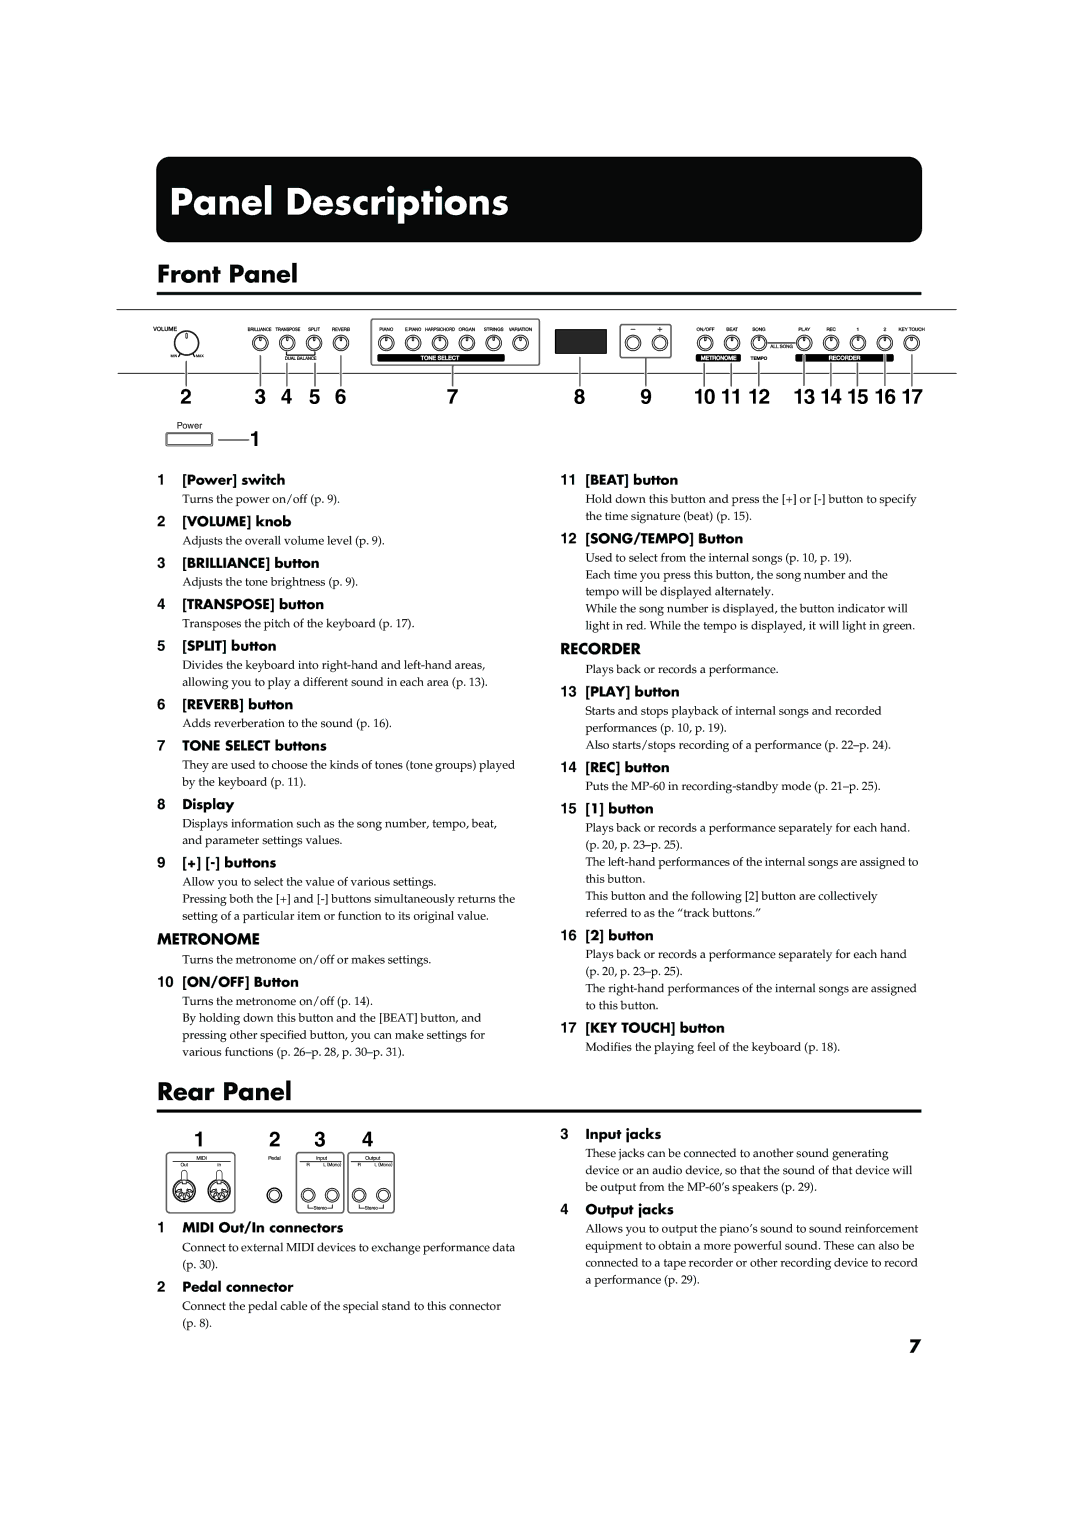
2 | 3 | 4 | 5 | 6 | 7 | 8 | 9 | 10 11 12 | 13 14 15 16 17 |
Power
1
1[Power] switch
Turns the power on/off (p. 9).
2[VOLUME] knob
Adjusts the overall volume level (p. 9).
3[BRILLIANCE] button
Adjusts the tone brightness (p. 9).
4[TRANSPOSE] button
Transposes the pitch of the keyboard (p. 17).
11[BEAT] button
Hold down this button and press the [+] or
12[SONG/TEMPO] Button
Used to select from the internal songs (p. 10, p. 19).
Each time you press this button, the song number and the tempo will be displayed alternately.
While the song number is displayed, the button indicator will light in red. While the tempo is displayed, it will light in green.
5[SPLIT] button
Divides the keyboard into
6[REVERB] button
Adds reverberation to the sound (p. 16).
7TONE SELECT buttons
They are used to choose the kinds of tones (tone groups) played by the keyboard (p. 11).
8Display
Displays information such as the song number, tempo, beat, and parameter settings values.
9[+] [-] buttons
Allow you to select the value of various settings.
Pressing both the [+] and
METRONOME
Turns the metronome on/off or makes settings.
10[ON/OFF] Button
Turns the metronome on/off (p. 14).
By holding down this button and the [BEAT] button, and pressing other specified button, you can make settings for various functions (p.
RECORDER
Plays back or records a performance.
13[PLAY] button
Starts and stops playback of internal songs and recorded performances (p. 10, p. 19).
Also starts/stops recording of a performance (p.
14[REC] button
Puts the
15[1] button
Plays back or records a performance separately for each hand. (p. 20, p.
The
This button and the following [2] button are collectively referred to as the “track buttons.”
16[2] button
Plays back or records a performance separately for each hand (p. 20, p.
The
17[KEY TOUCH] button
Modifies the playing feel of the keyboard (p. 18).
Rear Panel
1 | 2 | 3 | 4 | |
|
|
|
|
|
1MIDI Out/In connectors
Connect to external MIDI devices to exchange performance data (p. 30).
2Pedal connector
Connect the pedal cable of the special stand to this connector (p. 8).
3Input jacks
These jacks can be connected to another sound generating device or an audio device, so that the sound of that device will be output from the
4Output jacks
Allows you to output the piano’s sound to sound reinforcement equipment to obtain a more powerful sound. These can also be connected to a tape recorder or other recording device to record a performance (p. 29).
7