6 Printing and Cutting Samples
6 Printing and Cutting Samples
Removing the blank space surrounding a picture
Cutting outline
Material
Adding color to a border
Cutting outline
Material
Stick
Stick
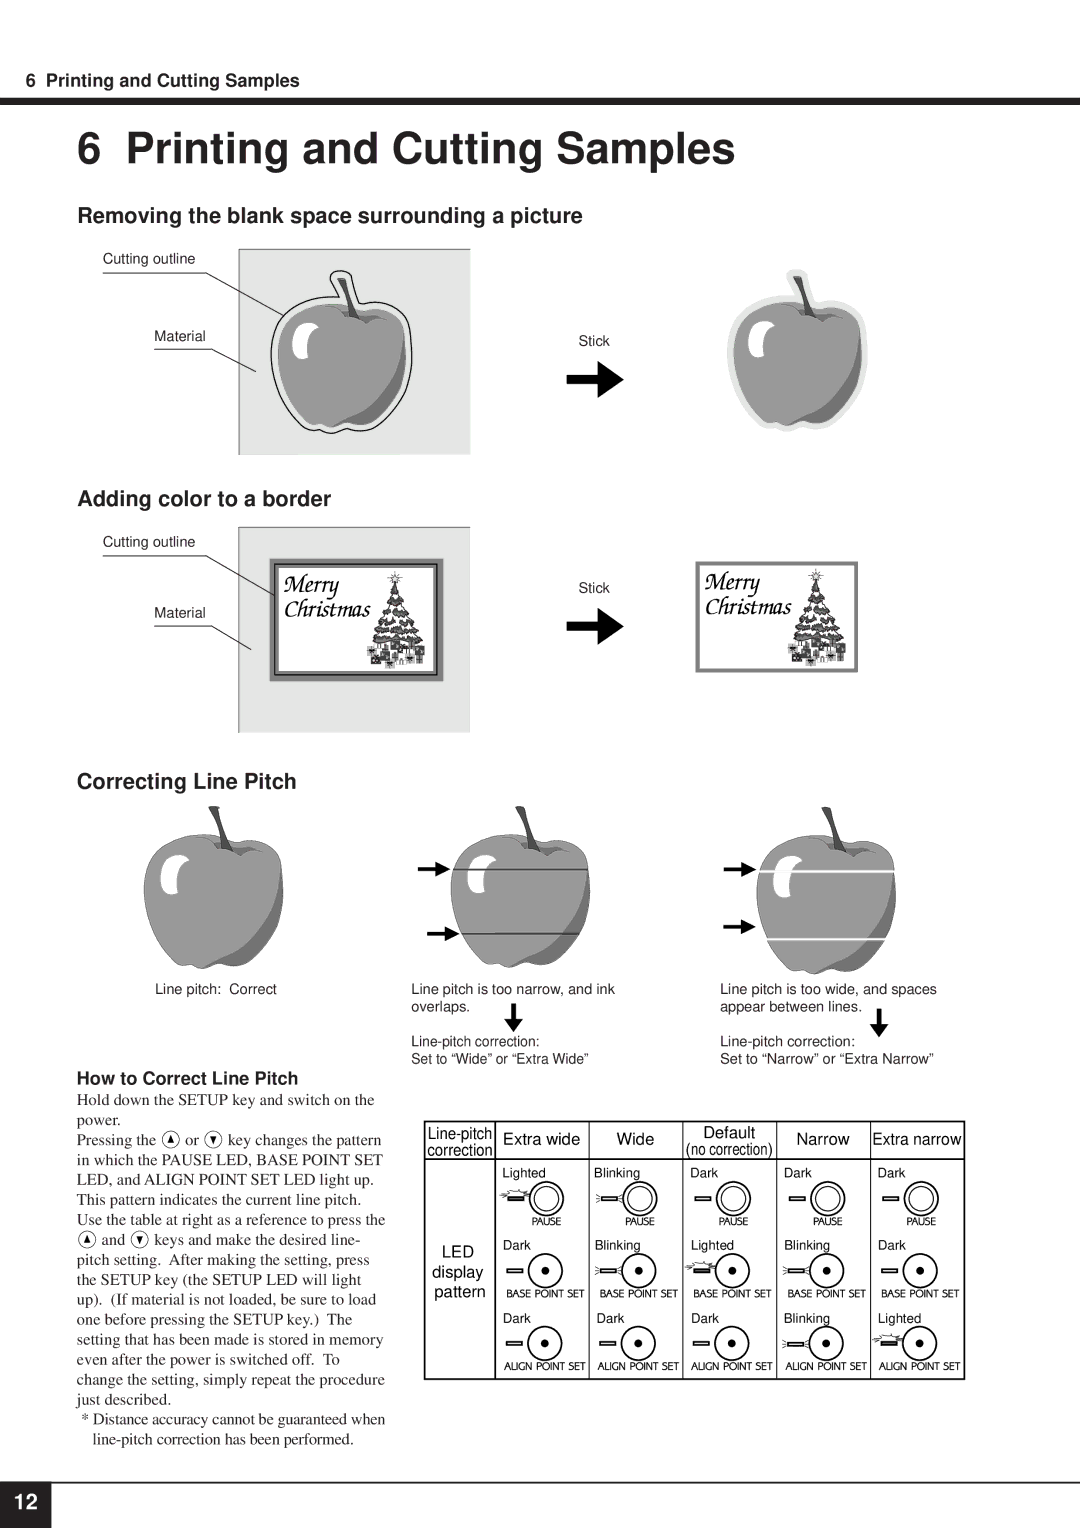
Correcting Line Pitch
Line pitch: Correct
How to Correct Line Pitch
Hold down the SETUP key and switch on the power.
Pressing the ![]() or
or ![]() key changes the pattern in which the PAUSE LED, BASE POINT SET LED, and ALIGN POINT SET LED light up.
key changes the pattern in which the PAUSE LED, BASE POINT SET LED, and ALIGN POINT SET LED light up.
This pattern indicates the current line pitch. Use the table at right as a reference to press the
![]() and
and ![]() keys and make the desired line- pitch setting. After making the setting, press the SETUP key (the SETUP LED will light up). (If material is not loaded, be sure to load one before pressing the SETUP key.) The setting that has been made is stored in memory even after the power is switched off. To change the setting, simply repeat the procedure just described.
keys and make the desired line- pitch setting. After making the setting, press the SETUP key (the SETUP LED will light up). (If material is not loaded, be sure to load one before pressing the SETUP key.) The setting that has been made is stored in memory even after the power is switched off. To change the setting, simply repeat the procedure just described.
*Distance accuracy cannot be guaranteed when
Line pitch is too narrow, and ink | Line pitch is too wide, and spaces |
overlaps. | appear between lines. |
Set to “Wide” or “Extra Wide” | Set to “Narrow” or “Extra Narrow” |
Extra wide | Wide | Default | Narrow | Extra narrow | |
correction |
|
| (no correction) |
|
|
| Lighted | Blinking | Dark | Dark | Dark |
LED | Dark | Blinking | Lighted | Blinking | Dark |
|
|
|
|
| |
display |
|
|
|
|
|
pattern |
|
|
|
|
|
| Dark | Dark | Dark | Blinking | Lighted |
12
