2 Part Names and Functions
2-3 Operation Panel
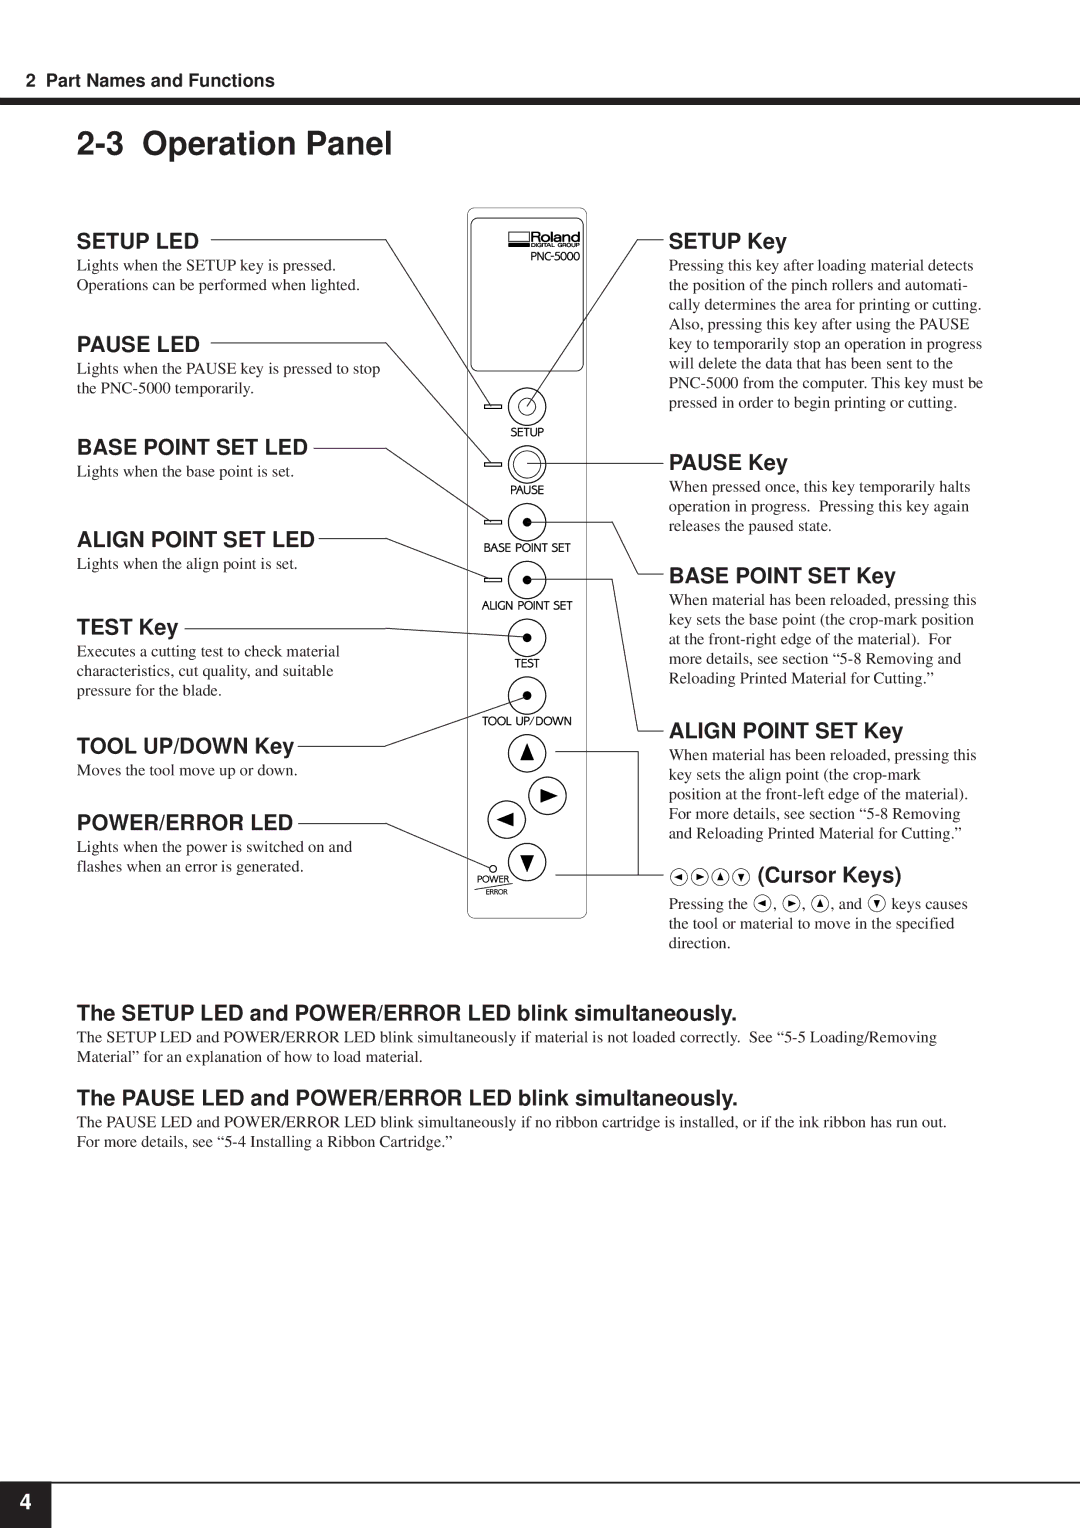
SETUP LED
Lights when the SETUP key is pressed. Operations can be performed when lighted.
PAUSE LED
Lights when the PAUSE key is pressed to stop the
BASE POINT SET LED
Lights when the base point is set.
ALIGN POINT SET LED
Lights when the align point is set.
TEST Key
Executes a cutting test to check material characteristics, cut quality, and suitable pressure for the blade.
TOOL UP/DOWN Key
Moves the tool move up or down.
POWER/ERROR LED
Lights when the power is switched on and flashes when an error is generated.
SETUP Key
Pressing this key after loading material detects the position of the pinch rollers and automati- cally determines the area for printing or cutting. Also, pressing this key after using the PAUSE key to temporarily stop an operation in progress will delete the data that has been sent to the
PAUSE Key
When pressed once, this key temporarily halts operation in progress. Pressing this key again releases the paused state.
BASE POINT SET Key
When material has been reloaded, pressing this key sets the base point (the
ALIGN POINT SET Key
When material has been reloaded, pressing this key sets the align point (the


 (Cursor Keys)
Pressing the ![]() ,
, ![]() ,
, ![]() , and
, and ![]() keys causes the tool or material to move in the specified direction.
keys causes the tool or material to move in the specified direction.
The SETUP LED and POWER/ERROR LED blink simultaneously.
The SETUP LED and POWER/ERROR LED blink simultaneously if material is not loaded correctly. See
The PAUSE LED and POWER/ERROR LED blink simultaneously.
The PAUSE LED and POWER/ERROR LED blink simultaneously if no ribbon cartridge is installed, or if the ink ribbon has run out. For more details, see
4
