5 Basic Operation
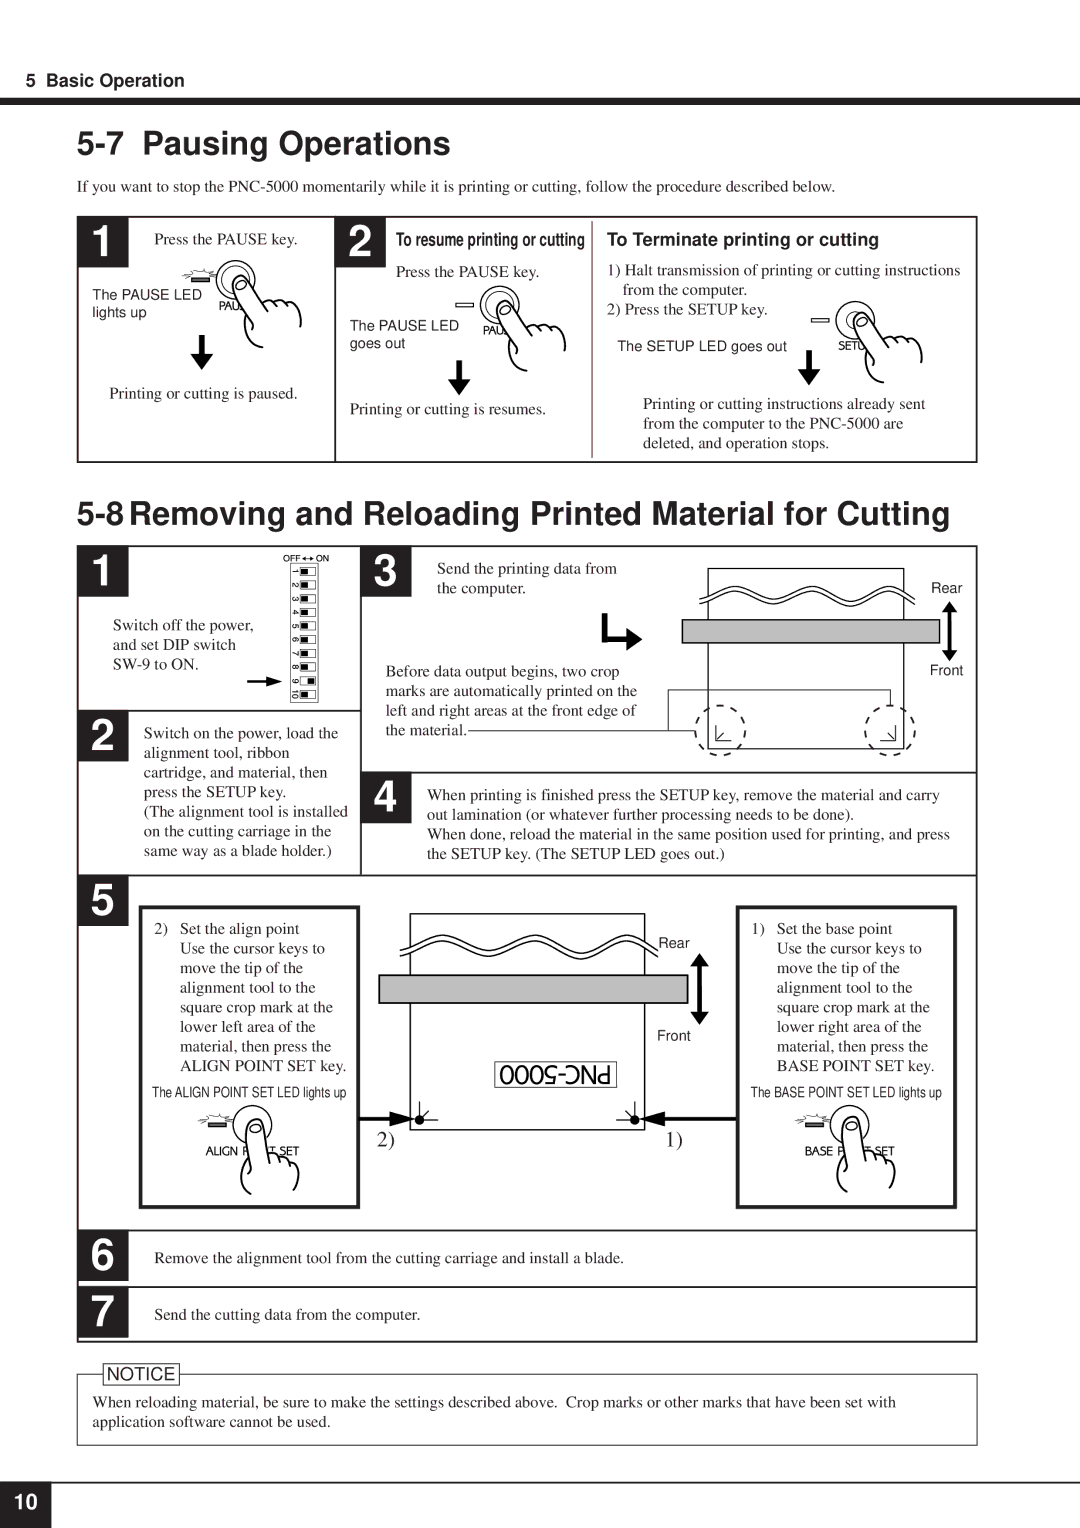
5-7 Pausing Operations
If you want to stop the
1 | Press the PAUSE key. |
|
The PAUSE LED lights up
Printing or cutting is paused.
2 | To resume printing or cutting |
| To Terminate printing or cutting |
| |||
| Press the PAUSE key. |
| 1) Halt transmission of printing or cutting instructions |
| |||
|
|
| from the computer. |
The PAUSE LED |
| 2) Press the SETUP key. | |
|
| ||
goes out |
| The SETUP LED goes out | |
Printing or cutting is resumes. |
| Printing or cutting instructions already sent | |
| from the computer to the | ||
|
|
| |
|
|
| deleted, and operation stops. |
|
|
|
|
5-8 Removing and Reloading Printed Material for Cutting
1
Switch off the power, and set DIP switch
2 | Switch on the power, load the |
alignment tool, ribbon |
cartridge, and material, then press the SETUP key.
(The alignment tool is installed on the cutting carriage in the same way as a blade holder.)
3 | Send the printing data from |
|
the computer. | Rear |
Before data output begins, two crop | Front |
marks are automatically printed on the |
|
left and right areas at the front edge of |
|
the material. |
|
4 | When printing is finished press the SETUP key, remove the material and carry |
out lamination (or whatever further processing needs to be done). |
When done, reload the material in the same position used for printing, and press the SETUP key. (The SETUP LED goes out.)
5
2)Set the align point Use the cursor keys to move the tip of the alignment tool to the square crop mark at the lower left area of the material, then press the ALIGN POINT SET key.
The ALIGN POINT SET LED lights up
Rear
| Front |
2) | 1) |
1)Set the base point Use the cursor keys to move the tip of the alignment tool to the square crop mark at the lower right area of the material, then press the BASE POINT SET key.
The BASE POINT SET LED lights up
6 | Remove the alignment tool from the cutting carriage and install a blade. |
| |
|
|
|
|
7 | Send the cutting data from the computer. |
| |
|
|
![]() NOTICE
NOTICE
When reloading material, be sure to make the settings described above. Crop marks or other marks that have been set with application software cannot be used.
10