Configure Group
Configure Group |
| Computer |
|
|
|
|
| Group 2 |
|
|
|
|
|
|
|
|
| ||
1 | Computer | 1 | + | + | + | + | + | + | + | + | + | + | + | + | + | + | + | + |
2 | Computer | 2 | + | + | + | + | + | + | + | + | + | + | + | + | + | + | + | + |
3 | Computer | 3 | + | + | + | + | + | + | + | + | + | + | + | + | + | + | + | + |
4 | Computer | 4 | + | + | + | + | + | + | + | + | + | + | + | + | + | + | + | + |
5 | Computer | 5 | + | + | + | + | + | + | + | + | + | + | + | + | + | + | + | + |
6 | Computer | 6 | + | + | + | + | + | + | + | + | + | + | + | + | + | + | + | + |
7 | Computer | 7 | + | + | + | + | + | + | + | + | + | + | + | + | + | + | + | + |
8 | Computer | 8 | + | + | + | + | + | + | + | + | + | + | + | + | + | + | + | + |
9 | Computer | 9 | + | + | + | + | + | + | + | + | + | + | + | + | + | + | + | + |
10 | Computer | 10 | + | + | + | + | + | + | + | + | + | + | + | + | + | + | + | + |
11 | Computer | 11 | + | + | + | + | + | + | + | + | + | + | + | + | + | + | + | + |
12 | Computer | 12 | + | + | + | + | + | + | + | + | + | + | + | + | + | + | + | + |
13 | Computer | 13 | + | + | + | + | + | + | + | + | + | + | + | + | + | + | + | + |
14 | Computer | 14 | + | + | + | + | + | + | + | + | + | + | + | + | + | + | + | + |
15 | Computer | 15 | + | + | + | + | + | + | + | + | + | + | + | + | + | + | + | + |
16 | Computer | 16 | + | + | + | + | + | + | + | + | + | + | + | + | + | + | + | + |
SPACE BAR adds/removes computer from group Enter renames group
Page up/down more computers + computer belongs to group
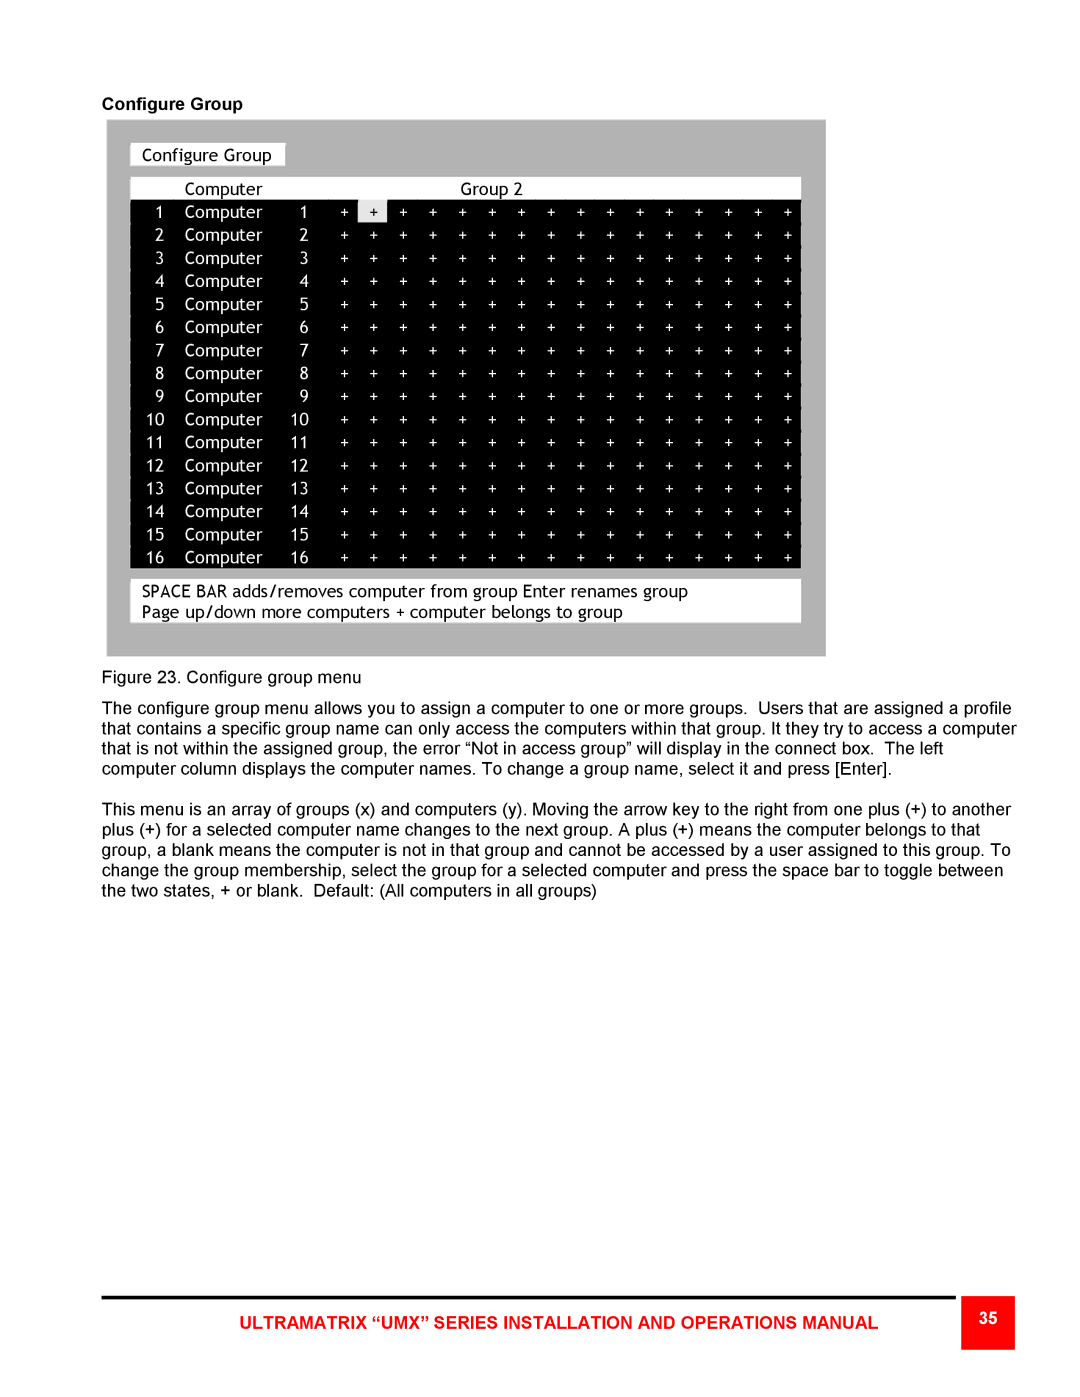
Figure 23. Configure group menu
The configure group menu allows you to assign a computer to one or more groups. Users that are assigned a profile that contains a specific group name can only access the computers within that group. It they try to access a computer that is not within the assigned group, the error “Not in access group” will display in the connect box. The left computer column displays the computer names. To change a group name, select it and press [Enter].
This menu is an array of groups (x) and computers (y). Moving the arrow key to the right from one plus (+) to another plus (+) for a selected computer name changes to the next group. A plus (+) means the computer belongs to that group, a blank means the computer is not in that group and cannot be accessed by a user assigned to this group. To change the group membership, select the group for a selected computer and press the space bar to toggle between the two states, + or blank. Default: (All computers in all groups)
ULTRAMATRIX “UMX” SERIES INSTALLATION AND OPERATIONS MANUAL
35 |
