Controls and Functions
Connector Panel
Runco Logo
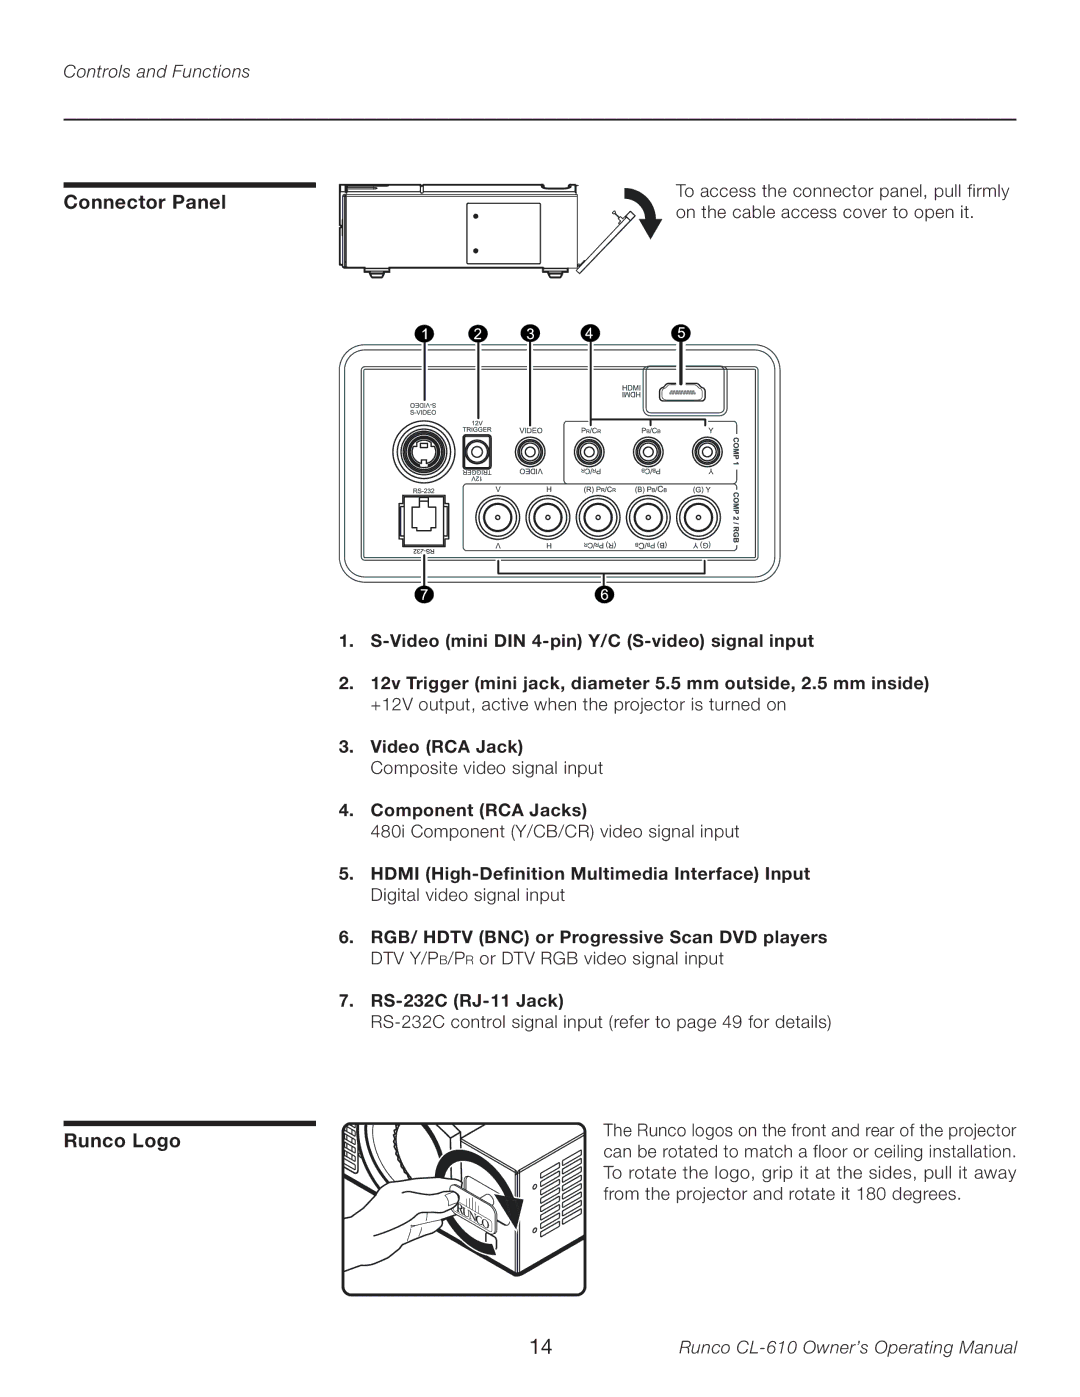
To access the connector panel, pull firmly on the cable access cover to open it.
1.
2.12v Trigger (mini jack, diameter 5.5 mm outside, 2.5 mm inside) +12V output, active when the projector is turned on
3.Video (RCA Jack) Composite video signal input
4.Component (RCA Jacks)
480i Component (Y/CB/CR) video signal input
5.HDMI
6.RGB/ HDTV (BNC) or Progressive Scan DVD players DTV Y/PB/PR or DTV RGB video signal input
7.
The Runco logos on the front and rear of the projector can be rotated to match a floor or ceiling installation. To rotate the logo, grip it at the sides, pull it away from the projector and rotate it 180 degrees.
14 | Runco |
