RS-232 Setup
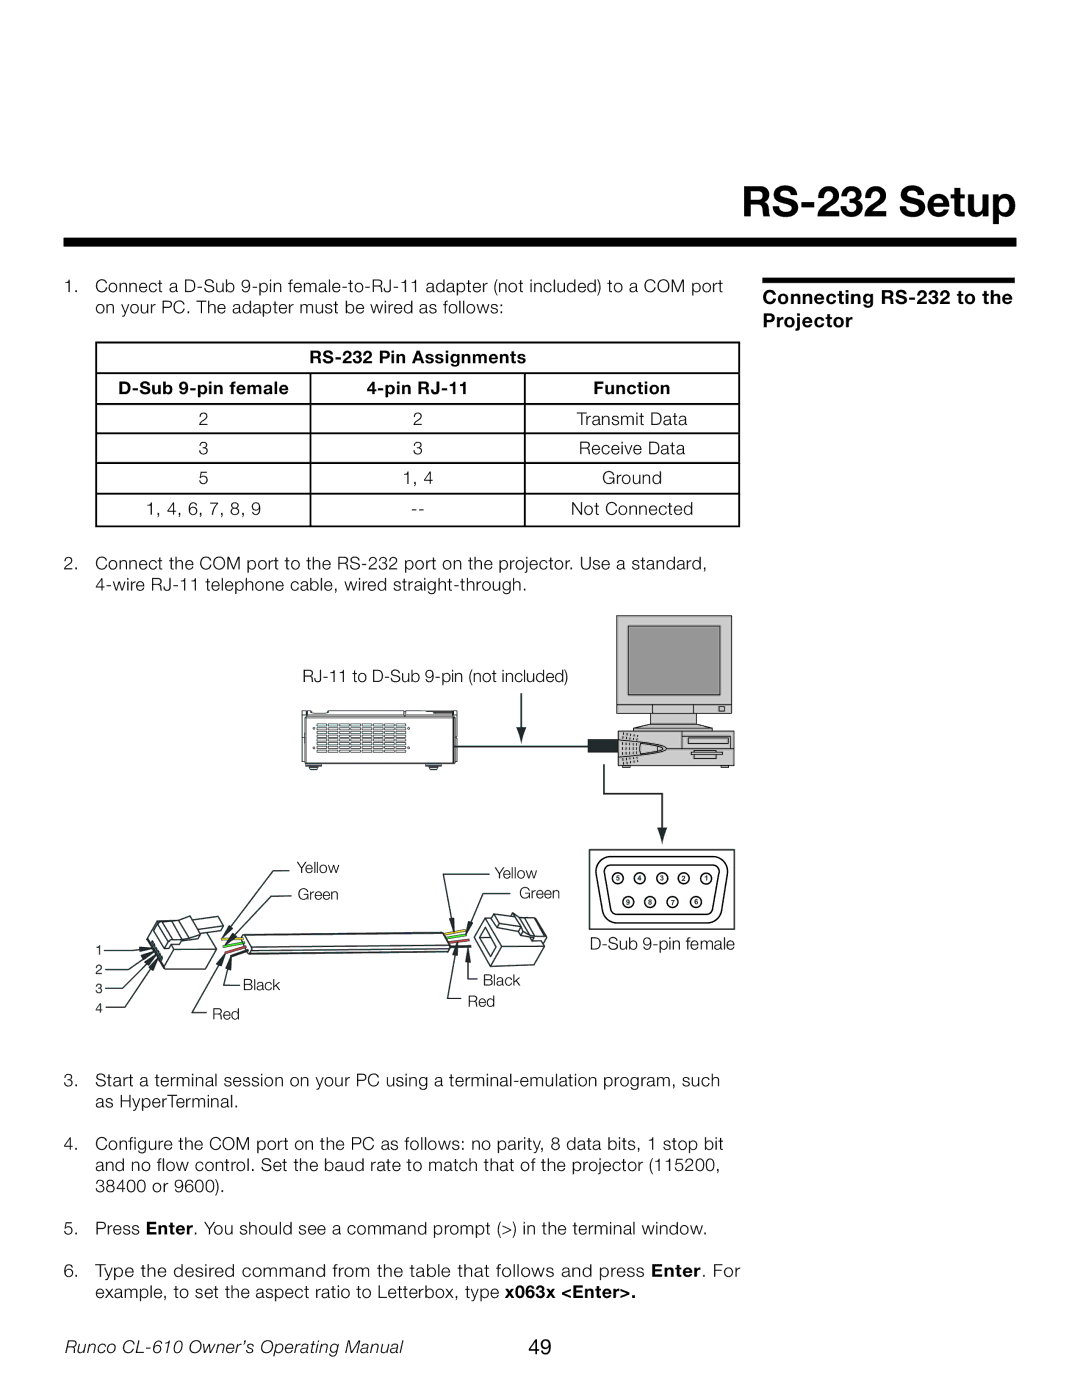
1.Connect a
RS-232 Pin Assignments
|
| Function |
|
|
|
2 | 2 | Transmit Data |
|
|
|
3 | 3 | Receive Data |
|
|
|
5 | 1, 4 | Ground |
|
|
|
1, 4, 6, 7, 8, 9 | Not Connected | |
|
|
|
2.Connect the COM port to the
Connecting RS-232 to the Projector
| Yellow | Yellow | |
|
| ||
| Green | Green | |
1 |
|
| |
2 | Black | Black | |
3 | |||
Red | |||
|
|
4 | Red |
|
5 | 4 | 3 | 2 | 1 |
9 | 8 |
| 7 | 6 |
3.Start a terminal session on your PC using a
4.Configure the COM port on the PC as follows: no parity, 8 data bits, 1 stop bit and no flow control. Set the baud rate to match that of the projector (115200, 38400 or 9600).
5.Press Enter. You should see a command prompt (>) in the terminal window.
6.Type the desired command from the table that follows and press Enter. For example, to set the aspect ratio to Letterbox, type x063x <Enter>.
Runco | 49 |