Imprint
![]() There is an option to include DATE/TIME on still images.
There is an option to include DATE/TIME on still images.
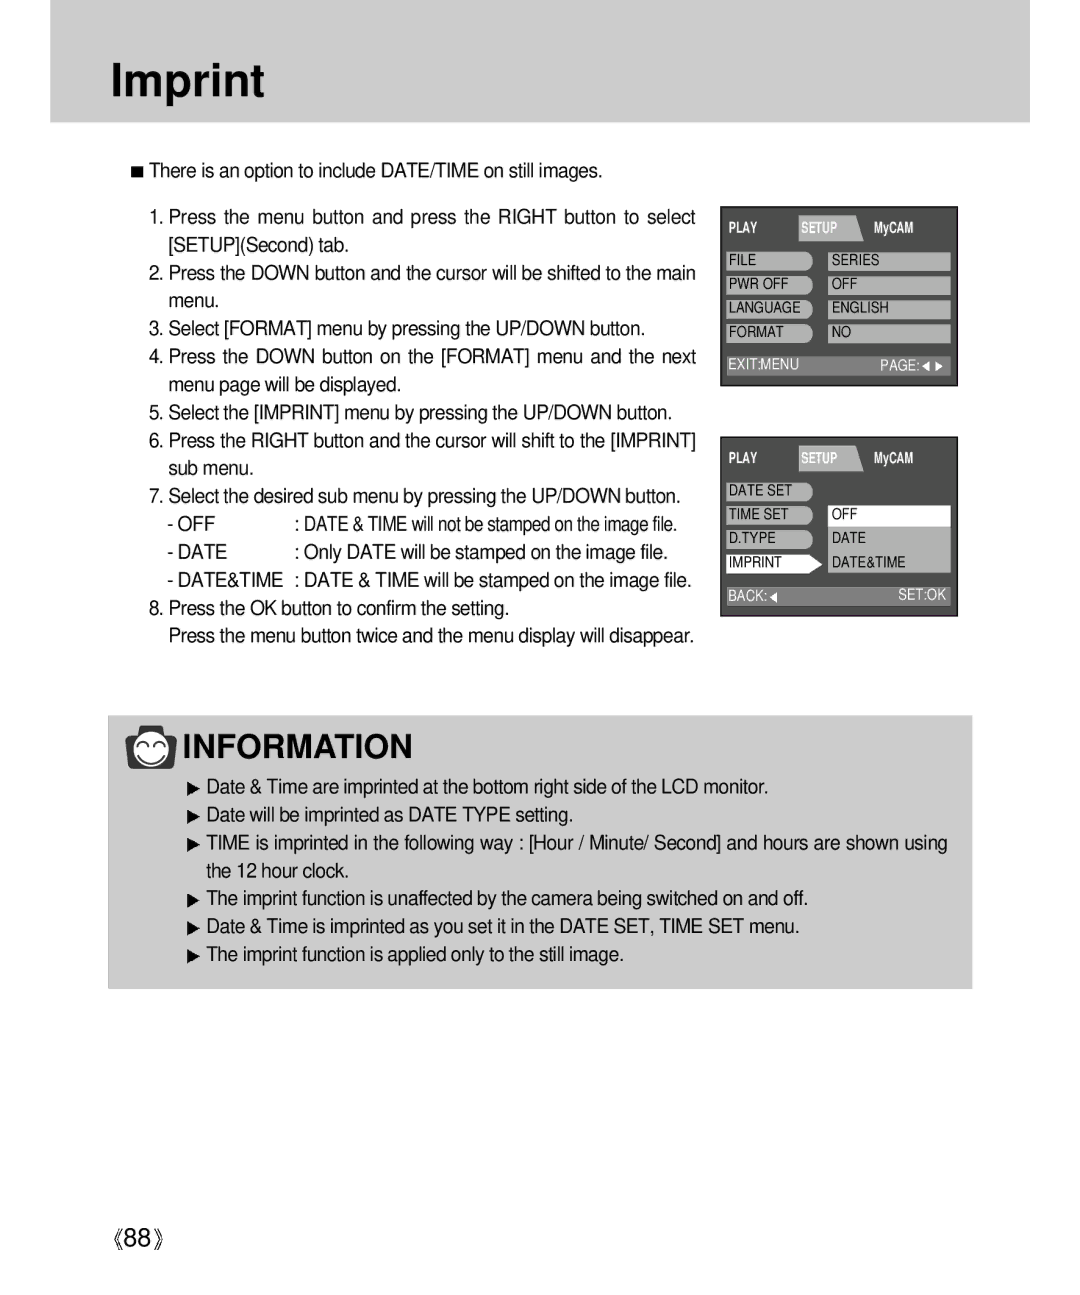
1.Press the menu button and press the RIGHT button to select [SETUP](Second) tab.
2.Press the DOWN button and the cursor will be shifted to the main menu.
3.Select [FORMAT] menu by pressing the UP/DOWN button.
4.Press the DOWN button on the [FORMAT] menu and the next menu page will be displayed.
5.Select the [IMPRINT] menu by pressing the UP/DOWN button.
6.Press the RIGHT button and the cursor will shift to the [IMPRINT] sub menu.
7.Select the desired sub menu by pressing the UP/DOWN button.
- OFF | : DATE & TIME will not be stamped on the image file. |
- DATE | : Only DATE will be stamped on the image file. |
-DATE&TIME : DATE & TIME will be stamped on the image file.
8.Press the OK button to confirm the setting.
Press the menu button twice and the menu display will disappear.
PLAY | SETUP | MyCAM | |
FILE |
|
| |
| SERIES | ||
PWR OFF |
| OFF |
|
LANGUAGE |
| ENGLISH | |
FORMAT |
| NO |
|
|
|
|
|
EXIT:MENU |
|
| PAGE: |
|
|
|
|
PLAY | SETUP | MyCAM | ||
DATE SET |
|
|
|
|
TIME SET |
|
| OFF |
|
D.TYPE |
|
| DATE |
|
|
|
| DATE&TIME | |
IMPRINT |
|
| ||
|
|
|
|
|
BACK: |
|
|
| SET:OK |
|
|
|
|
|
 INFORMATION
![]() Date & Time are imprinted at the bottom right side of the LCD monitor.
Date & Time are imprinted at the bottom right side of the LCD monitor.
![]() Date will be imprinted as DATE TYPE setting.
Date will be imprinted as DATE TYPE setting.
![]() TIME is imprinted in the following way : [Hour / Minute/ Second] and hours are shown using the 12 hour clock.
TIME is imprinted in the following way : [Hour / Minute/ Second] and hours are shown using the 12 hour clock.
![]() The imprint function is unaffected by the camera being switched on and off.
The imprint function is unaffected by the camera being switched on and off.
![]() Date & Time is imprinted as you set it in the DATE SET, TIME SET menu.
Date & Time is imprinted as you set it in the DATE SET, TIME SET menu. ![]() The imprint function is applied only to the still image.
The imprint function is applied only to the still image.
![]() 88
88![]()
