Démarrer
Connecting | ❚ Progressive Scan | |||
TV using the Component | the P.SCAN button on the front panel in stop mode. | |||
Video Cable (DVD Only) | If the TV connected supports Progressive Scan, press | |||
for DVD. Activate it in DVD Stop mode. | ||||
|
| • The Progressive Scan feature is only available | ||
|
| • The message “Press OK to confirm Progressive | ||
Your TV must support progressive scan input to allow | scan mode. Otherwise press RETURN.” will be | |||
you to watch component video output. | displayed. If you want Progressive scan mode, | |||
You will enjoy high quality accurate colour reproduction | select OK. Make sure that the disc has stopped | |||
images. Component video seperates the picture | completely before changing the mode. | |||
element into black and white(Y), blue(Pb), red(Pr) |
|
| ||
signals to present most clear and clean images. |
|
| ||
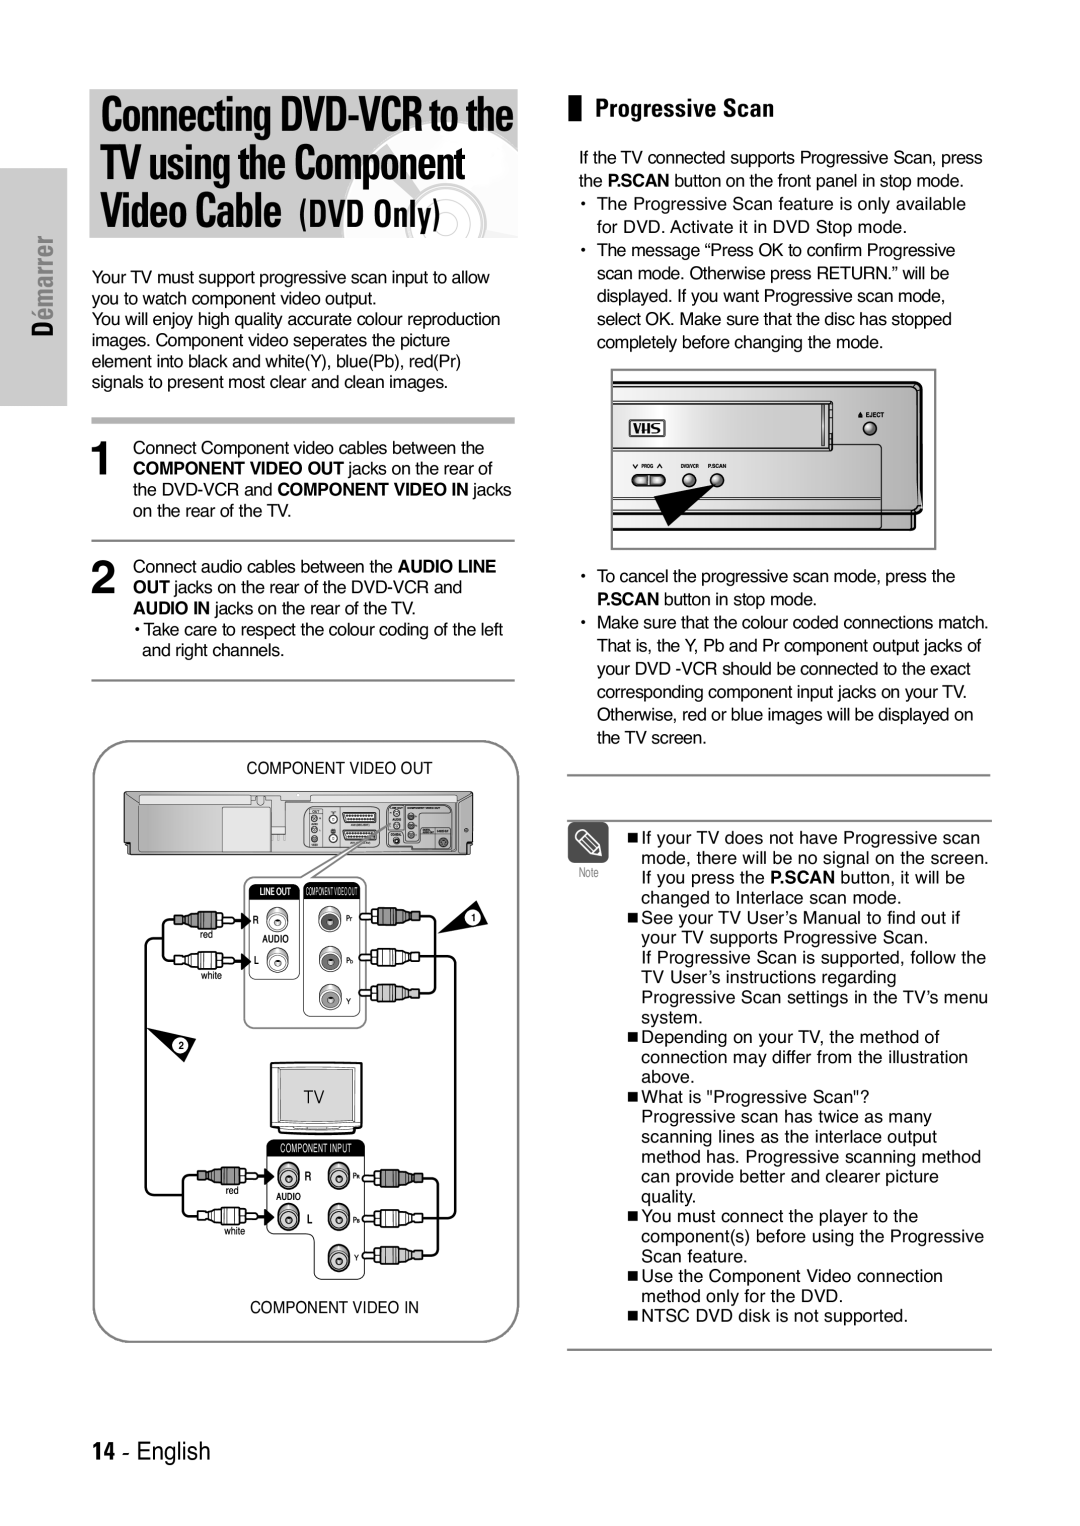
1 | Connect Component video cables between the |
|
| |
COMPONENT VIDEO OUT jacks on the rear of |
|
| ||
| the |
|
| |
| on the rear of the TV. |
|
| |
| Connect audio cables between the AUDIO LINE | • To cancel the progressive scan mode, press the | ||
2 OUT jacks on the rear of the | ||||
P.SCAN button in stop mode. | ||||
| AUDIO IN jacks on the rear of the TV. | |||
| • Make sure that the colour coded connections match. | |||
| • Take care to respect the colour coding of the left | |||
| That is, the Y, Pb and Pr component output jacks of | |||
| and right channels. | |||
|
| your DVD | ||
|
| corresponding component input jacks on your TV. | ||
|
| Otherwise, red or blue images will be displayed on | ||
|
| the TV screen. | ||
| COMPONENT VIDEO OUT |
|
| |
|
|
| If your TV does not have Progressive scan | |
|
| Note | mode, there will be no signal on the screen. | |
|
| If you press the P.SCAN button, it will be | ||
| COMPONENT VIDEO OUT |
| ||
|
| changed to Interlace scan mode. | ||
|
|
| ||
| 1 |
| See your TV User’s Manual to find out if | |
|
|
| your TV supports Progressive Scan. | |
|
|
| If Progressive Scan is supported, follow the | |
|
|
| TV User’s instructions regarding | |
|
|
| Progressive Scan settings in the TV’s menu | |
|
|
| system. | |
| 2 |
| Depending on your TV, the method of | |
|
| connection may differ from the illustration | ||
|
|
| ||
|
|
| above. | |
|
|
| What is "Progressive Scan"? | |
|
|
| Progressive scan has twice as many | |
| COMPONENT INPUT |
| scanning lines as the interlace output | |
|
| method has. Progressive scanning method | ||
|
|
| ||
|
|
| can provide better and clearer picture | |
|
|
| quality. | |
|
|
| You must connect the player to the | |
|
|
| component(s) before using the Progressive | |
|
|
| Scan feature. | |
|
|
| Use the Component Video connection | |
| COMPONENT VIDEO IN |
| method only for the DVD. | |
|
| NTSC DVD disk is not supported. | ||
|
|
| ||
14 - English