LCD monitor indicator
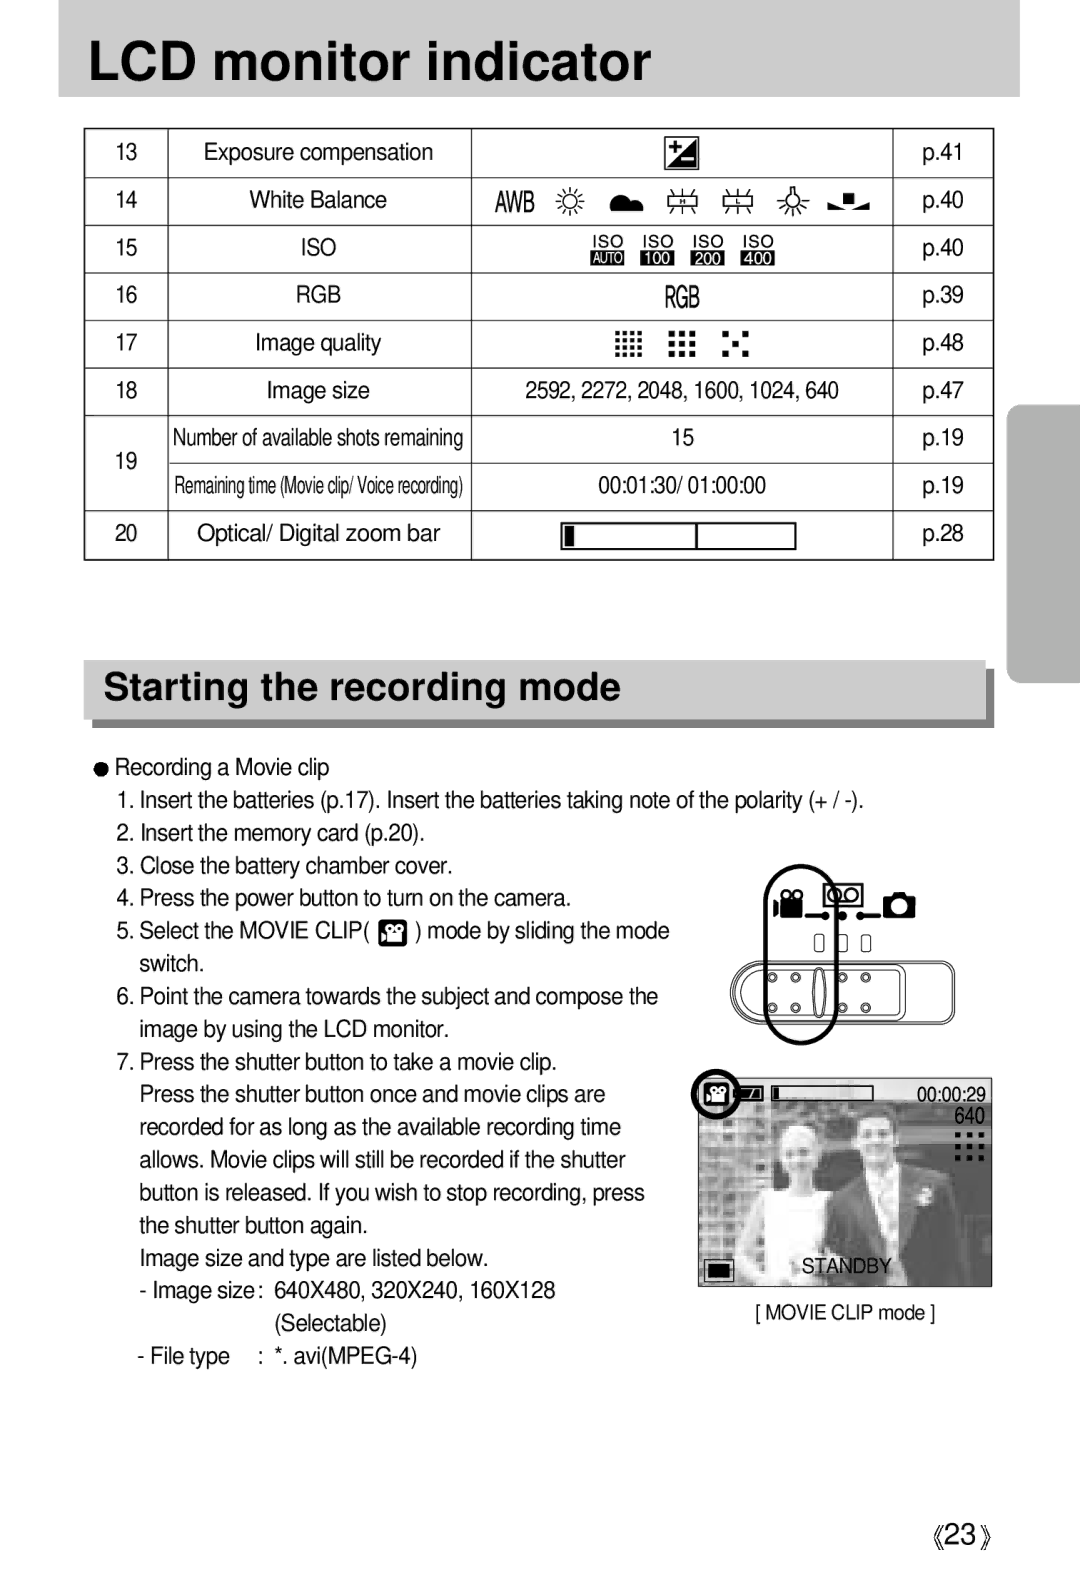
13 | Exposure compensation |
| p.41 | |
14 | White Balance |
| p.40 | |
15 | ISO |
| p.40 | |
16 | RGB |
| p.39 | |
17 | Image quality |
| p.48 | |
18 | Image size | 2592, 2272, 2048, 1600, 1024, 640 | p.47 | |
19 | Number of available shots remaining | 15 | p.19 | |
Remaining time (Movie clip/ Voice recording) | 00:01:30/ 01:00:00 | p.19 | ||
| ||||
20 | Optical/ Digital zoom bar |
| p.28 |
Starting the recording mode
Recording a Movie clip
1.Insert the batteries (p.17). Insert the batteries taking note of the polarity (+ /
2.Insert the memory card (p.20).
3.Close the battery chamber cover.
4. Press the power button to turn on the camera.
5.Select the MOVIE CLIP( ![]() ) mode by sliding the mode switch.
) mode by sliding the mode switch.
6.Point the camera towards the subject and compose the image by using the LCD monitor.
7.Press the shutter button to take a movie clip.
Press the shutter button once and movie clips are recorded for as long as the available recording time allows. Movie clips will still be recorded if the shutter button is released. If you wish to stop recording, press the shutter button again.
Image size and type are listed below.
- Image size: 640X480, 320X240, 160X128 (Selectable)
- File type : *.
![]() 23
23![]()
