Main
Precautions When Displaying a Still Image
Astill image may cause permanent damage to the TV screen.
Integrated
When you connect a computer or a game console to the TV and select the 4:3 screen mode.
C
Chapter 1: Your New TV
Chapter 2: Installation
Chapter 3: Special Features
Chapter 4: Operation
C
Chapter 5: PC Display
Chapter 6: Troubleshooting
Appendix
List of Features
List of Parts
Chapter One
Familiarizing Yourself with Your New TV
Page
Remote Control
Installing Batteries in the Remote Control
If remote control doesnt work
Connecting VHF and UHF Antennas
Chapter Two
Connecting Cable TV
To connect to a cable TV system, follow the instructions below.
Page
Connecting a PC
Follow the instructions in Viewing a VCRor Camcorder Tape to view your VCR tape.
Acoaxial cable is usually included with a VCR. (If not, check your local electronics store).
Connecting a VCR
Connecting an S-VHS VCR
Connecting a DVD Player
The rear panel jacks on your TVmake it easy to connect a DVD player to your TV.
Changing Channels
Chapter Three
At any time, you can temporarily cut off the sound using the Mute button.
SPECIAL FEATURES
Adjusting the Volume
Turning the TV On and Off
Viewing the Display
The display identifies the current channel and the status of certain audio-video settings.
Viewing the Menus
Chapter Four
Plug & Play Feature
You can select the Hour or Minute by pressing the number buttons on the remote control.
Memorizing the Channels
Page
Alternate method
ADD and DEL Channels (Manual Method)
To select the Input Source
Note: You can also press the SOURCE button on the remote to choose the Input source.
To Edit the Input Source Name
Name the input device connected to the input jacks to make your input source selection easier.
Note: DHR = DVDHDD Receiver
Using Automatic Picture Settings
Customizing the Picture
Note: The Tint feature does not work in component mode.
Using Automatic Sound Settings
Alternate method:
To select the Sound option
Selecting a Menu Language
Setting the Blue Screen Mode
Pressing the UP/DOWN buttons will alternate between On and Off.
Adjusting the Color Tone
You can change the color of the entire screen according to your preference.
Automatic Volume Control
Reduces the differences in volume level among broadcasters.
Note :You can also set the time using the numeric buttons on the remote.
Setting the Clock
Option 2: Using the Local PBS Channel to Automatically Set the TV Clock
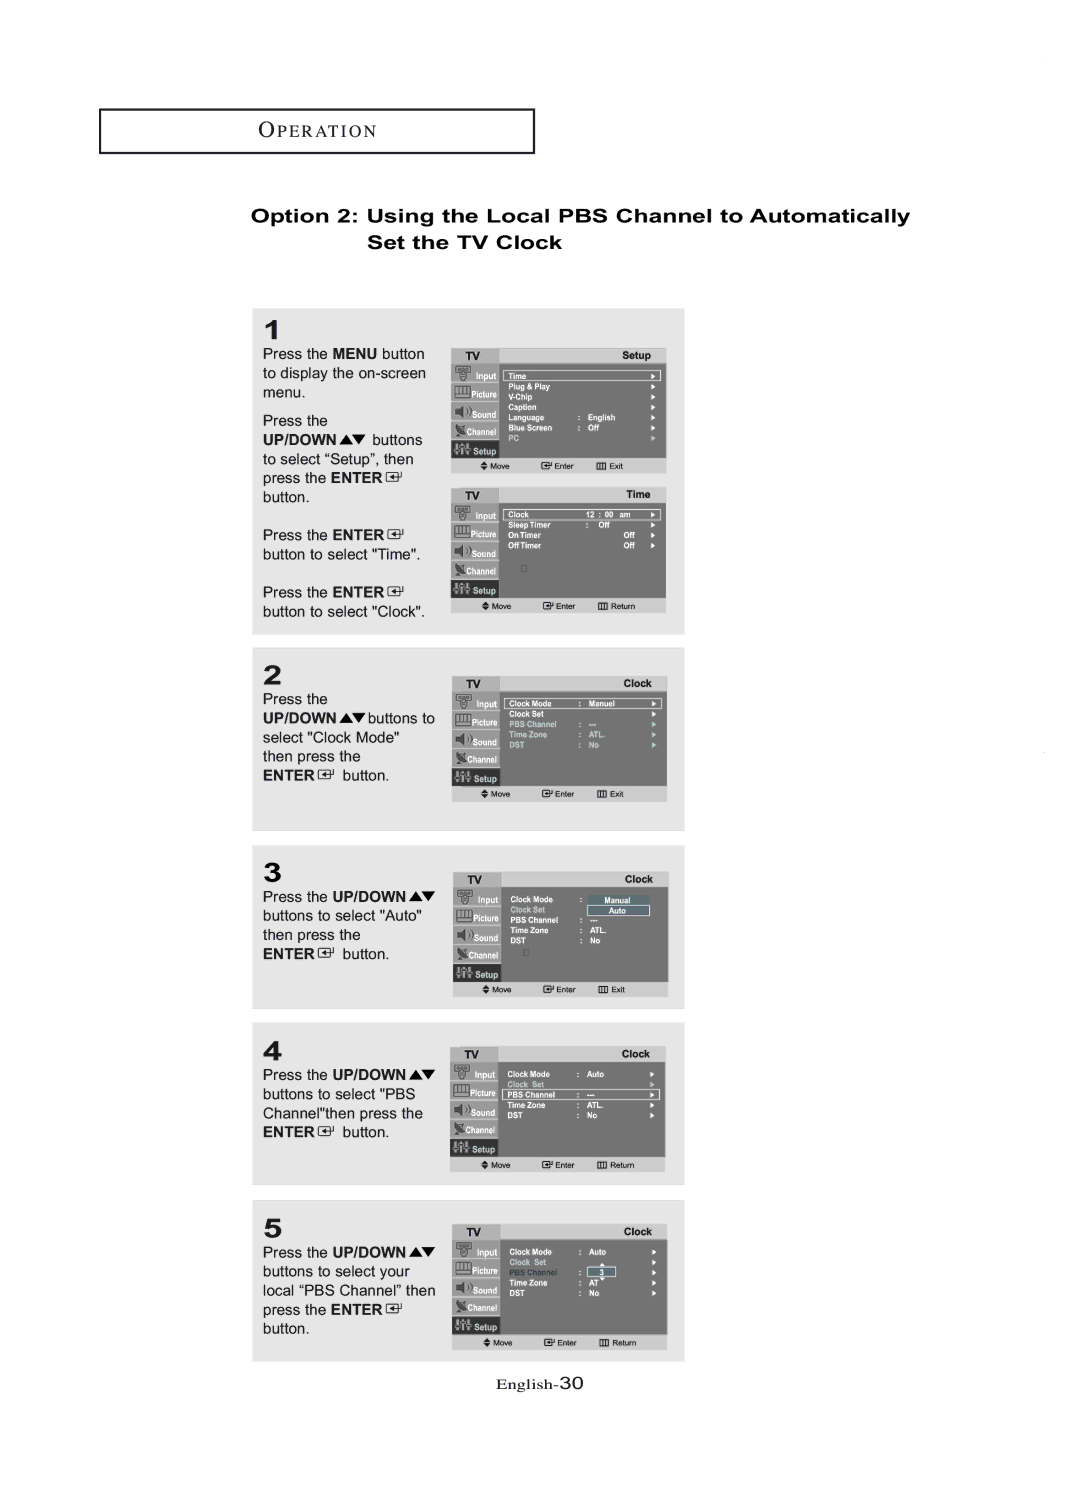
Note: Make sure the PBS channel is in memory before using this feature.
Setting the On/Off Timer
Before using the timer, you must set the TVs clock. (See Setting the Clock on page 29)
To deactivate the On time, select Off during this step.
Setting the Sleep Timer
Set the timer for the TVto turn off at the preset time automatically.
Viewing Closed Captions
Using the V-Chip
Setting Up Your Personal ID Number (PIN)
0-0-0-0.
How to Enable/Disable the V-Chip
How to Set up Restrictions Using the TV guidelines
Page
How to Set up Restrictions Using the MPAARatings: G, PG, PG-13, R, NC-17, X
Page
How to Set up Restrictions Using Canadian English
How to Set up Restrictions Using Canadian French
Chapter Five
Using Your TV as a Computer (PC) Display
Page
Changing the Screen Position
To Initialize the Screen Position or Color Settings
How to Auto Adjust
Using Automatic Picture Settings
Customizing the Picture
Adjusting the Color Tone
You can change the color of the entire screen according to your preference.
Customizing the Color
Preset to PCmode by pressing the SOURCE button on the remote contro
Chapter Six
T
Identifying Problems
T
Using the Anti-Theft Kensington Lock
1.
2. 3.
Retractable Stand
Installing VESA compliant mounting devices
<1> <2>
Wall Mount Instructions
Mounting pad
Installing the Wall Mount Kit
3
2
Please use provided components or parts to install the Wall Mount Kit.
1
Installing the Wall Mount Kit
(LT-P1545/LT-P1745/LT-P1745U)
How to adjust an angle
4
5
Installing the Wall Mount Kit
3
2
Please use provided components or parts to install the Wall Mount Kit.
1
Installing the Wall Mount Kit
How to adjust an angle
4
5
6
Using Your TV in Another Country
Display Mode
Specifications
LT-P1745/LT-P1745U
LT-P1545
LT-P2045 LT-P2045U