Notes
• Do not push the paper width guide far enough to cause the material to warp.
•If you do not adjust the paper width guide, it may cause paper jams.
Using the multi-purpose tray
The
To load paper in the
1Open the
2If you are using paper, flex or fan the edge of the paper stack to separate the pages before loading.
For transparencies, hold them by the edges and avoid touching the print side. Oils from your fingers can cause print quality problems.
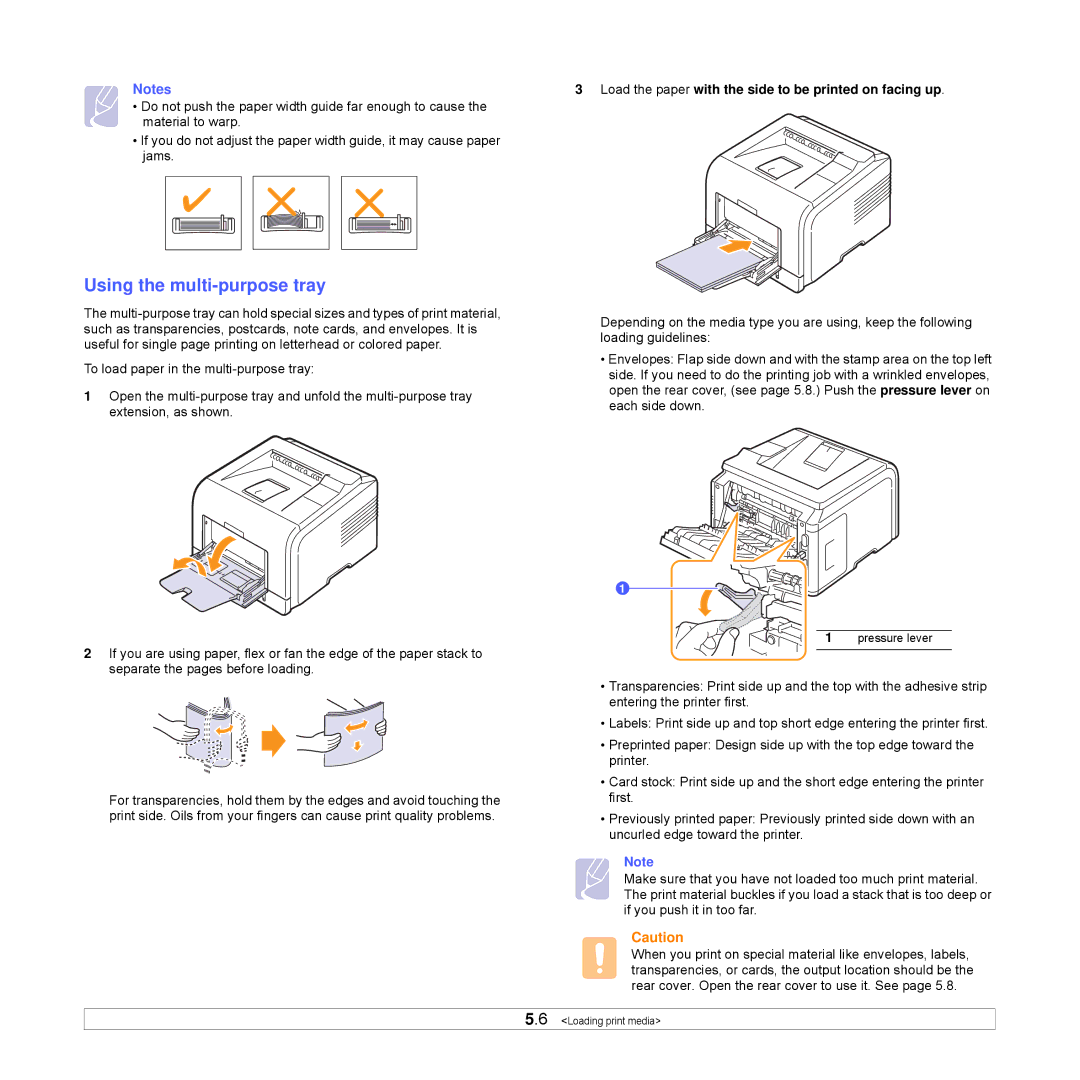
3 Load the paper with the side to be printed on facing up.
Depending on the media type you are using, keep the following loading guidelines:
•Envelopes: Flap side down and with the stamp area on the top left side. If you need to do the printing job with a wrinkled envelopes, open the rear cover, (see page 5.8.) Push the pressure lever on each side down.
1
1 pressure lever
•Transparencies: Print side up and the top with the adhesive strip entering the printer first.
•Labels: Print side up and top short edge entering the printer first.
•Preprinted paper: Design side up with the top edge toward the printer.
•Card stock: Print side up and the short edge entering the printer first.
•Previously printed paper: Previously printed side down with an uncurled edge toward the printer.
Note
Make sure that you have not loaded too much print material. The print material buckles if you load a stack that is too deep or if you push it in too far.
Caution
When you print on special material like envelopes, labels, transparencies, or cards, the output location should be the rear cover. Open the rear cover to use it. See page 5.8.
5.6 <Loading print media>