ENG
Remote Control
1
2
3
4
5
6
7
8
9
10
11
12
13
14
15
POWER
FUNCTION | DISPLAY | RIPPING | DISC SKIP |
SPEED | |||
TIMER | TIMER/CLOCK | SLEEP | |
ON/OFF |
|
|
|
REPEAT | REPEAT | PARTY | |
|
|
| |
MUTE | RIPPING | TAPE REC | |
RDS PTY | +10 |
| RDS DISPLAY |
|
| ||
GIGA | TUNING /ALBUM | DSP/EQ | |
|
| ||
VOL |
|
| VOL |
MO/ST | TUNING /ALBUM | TUNING | |
|
| ||
|
|
| MODE |
31
30
29
28
27
26
25
24
23
22
21
20
19
18
17
16
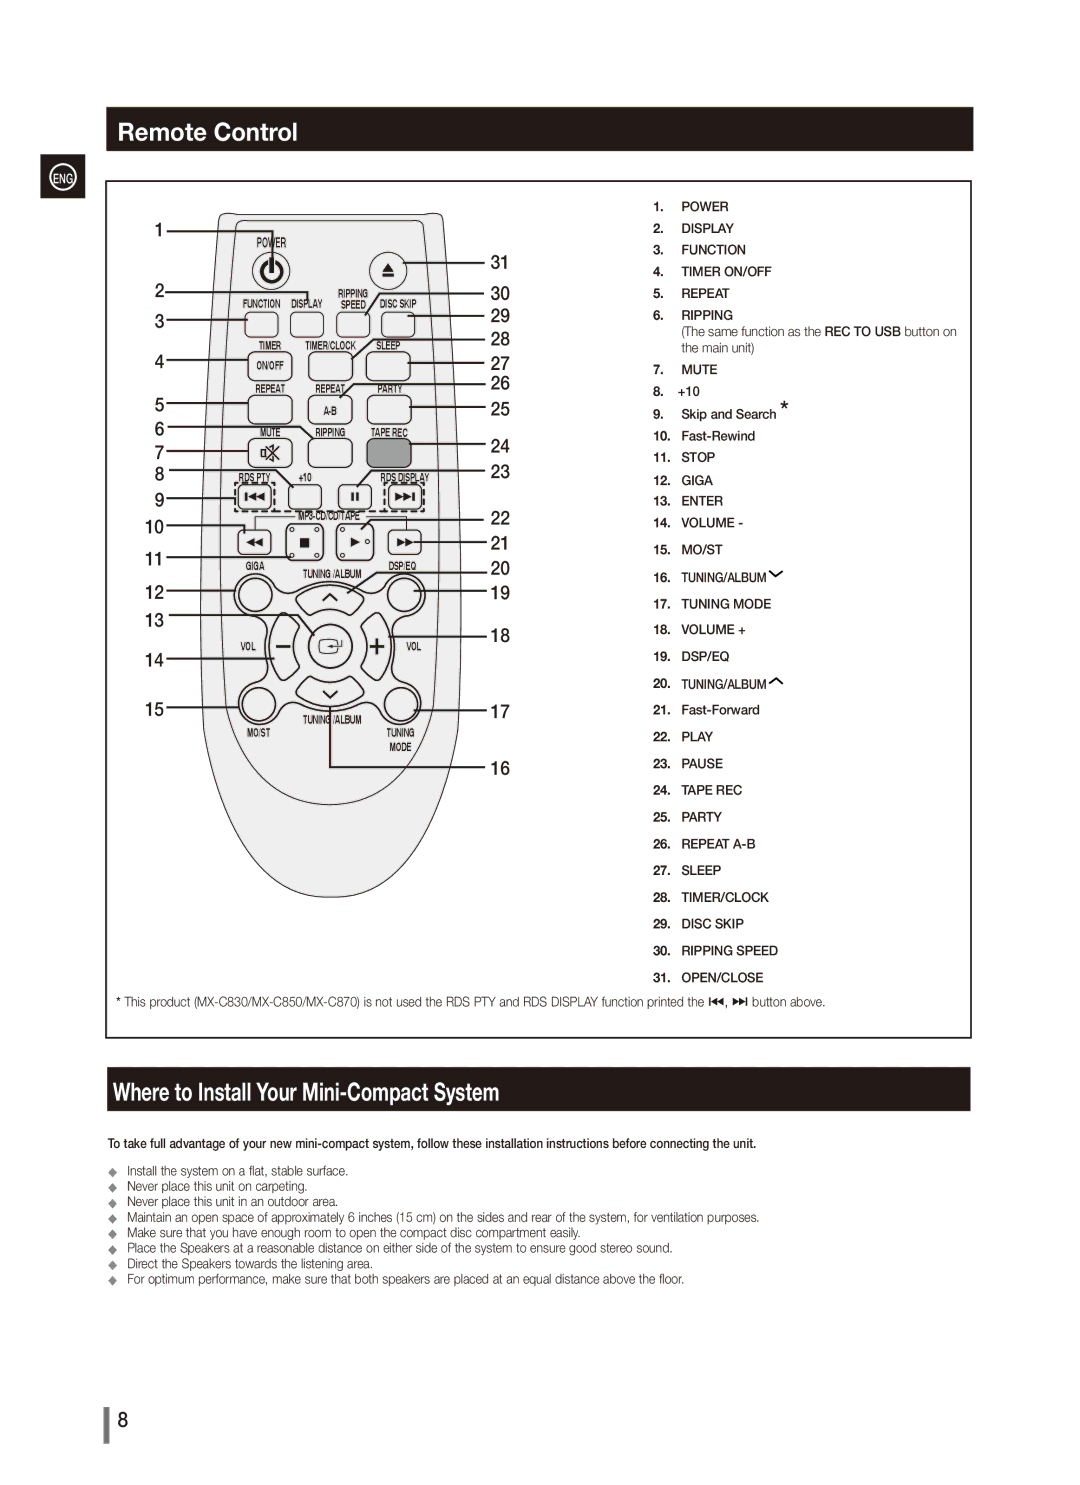
1.POWER
2.DISPLAY
3.FUNCTION
4.TIMER ON/OFF
5.REPEAT
6.RIPPING
(The same function as the REC TO USB button on the main unit)
7.MUTE
8.+10
9.Skip and Search *
10.
11.STOP
12.GIGA
13.ENTER
14.VOLUME -
15.MO/ST
16.TUNING/ALBUM![]()
17.TUNING MODE
18.VOLUME +
19.DSP/EQ
20.TUNING/ALBUM![]()
21.
22.PLAY
23.PAUSE
24.TAPE REC
25.PARTY
26.REPEAT
27.SLEEP
28.TIMER/CLOCK
29.DISC SKIP
30.RIPPING SPEED
31.OPEN/CLOSE
*This product
Where to Install Your Mini-Compact System
To take full advantage of your new
◆◆ Install the system on a flat, stable surface. ◆◆ Never place this unit on carpeting.
◆◆ Never place this unit in an outdoor area.
◆◆ Maintain an open space of approximately 6 inches (15 cm) on the sides and rear of the system, for ventilation purposes. ◆◆ Make sure that you have enough room to open the compact disc compartment easily.
◆◆ Place the Speakers at a reasonable distance on either side of the system to ensure good stereo sound. ◆◆ Direct the Speakers towards the listening area.
◆◆ For optimum performance, make sure that both speakers are placed at an equal distance above the floor.
8