4
CHAPTER FOUR
Special Features
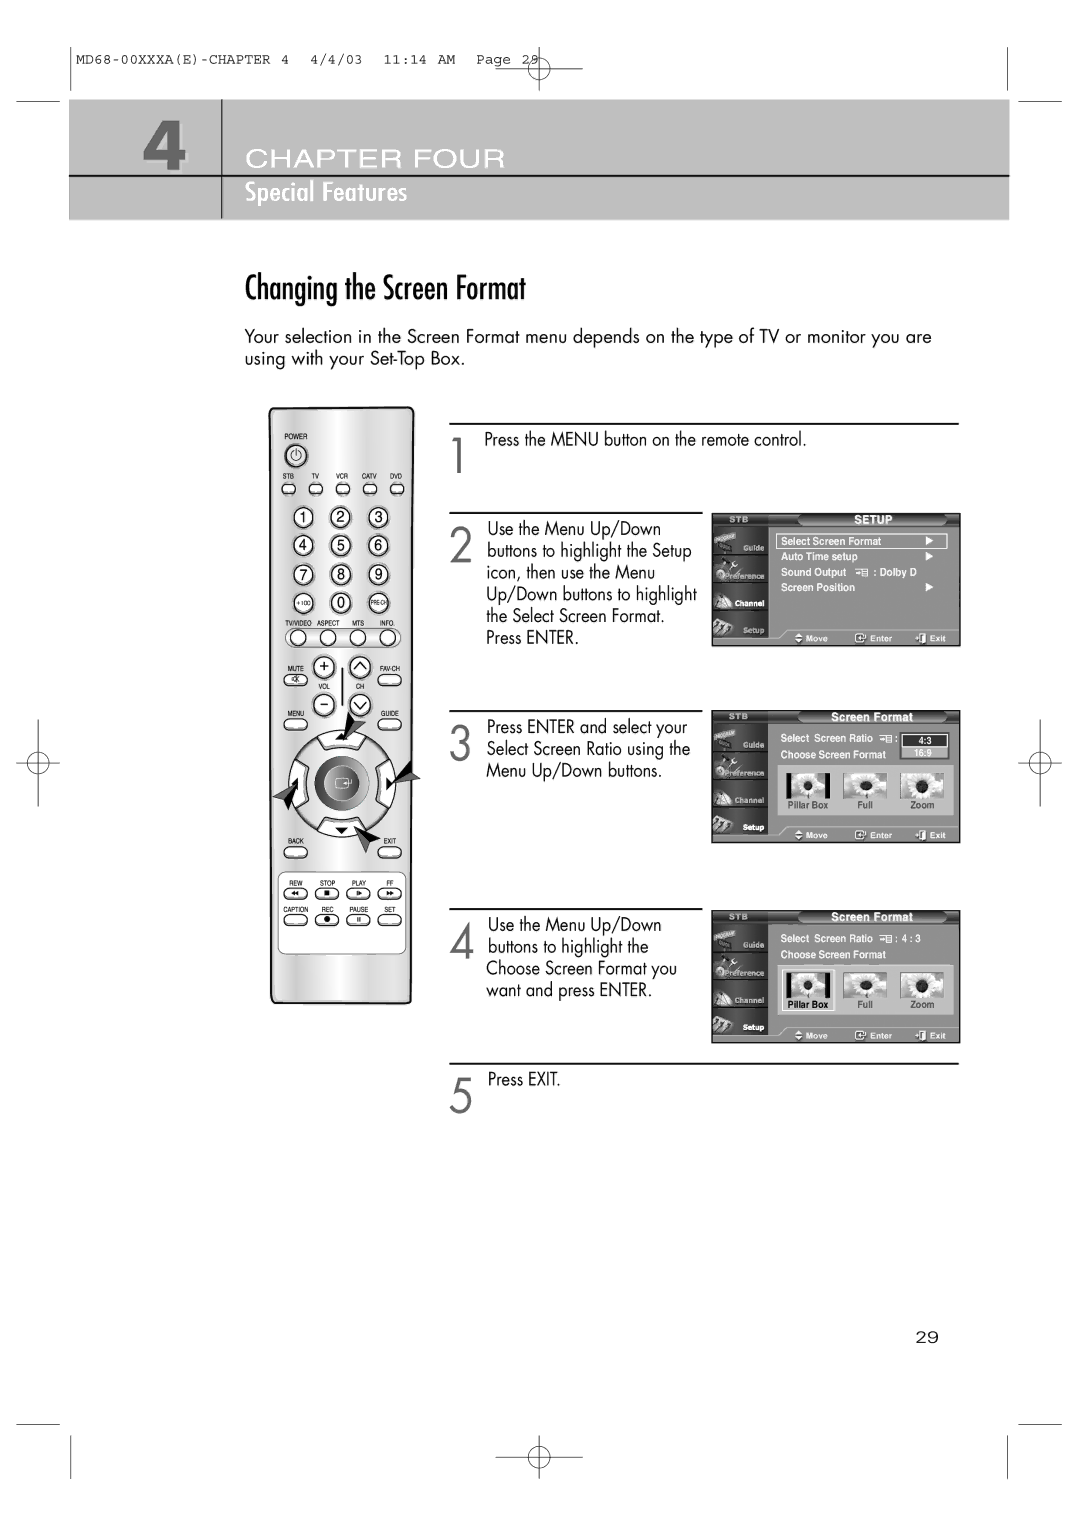
Changing the Screen Format
Your selection in the Screen Format menu depends on the type of TV or monitor you are using with your
1 Press the MENU button on the remote control.
Use the Menu Up/Down |
| SETUP |
|
| Select Screen Format |
| |
2 buttons to highlight the Setup |
| √ | |
| Auto Time setup | √ | |
icon, then use the Menu |
| Sound Output : Dolby D |
|
Up/Down buttons to highlight |
| Screen Position | √ |
|
|
| |
the Select Screen Format. |
|
|
|
Press ENTER. |
|
|
|
Press ENTER and select your |
| Screen Format | |||
Select Screen Ratio | : | 4:3 | |||
3 Select Screen Ratio using the | |||||
Choose Screen Format |
| 16:9 | |||
Menu Up/Down buttons. |
|
|
|
| |
| Pillar Box | Full |
| Zoom | |
Use the Menu Up/Down |
|
| Screen Format | |
|
|
| ||
4 buttons to highlight the | Select Screen Ratio | : 4 : 3 | ||
Choose Screen Format |
| |||
Choose Screen Format you |
|
|
| |
want and press ENTER. | Pillar Box | Full | Zoom | |
|
| |||
|
|
|
|
|
|
|
|
|
|
5 Press EXIT.
29
