[MOTION DETECT]
AREA SET | PRESET... |
SENSITIVITY MEDIUM
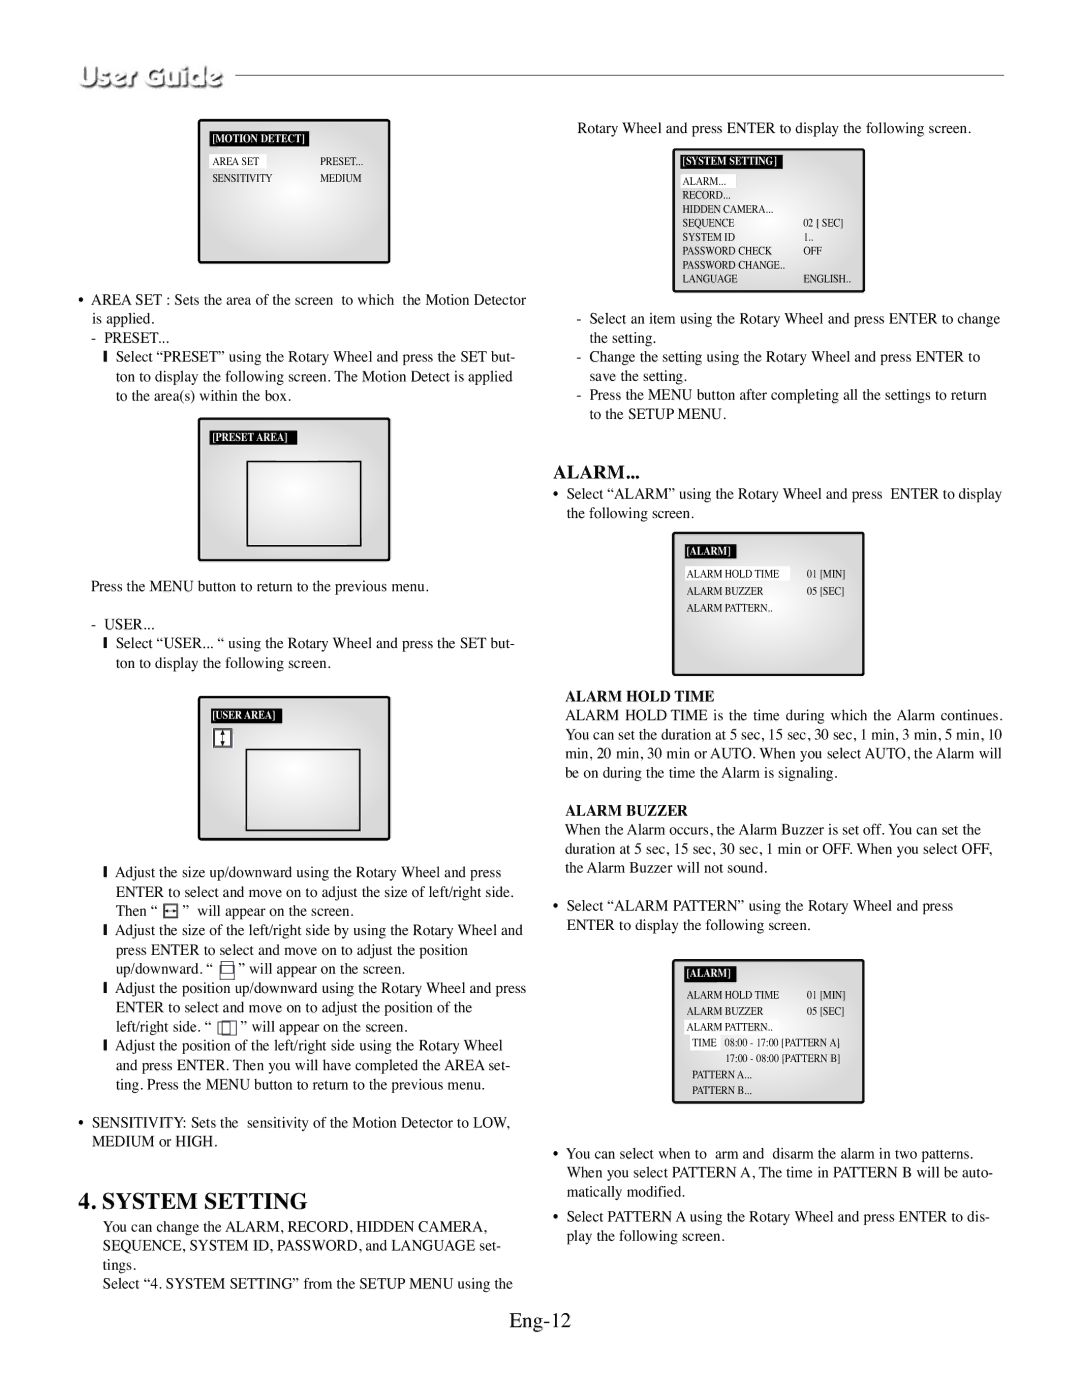
•AREA SET : Sets the area of the screen to which the Motion Detector is applied.
-PRESET...
❙Select “PRESET” using the Rotary Wheel and press the SET but- ton to display the following screen. The Motion Detect is applied to the area(s) within the box.
[PRESET AREA]
Press the MENU button to return to the previous menu.
-USER...
❙Select “USER... “ using the Rotary Wheel and press the SET but- ton to display the following screen.
[USER AREA]
❙Adjust the size up/downward using the Rotary Wheel and press ENTER to select and move on to adjust the size of left/right side. Then “ ![]() ” will appear on the screen.
” will appear on the screen.
❙Adjust the size of the left/right side by using the Rotary Wheel and
press ENTER to select and move on to adjust the position up/downward. “ ![]() ” will appear on the screen.
” will appear on the screen.
❙Adjust the position up/downward using the Rotary Wheel and press ENTER to select and move on to adjust the position of the left/right side. “ ![]() ” will appear on the screen.
” will appear on the screen.
❙Adjust the position of the left/right side using the Rotary Wheel and press ENTER. Then you will have completed the AREA set- ting. Press the MENU button to return to the previous menu.
•SENSITIVITY: Sets the sensitivity of the Motion Detector to LOW, MEDIUM or HIGH.
4. SYSTEM SETTING
You can change the ALARM, RECORD, HIDDEN CAMERA, SEQUENCE, SYSTEM ID, PASSWORD, and LANGUAGE set- tings.
Select “4. SYSTEM SETTING” from the SETUP MENU using the
Rotary Wheel and press ENTER to display the following screen.
| [SYSTEM SETTING] |
|
| |
| ALARM... |
|
| |
| RECORD... |
| ||
| HIDDEN CAMERA... |
| ||
| SEQUENCE | 02 [ SEC] | ||
| SYSTEM ID | 1.. | ||
| PASSWORD CHECK | OFF | ||
| PASSWORD CHANGE.. |
| ||
| LANGUAGE | ENGLISH.. | ||
|
|
|
|
|
-Select an item using the Rotary Wheel and press ENTER to change the setting.
-Change the setting using the Rotary Wheel and press ENTER to save the setting.
-Press the MENU button after completing all the settings to return to the SETUP MENU.
ALARM...
•Select “ALARM” using the Rotary Wheel and press ENTER to display the following screen.
|
|
|
|
|
| [ALARM] |
|
|
|
|
|
|
| |
| ALARM HOLD TIME | 01 | [MIN] | |
| ALARM BUZZER | 05 | [SEC] | |
| ALARM PATTERN.. |
|
| |
|
|
|
|
|
ALARM HOLD TIME
ALARM HOLD TIME is the time during which the Alarm continues. You can set the duration at 5 sec, 15 sec, 30 sec, 1 min, 3 min, 5 min, 10 min, 20 min, 30 min or AUTO. When you select AUTO, the Alarm will be on during the time the Alarm is signaling.
ALARM BUZZER
When the Alarm occurs, the Alarm Buzzer is set off. You can set the duration at 5 sec, 15 sec, 30 sec, 1 min or OFF. When you select OFF, the Alarm Buzzer will not sound.
•Select “ALARM PATTERN” using the Rotary Wheel and press ENTER to display the following screen.
[ALARM] |
|
|
|
|
ALARM HOLD TIME | 01 | [MIN] | ||
ALARM BUZZER | 05 | [SEC] | ||
ALARM PATTERN.. |
|
|
| |
TIME 08:00 - 17:00 [PATTERN A]
17:00 - 08:00 [PATTERN B]
PATTERN A...
PATTERN B...
•You can select when to arm and disarm the alarm in two patterns. When you select PATTERN A, The time in PATTERN B will be auto- matically modified.
•Select PATTERN A using the Rotary Wheel and press ENTER to dis- play the following screen.
