Modifying VIDEOPLUS+/SHOWVIEW Programming
NICAM
B
If you wish to correct the programme displayed or modify certain elements, such as the recording speed, you can do so before you press MENU a second time to confirm.
If you wish to... | Then... |
| |
|
|
|
|
Select an input source other | ◆ | Press the | or buttons, until the PR selection flashes. |
than the tuner (L1, L2, AV input) | ◆ | Press the INPUT button one or more times to change the | |
|
| input source selection. | |
|
| Result: | The programme number is replaced by: |
➢The input source must be selected before changing any other value.
Record a programme every day | ◆ | Press the | or | buttons, until the DAY selection flashes. |
(Monday to Sunday) at the same time | ◆ | Press the | or | buttons, until the DLY (Daily) value is |
|
| displayed. |
|
|
|
|
|
|
|
Record a programme every week | ◆ | Press the | or | buttons, until the DAY selection flashes. |
on the same day and at the same time | ◆ | Press the | or | buttons, until the W- (Week) value is |
|
| displayed, followed by the required day. | ||
|
| Example: | ||
|
|
|
|
|
Extend the recording time | ◆ | Press the | or | buttons, until the STOP selection flashes. |
| ◆ | Press the | or | buttons to increase or decrease the stop |
|
| time. |
|
|
Select the recording speed | ◆ Press the or buttons, until the recording speed selection |
| flashes. |
◆Press the ![]() or
or ![]() buttons until the correct indication is displayed:
buttons until the correct indication is displayed:
•AUTO (Auto Tape Speed Select)
•SP (Standard Play)
•LP (Long Play)
•SLP (Super Long Play)
Select the VPS/PDC recording | ◆ | Press the | or | buttons, until the V/P selection flashes. |
| ◆ | Press the | or | buttons until the “ON” indication is |
| ☛ | display. |
|
|
| Do not select VPS/PDC unless you are sure the programme | |||
|
| you wish to record is broadcast with VPS/PDC. If you do set | ||
|
| VPS/PDC ON (by selecting “ON” in the right - hand column on | ||
|
| the screen), then you must set up the | ||
|
| according to | the published TV schedule. Otherwise the timer | |
|
| recording | won’t take place. | |
|
|
|
|
|
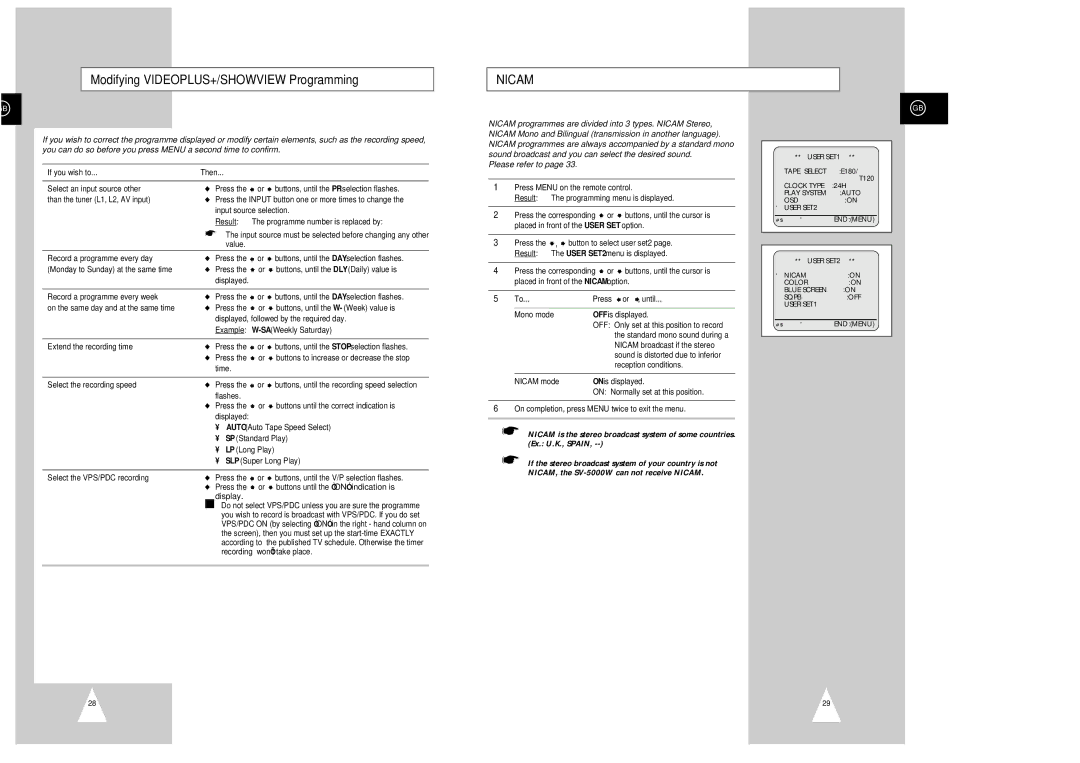
NICAM programmes are divided into 3 types. NICAM Stereo, NICAM Mono and Bilingual (transmission in another language). NICAM programmes are always accompanied by a standard mono sound broadcast and you can select the desired sound.
Please refer to page 33.
1Press MENU on the remote control.
Result: The programming menu is displayed.
2Press the corresponding ![]() or
or ![]() buttons, until the cursor is placed in front of the USER SET option.
buttons, until the cursor is placed in front of the USER SET option.
3Press the ![]() ,
, ![]() button to select user set2 page. Result: The USER SET2 menu is displayed.
button to select user set2 page. Result: The USER SET2 menu is displayed.
4Press the corresponding ![]() or
or ![]() buttons, until the cursor is placed in front of the NICAM option.
buttons, until the cursor is placed in front of the NICAM option.
5 | To... | Press or , until... |
|
|
|
| Mono mode | OFF is displayed. |
|
| OFF: Only set at this position to record |
|
| the standard mono sound during a |
|
| NICAM broadcast if the stereo |
|
| sound is distorted due to inferior |
|
| reception conditions. |
|
|
|
| NICAM mode | ON is displayed. |
|
| ON: Normally set at this position. |
6On completion, press MENU twice to exit the menu.
➢NICAM is the stereo broadcast system of some countries. (Ex.: U.K., SPAIN,
➢If the stereo broadcast system of your country is not NICAM, the
GB
| ** USER SET1 ** | |
TAPE SELECT | :E180/ | |
|
| T120 |
CLOCK TYPE | :24H | |
PLAY SYSTEM | :AUTO | |
OSD | :ON | |
❿ USER SET2 |
| |
#❷ | ❿ | END:(MENU) |
| ** USER SET2 ** | |
❿ NICAM | :ON | |
COLOR | :ON | |
BLUE SCREEN | :ON | |
SQPB | :OFF | |
USER SET1 |
| |
|
|
|
#❷ | ❿ | END:(MENU) |
28 | 29 |
