VIDEOPLUS+ EXTEND
Connecting an RCA Audio/Video Input Cable
★
GB
PROG OPTIONS INSTALL
CLOCK BONUS
EASY OPERATION
$❷!!➛❿!! OK | END: MENU | ||
BONUS |
|
|
|
PDC/VPS DEFAULT | :OFF | ||
VIDEOPLUS EXTEND | :OFF | ||
AUTO POWER OFF |
| :OFF | |
REPEAT PLAY |
| :OFF | |
NO. OF |
|
| |
INTERVAL REPEAT : 5 | |||
$❷ | ❿ | END: MENU | |
To prevent delays or
➢Only use if PDC is not available or set to OFF.
1Press the MENU button on the remote control.
2Press the corresponding $,❷ or ➛, ❿ buttons to select the
EASY OPERATION option.
3Press the OK button to select this option.
Result: The EASY OPERATION menu is displayed.
4Press the corresponding $or ❷ buttons, until the VIDEOPLUS EXTEND option is selected.
5Press ➛ or ❿ buttons to set the Videoplus EXTEND time by increments of 10 minutes.
6To turn off, press ➛ or ❿ buttons repeatedly until OFF shows.
You can connect other audio/video equipment to your VCR using audio/video cables if the appropriate outputs are available on the equipment chosen.
Examples: ◆ You wish to copy a video cassette with the help of a second VCR (see page 40).
◆You wish to play back and/or copy pictures taken with a camcorder (see page 40).
☛◆ Regardless of the type of connection chosen, you must always connect the coaxial cable supplied. Otherwise, no picture will be visible on the screen when the VCR is switched off.
◆Make sure that both the television and the VCR are switched off before connecting the cables.
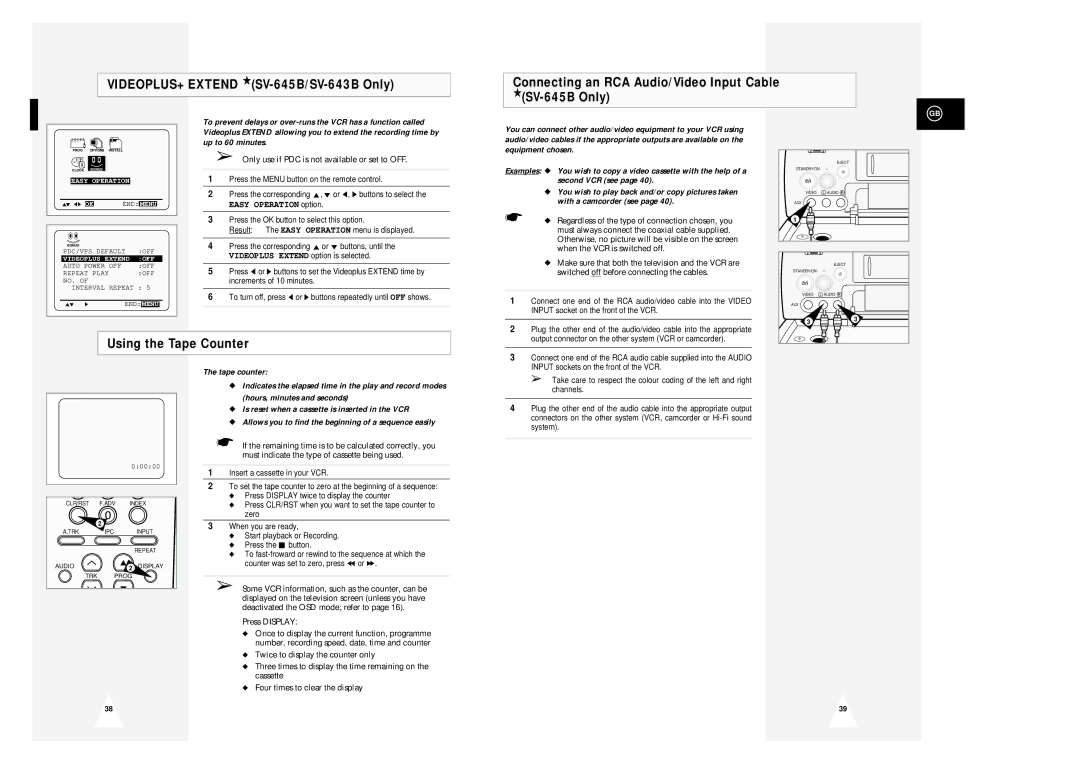
1 | Connect one end of the RCA audio/video cable into the VIDEO |
| INPUT socket on the front of the VCR. |
|
|
2 | Plug the other end of the audio/video cable into the appropriate |
| output connector on the other system (VCR or camcorder). |
EJECT
STANDBY/ON
VIDEO L - AUDIO - R
AUX
1 |
EJECT
STANDBY/ON
VIDEO L - AUDIO - R
AUX
3 | 3 |
Using the Tape Counter
|
| 0:00:00 |
CLR/RST | F.ADV | INDEX |
| 2 |
|
A.TRK | IPC | INPUT |
|
| REPEAT |
AUDIO |
| 2 |
TRK | PROG | |
The tape counter:
◆Indicates the elapsed time in the play and record modes (hours, minutes and seconds)
◆Is reset when a cassette is inserted in the VCR
◆Allows you to find the beginning of a sequence easily
☛If the remaining time is to be calculated correctly, you must indicate the type of cassette being used.
1Insert a cassette in your VCR.
2To set the tape counter to zero at the beginning of a sequence:
◆Press DISPLAY twice to display the counter
◆Press CLR/RST when you want to set the tape counter to zero
3When you are ready,
◆Start playback or Recording.
◆Press the ■ button.
◆To
➢Some VCR information, such as the counter, can be displayed on the television screen (unless you have deactivated the OSD mode; refer to page 16).
Press DISPLAY:
◆Once to display the current function, programme number, recording speed, date, time and counter
◆Twice to display the counter only
◆Three times to display the time remaining on the cassette
◆Four times to clear the display
3Connect one end of the RCA audio cable supplied into the AUDIO INPUT sockets on the front of the VCR.
➢Take care to respect the colour coding of the left and right channels.
4Plug the other end of the audio cable into the appropriate output connectors on the other system (VCR, camcorder or
38 | 39 |