2.Once the bolt is loose, move it to the center of the hole and completely pull out the bolt, including the plastic spacer covering the bolt.
3.Once all 4 bolts are removed, discard the bolts and spacers. Then pull the power cord through the opening of the rear panel and close the hole with the attached cap.
4.Close the bolt holes with the 4 transport bolt hole plugs.
NOTE: If the washer is to be transported at a later date, call your local service center. To avoid suspension and structural damage to your washer, it must be properly set up for relocation by a certified technician.
Connect the Inlet Hoses
Make sure the washer drum is empty.
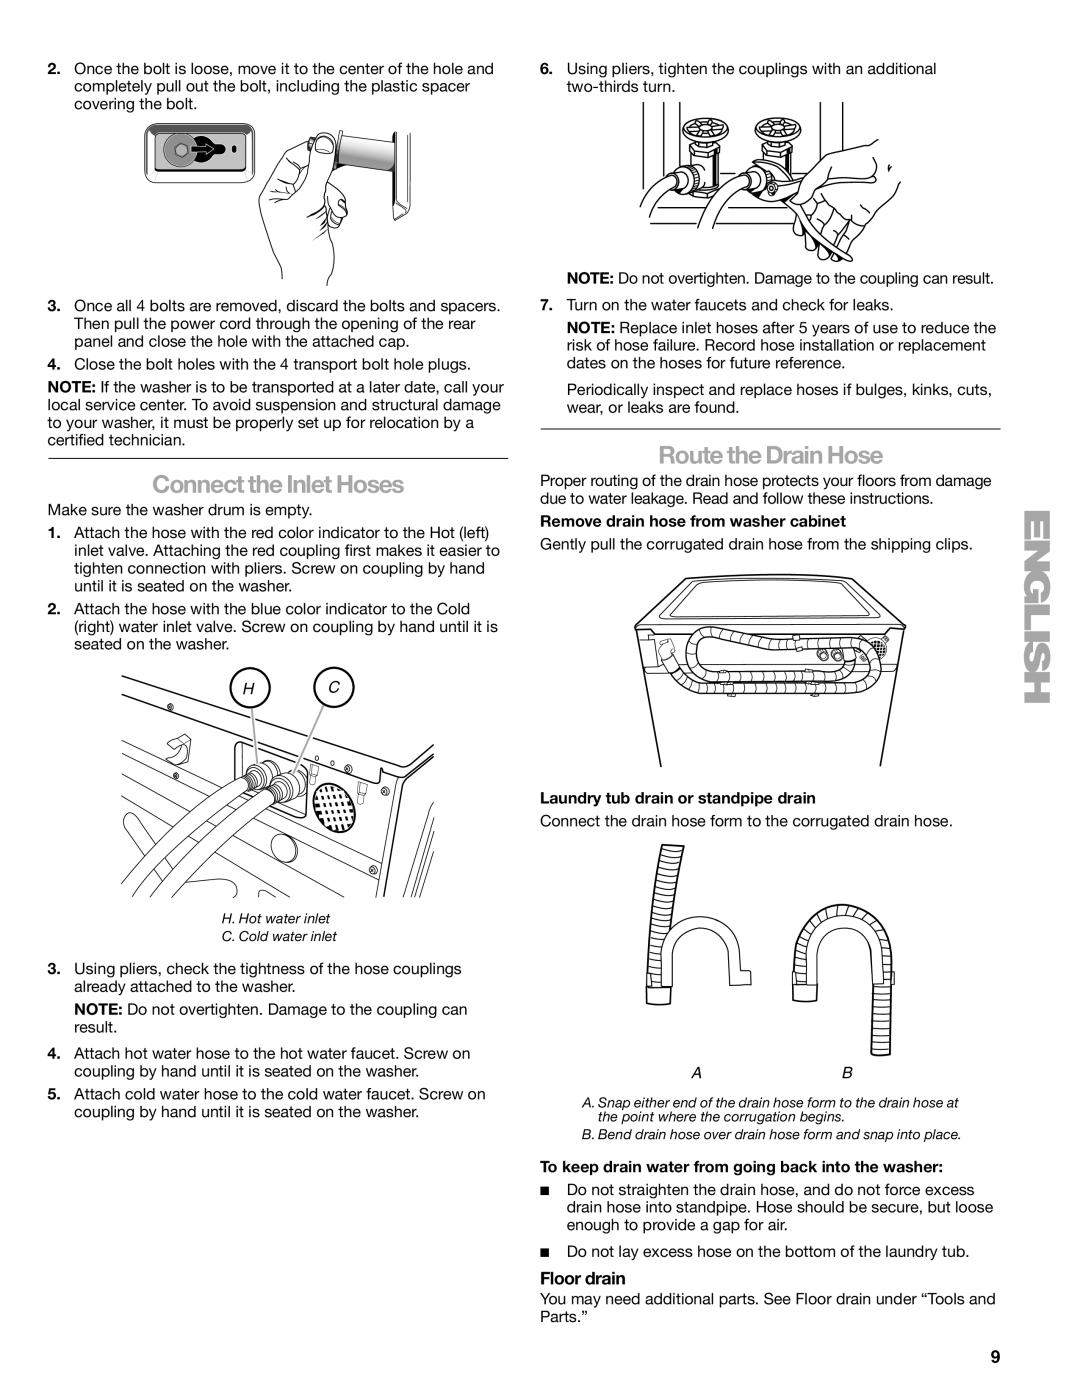
1.Attach the hose with the red color indicator to the Hot (left) inlet valve. Attaching the red coupling first makes it easier to tighten connection with pliers. Screw on coupling by hand until it is seated on the washer.
2.Attach the hose with the blue color indicator to the Cold (right) water inlet valve. Screw on coupling by hand until it is seated on the washer.
HC
6.Using pliers, tighten the couplings with an additional
NOTE: Do not overtighten. Damage to the coupling can result.
7.Turn on the water faucets and check for leaks.
NOTE: Replace inlet hoses after 5 years of use to reduce the risk of hose failure. Record hose installation or replacement dates on the hoses for future reference.
Periodically inspect and replace hoses if bulges, kinks, cuts, wear, or leaks are found.
Route the Drain Hose
Proper routing of the drain hose protects your floors from damage due to water leakage. Read and follow these instructions.
Remove drain hose from washer cabinet
Gently pull the corrugated drain hose from the shipping clips.
Laundry tub drain or standpipe drain
Connect the drain hose form to the corrugated drain hose.
H. Hot water inlet
C. Cold water inlet
3.Using pliers, check the tightness of the hose couplings already attached to the washer.
NOTE: Do not overtighten. Damage to the coupling can result.
4.Attach hot water hose to the hot water faucet. Screw on coupling by hand until it is seated on the washer.
5.Attach cold water hose to the cold water faucet. Screw on coupling by hand until it is seated on the washer.
AB
A. Snap either end of the drain hose form to the drain hose at the point where the corrugation begins.
B. Bend drain hose over drain hose form and snap into place.
To keep drain water from going back into the washer:
■Do not straighten the drain hose, and do not force excess drain hose into standpipe. Hose should be secure, but loose enough to provide a gap for air.
■Do not lay excess hose on the bottom of the laundry tub.
Floor drain
You may need additional parts. See Floor drain under “Tools and Parts.”
9