assembly
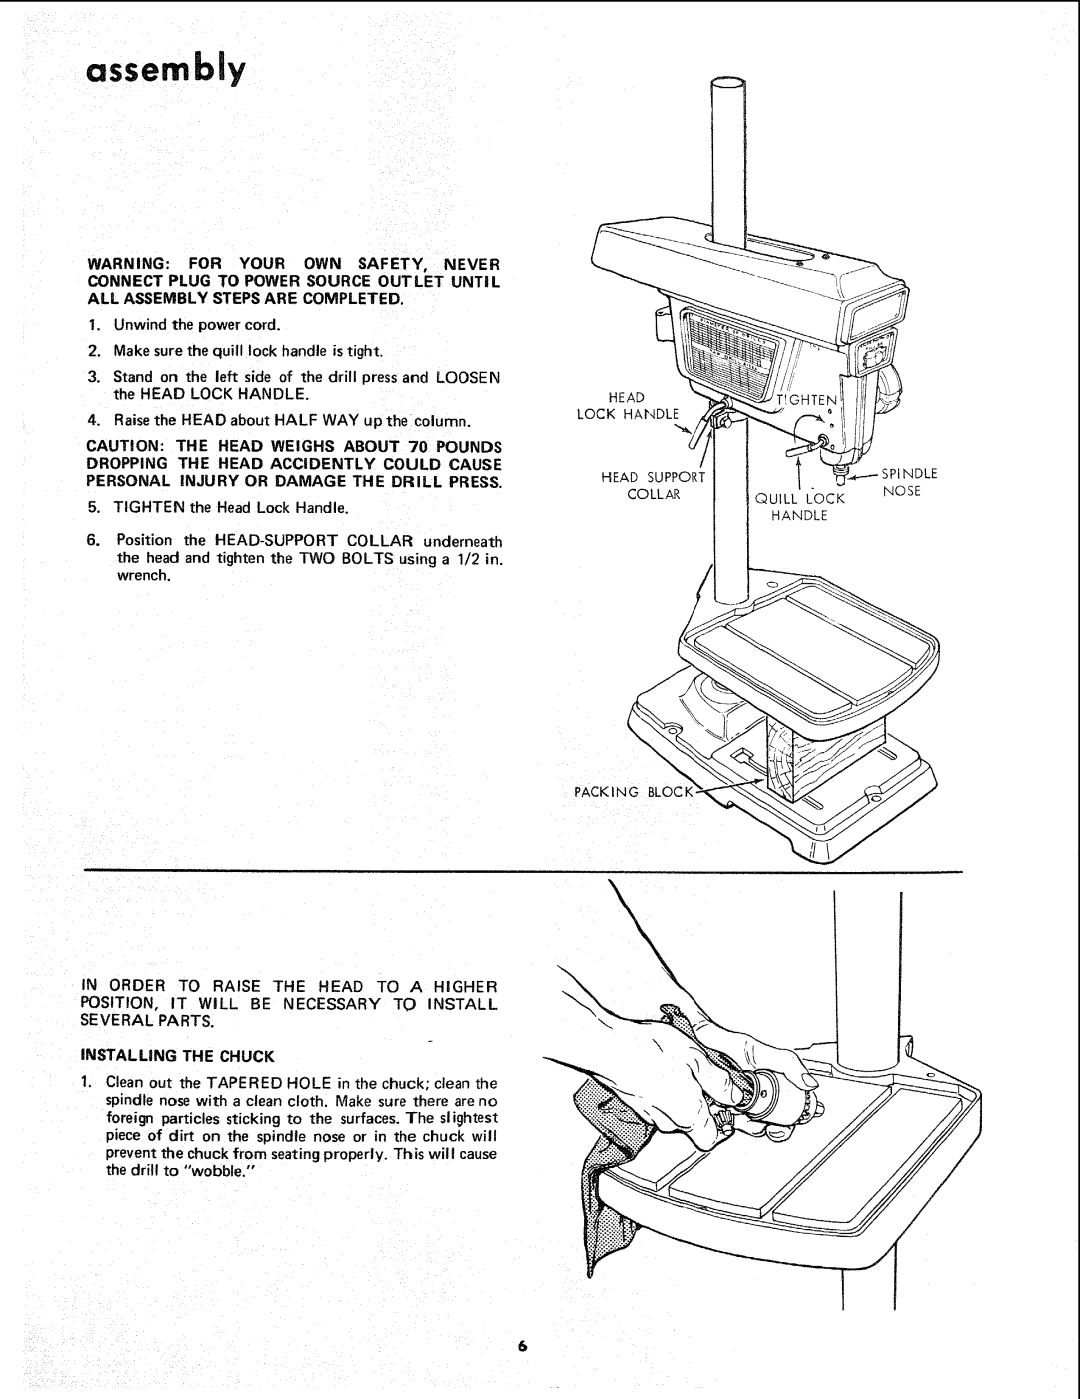
WARNING: FOR YOUR OWN SAFETY, NEVER CONNECT PLUG TO POWER SOURCE OUTLET UNTIL ALL ASSEMBLY STEPS ARE COMPLETED.
1.Unwind the power cord.
2.Make sure the quill lock handle is tight.
3.Stand on the left side of the drill pressand LOOSEN the HEAD LOCK HANDLE.
4.Raise the HEAD about HALF WAY up the column.
CAUTION: THE HEAD WEIGHS ABOUT 70 POUNDS
DROPPING THE HEAD ACCIDENTLY COULD CAUSE PERSONAL INJURY OR DAMAGE THE DRILL PRESS.
5.TIGHTEN the Head Lock Handle.
6.Position the
the head and tighten the TWO BOLTS using a 1/2 in. wrench.
HEAD
LOCK HAINDLE
| I | SPINDLE |
HEAD SUPPORT |
| |
|
| |
COLLAR | QUILL L'OCK | NOSE |
| ||
| HANDLE |
|
PACKING BLOCK
IN ORDER TO RAISE THE HEAD TO A HIGHER
POSITION, IT WILL BE NECESSARY TO INSTALL SEVERAL PARTS.
INSTALLING THE CHUCK
Clean out the TAPERED HOLE in the chuck; clean the spindle nose with a clean cloth. Make sure there are no
foreign particles sticking to the surfaces. The slightest piece of dirt on the spindle nose or in the chuck will prevent the chuck from seating properly. This will cause the drill to "wobble."
6