ROUTING AND DOVETAILING
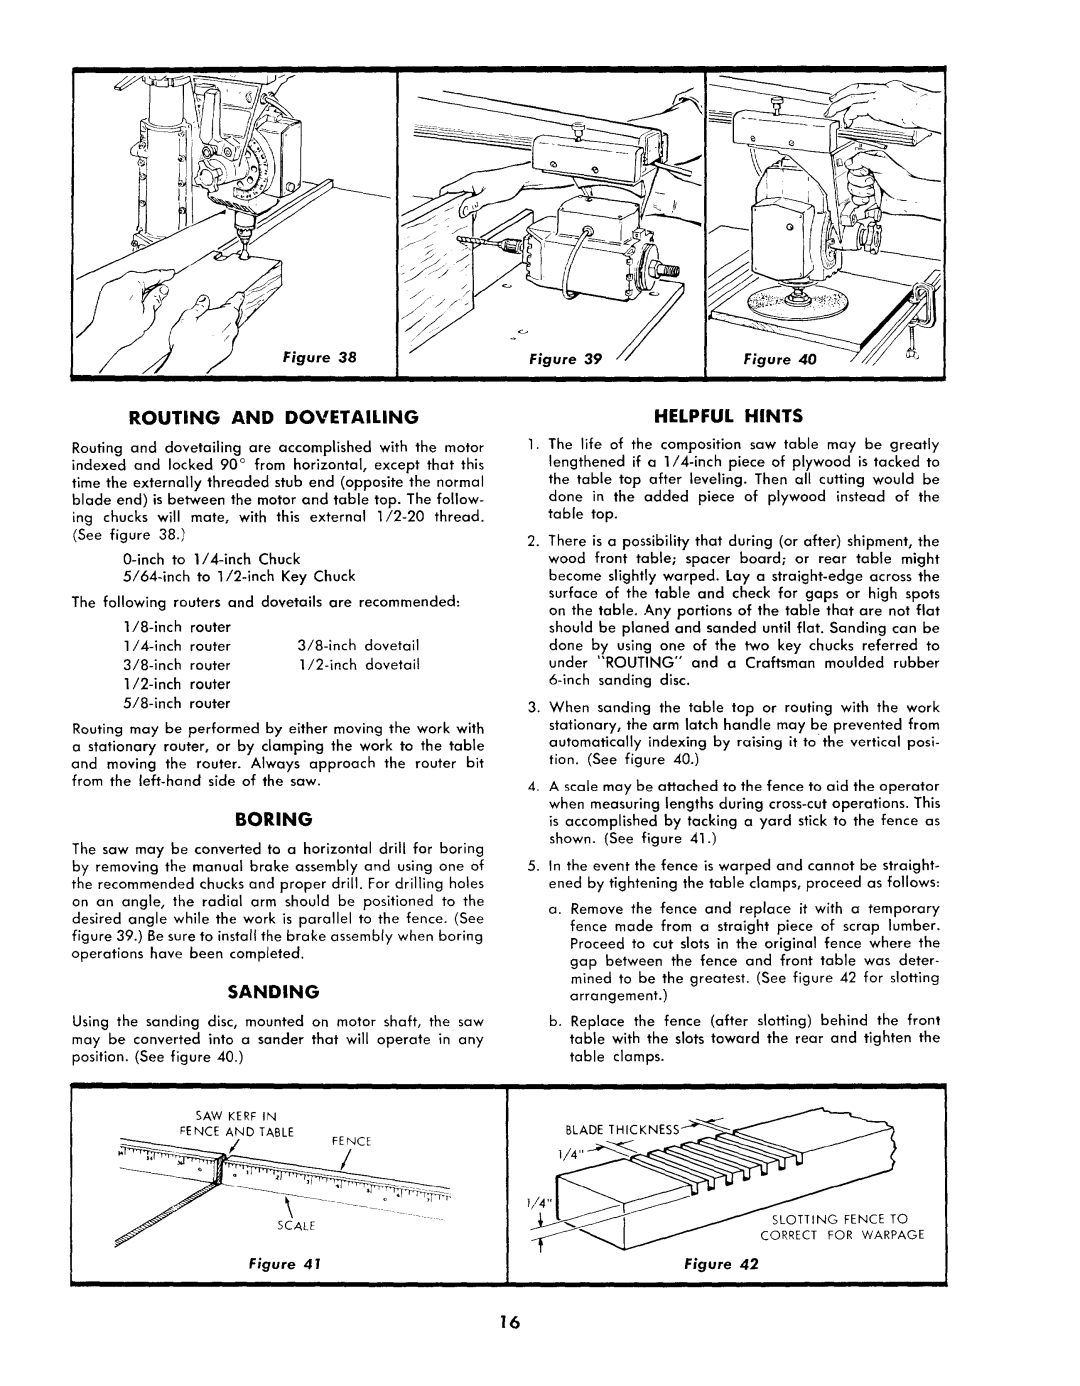
Routing and dovetailing are accomplished with the motor indexed and locked 90 ° from horizontal, except that this
time the externally threaded stub end (opposite the normal blade end) is between the motor and table top. The follow-
ing chucks will mate, with this external
The following touters and dovetails are recommended:
router |
|
| |
router | dovetail | ||
router | dovetail | ||
router |
|
| |
router |
|
|
Routing may be performed by either moving the work with a stationary router, or by clamping the work to the table and moving the router. Always approach the router bit from the
BORING
The saw may be converted to a horizontal drill for boring by removing the manual brake assembly and using one of the recommended chucks and proper drill. For drilling holes on an angle, the radial arm should be positioned to the desired angle while the work is parallel to the fence. (See figure 39.) Be sure to install the brake assembly when boring operations have been completed.
SANDING
Using the sanding disc, mounted on motor shaft, the saw may be converted into a sander that will operate in any position. (See figure 40.)
SAW KERF IN
_ENCE AND TABLE
_p/ | FENCE |
fSCALE
Figure 41
HELPFUL HINTS
1.The life of the composition saw table may be greatly lengthened if a
2.There is a possibility that during (or after) shipment, the wood front table; spacer board; or rear table might become slightly warped. Lay a
done by using one of the two key chucks referred to under "ROUTING" and a Craftsman moulded rubber
3.When sanding the table top or routing with the work stationary, the arm latch handle may be prevented from automatically indexing by raising it to the vertical posi- tion. (See figure 40.)
4.A scale may be attached to the fence to aid the operator when measuring lengths during
is accomplished by tacking a yard stick to the fence as shown. (See figure 41.)
5.In the event the fence is warped and cannot be straight- ened by tightening the table clamps, proceed as follows:
a. Remove the fence and replace it with a temporary fence made from a straight piece of scrap lumber. Proceed to cut slots in the original fence where the gap between the fence and front table was deter- mined to be the greatest. (See figure 42 for slotting arrangement.)
b. Replace the fence (after slotting) behind the front table with the slots toward the rear and tighten the table clamps.
BLADE
SLOTTING FENCE TO
CORRECT FOR WARPAGE
Figure 42
16