PUT YOUR DISPENSING
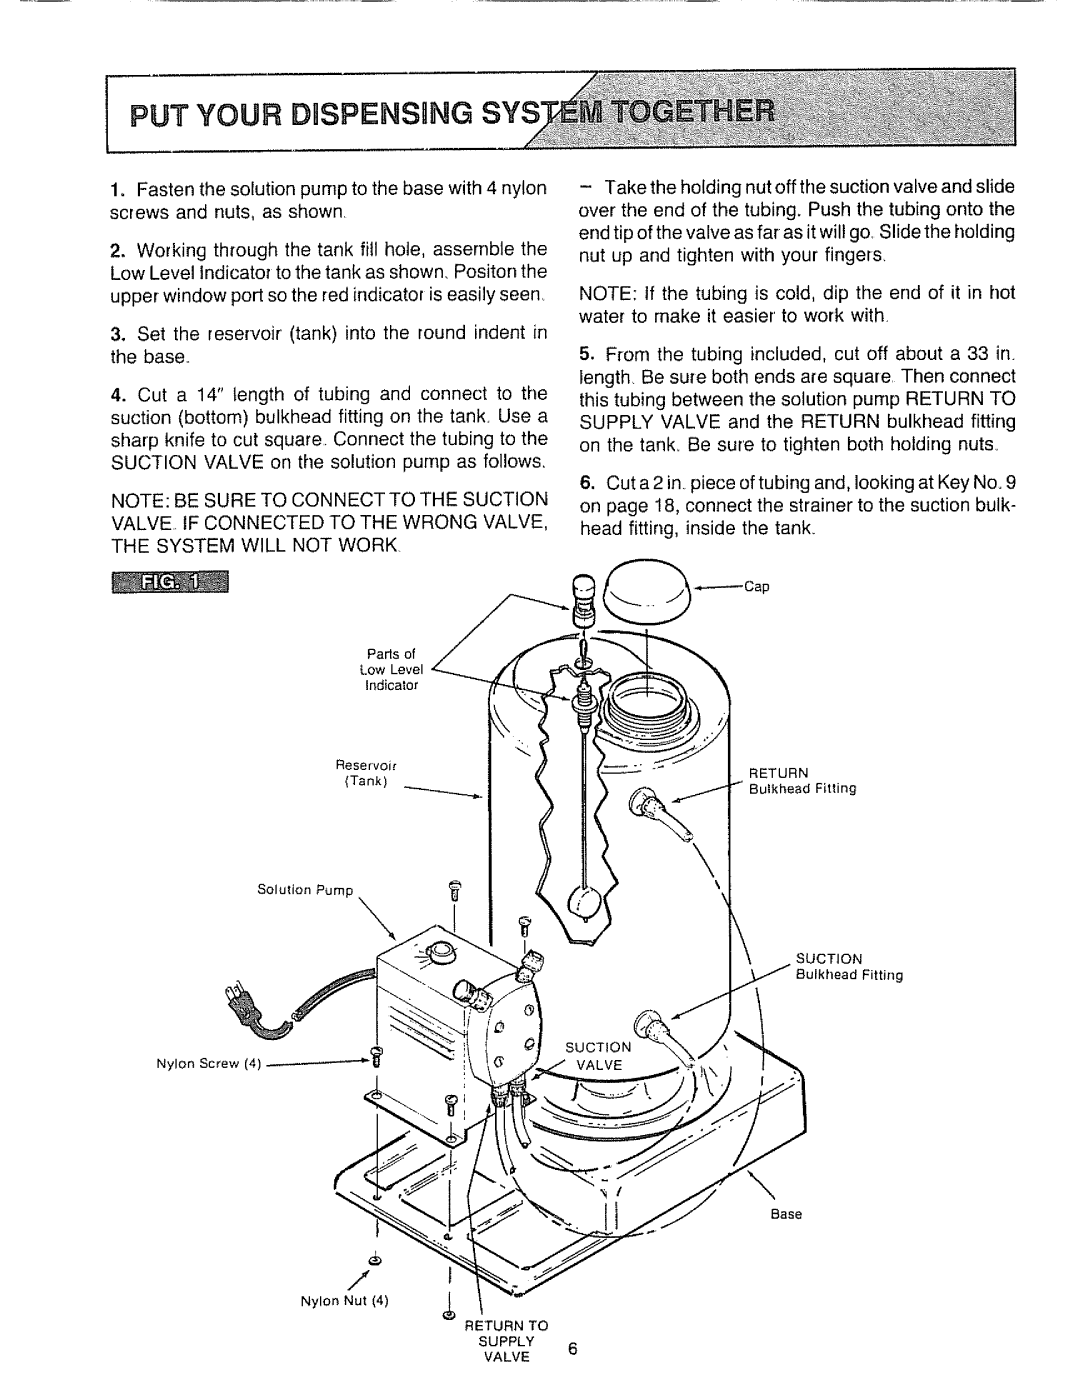
1, Fasten the solution pump to the base with 4 nylon screws and nuts, as shown
2.Working through the tank fill hole, assemble the Low Level Indicator to the tank as shown, Positon the upper window port so the red indicator is easily seen_
3.Set the reservoir (tank) into the round indent in the base
4.Cut a 14" length of tubing and connect to the suction (bottom) bulkhead fitting on the tank, Use a
sharp knife to cut square. Connect the tubing to the SUCTION VALVE on the solution pump as follow&
NOTE: BE SURE TO CONNECT TO THE SUCTION VALVE IF CONNECTED TO THE WRONG VALVE, THE SYSTEM WILL NOT WORK,
-Take the holding nut off the suction valve and slide over the end of the tubing. Push the tubing onto the end tip of the valve as far as it will go, Slide the holding nut up and tighten with your finger&
NOTE: If the tubing is cold, dip the end of it in hot water to make it easier to work with,
5. From the tubing included, cut off about a 33 in, length, Be sure both ends are square Then connect this tubing between the solution pump RETURN TO SUPPLY VALVE and the RETURN bulkhead fitting on the tank_ Be sure to tighten both holding nuts.
6.Cut a 2 in piece of tubing and, looking at Key No_ 9 on page !8, connect the strainer to the suction bulk- head fitting, inside the tank
Parts of
Low Level
Indicator
Reservort
(Tank)
Solution Pump "_
Nylon Screw (4) __
RETURN
Bulkhead Fitting
SUCTION
Fitting
Base
/I
Nylon Nut (4)
RETURN TO
SUPPLY 6
VALVE