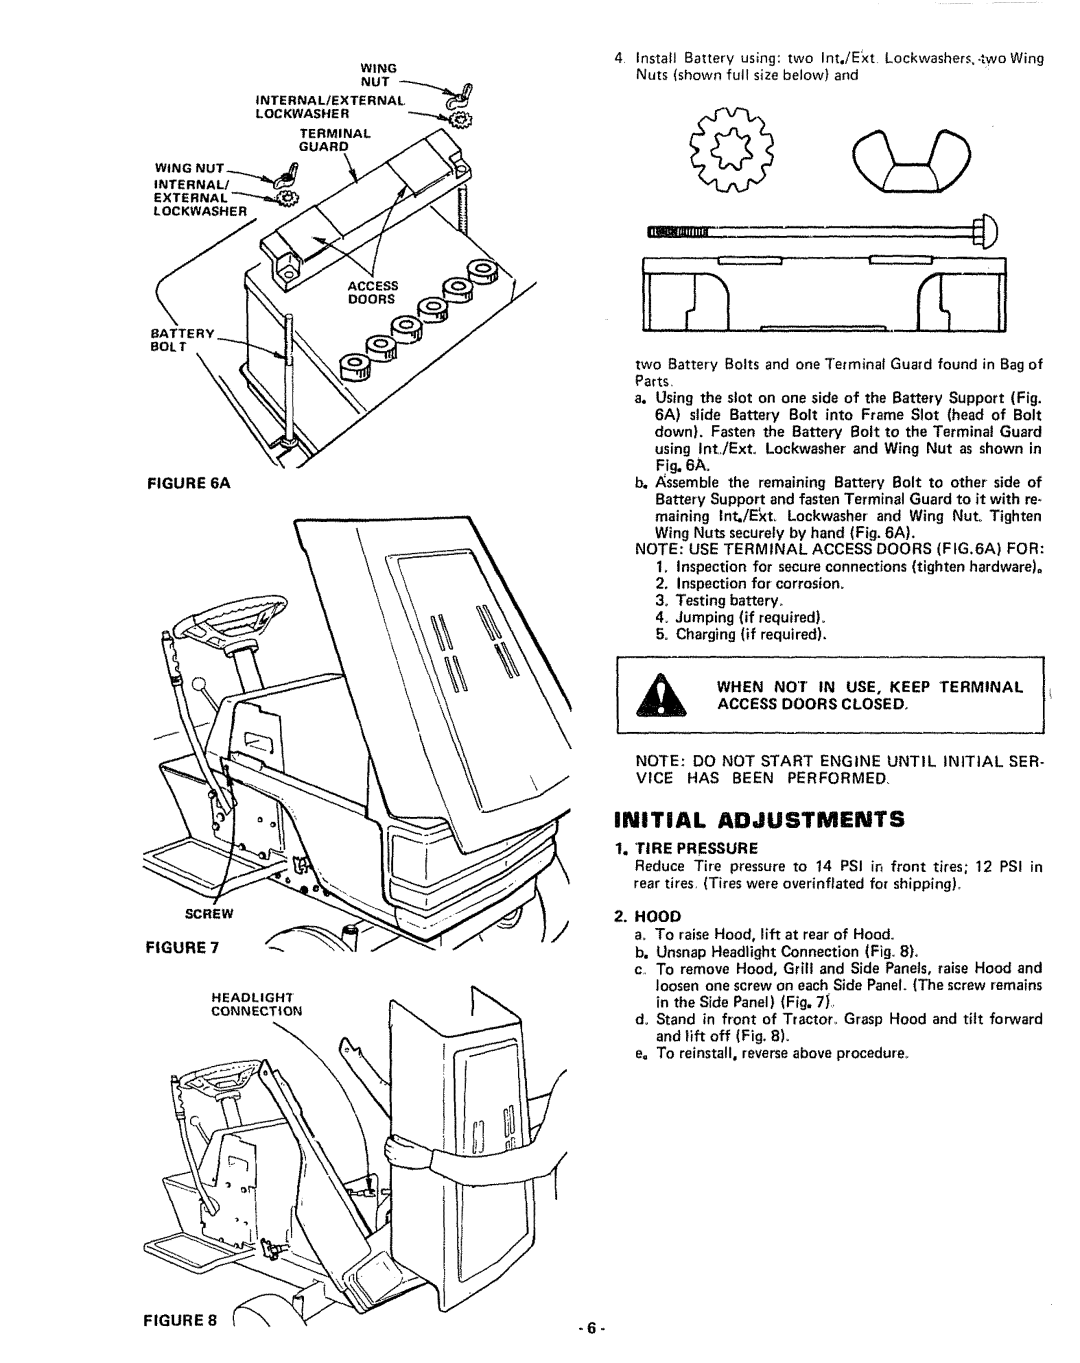
WING
NUT
INTERNALIEXTERNAL
LOCKWASHE R
TERMINAL
GUARD
WING
INTERNAL/
EXTERNAL
LOCKWASHER
\
BATTERY
BOLT
FIGURE 6A
4, Install Battery using: two Int./Ext Lockwashers,,two Wing Nuts (shown full size below} and
q=D
0
two Battery Bolts and one Terminal Guard found in Bag of Parts.
ao Using the slot on one side of the Battery Support (Fig. 6A) slide Battery Bolt into Frame Slot (head of Bolt down}. Fasten the Battery Bolt to the Terminal Guard using IntjExt° Lockwasher and Wing Nut as shown in
Fig. 6Ao
b. Assemble the remaining Battery Bolt to other side of
SCREW
FIGURE 7
HEADLIGHT
CONNECTION
Battery Support and fasten Terminal Guard to it with re, maining Int,/E_t_ Lockwasher and Wing Nut° Tighten
Wing Nuts securely by hand (Fig. 6A).
NOTE: USE TERMINAL ACCESS DOORS (F tG.6A) FOR: 1, Inspection for secure connections (tighten hardware).
2.inspection for corrosion, 3, Testing battery,
4, Jumping (if required). 5_ Charging (if required).
WHEN NOT IN USE, KEEP TERMINAL
ACCESS DOORS CLOSED,
NOTE: DO NOT START ENGINE UNTIL INITIAL SER- VICE HAS BEEN PERFORMED,
INITIAL ADJUSTMENTS
1.TIRE PRESSURE
Reduce Tire pressure to t4 PSI in front tires; 12 PSI in rear tires, (Tires were overinflated for shippingL
/ | . | HOOD |
|
| a. To | raise Hood, lift at rear of Hood. | |
|
| b. Unsnap Headlight Connection (Fig, 8). | |
|
| c,. To | remove Hood, Grill and Side Panels, raise Hood and |
|
| loosen one screw on each Side Panel. (The screw remains | |
in the Side Panel) (Fig, 7)._
d, Stand in front of Tractor_ Grasp Hood and titt forward and lift off (Fig. 8),
e, To reinstall, reverse above procedure..
FIGURE 8 | - 6 - |