MAINTENANCE
1
2 4
3
5 ![]()
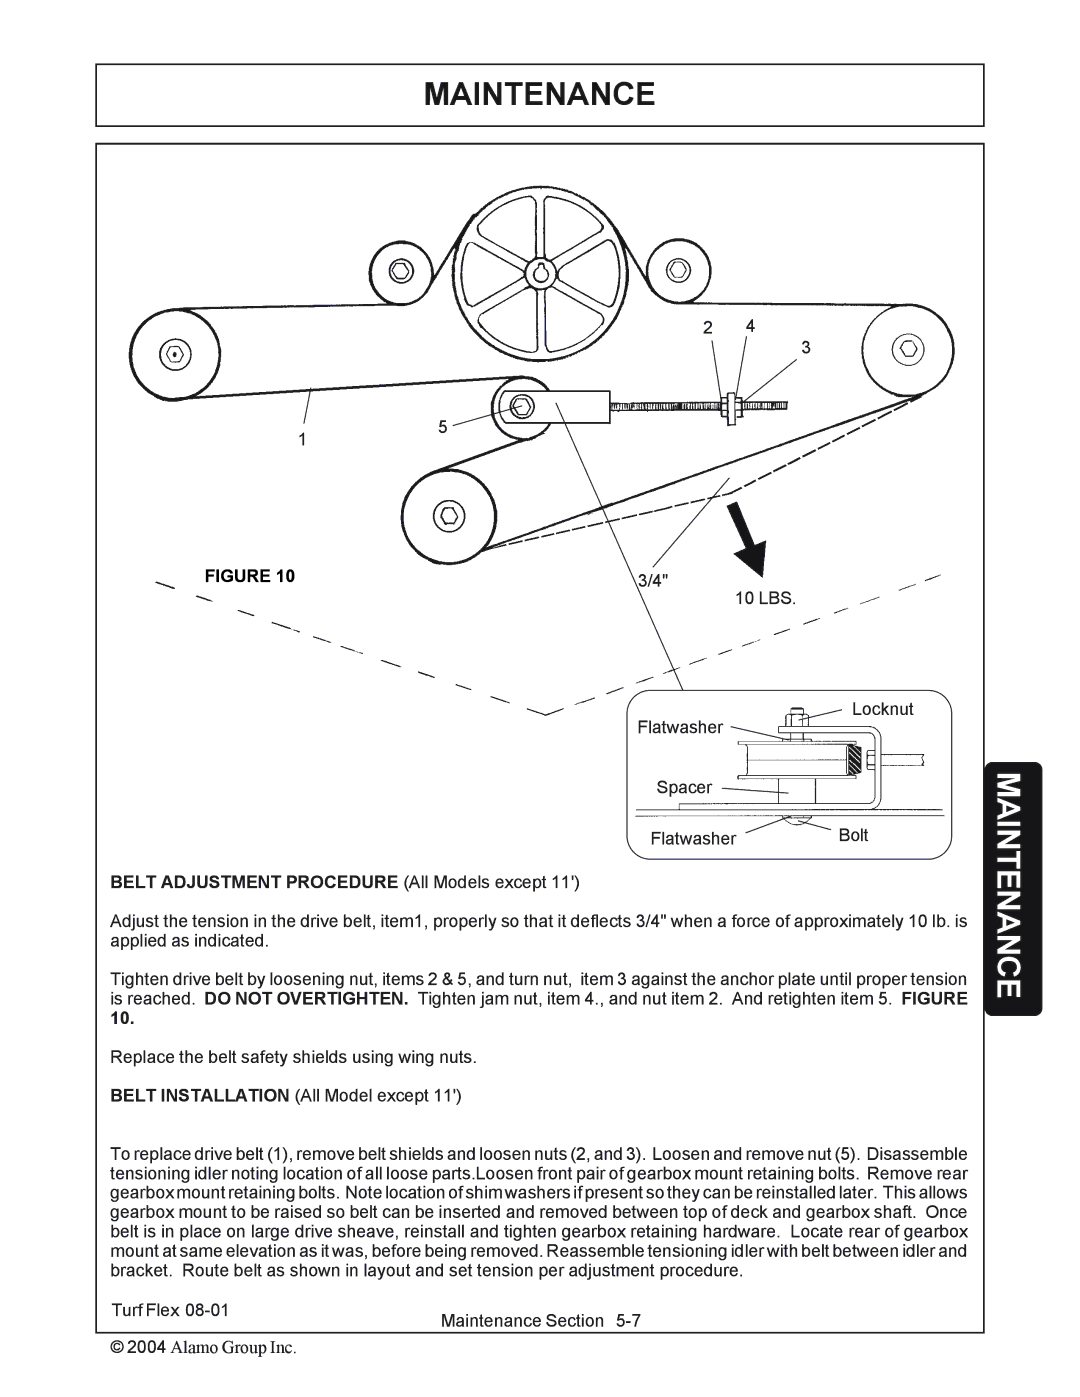
FIGURE 10 | 3/4" |
10 LBS.
Locknut
Flatwasher
Spacer
FlatwasherBolt
BELT ADJUSTMENT PROCEDURE (All Models except 11')
Adjust the tension in the drive belt, item1, properly so that it deflects 3/4" when a force of approximately 10 lb. is applied as indicated.
Tighten drive belt by loosening nut, items 2 & 5, and turn nut, item 3 against the anchor plate until proper tension is reached. DO NOT OVERTIGHTEN. Tighten jam nut, item 4., and nut item 2. And retighten item 5. FIGURE 10.
Replace the belt safety shields using wing nuts.
BELT INSTALLATION (All Model except 11')
To replace drive belt (1), remove belt shields and loosen nuts (2, and 3). Loosen and remove nut (5). Disassemble tensioning idler noting location of all loose parts.Loosen front pair of gearbox mount retaining bolts. Remove rear gearbox mount retaining bolts. Note location of shim washers if present so they can be reinstalled later. This allows gearbox mount to be raised so belt can be inserted and removed between top of deck and gearbox shaft. Once belt is in place on large drive sheave, reinstall and tighten gearbox retaining hardware. Locate rear of gearbox mount at same elevation as it was, before being removed. Reassemble tensioning idler with belt between idler and bracket. Route belt as shown in layout and set tension per adjustment procedure.
Turf Flex | Maintenance Section |
| |
© 2004 Alamo Group Inc. |
|