1
Getting Started
INSTALLING THE PRINTER DRIVER SOFTWARE
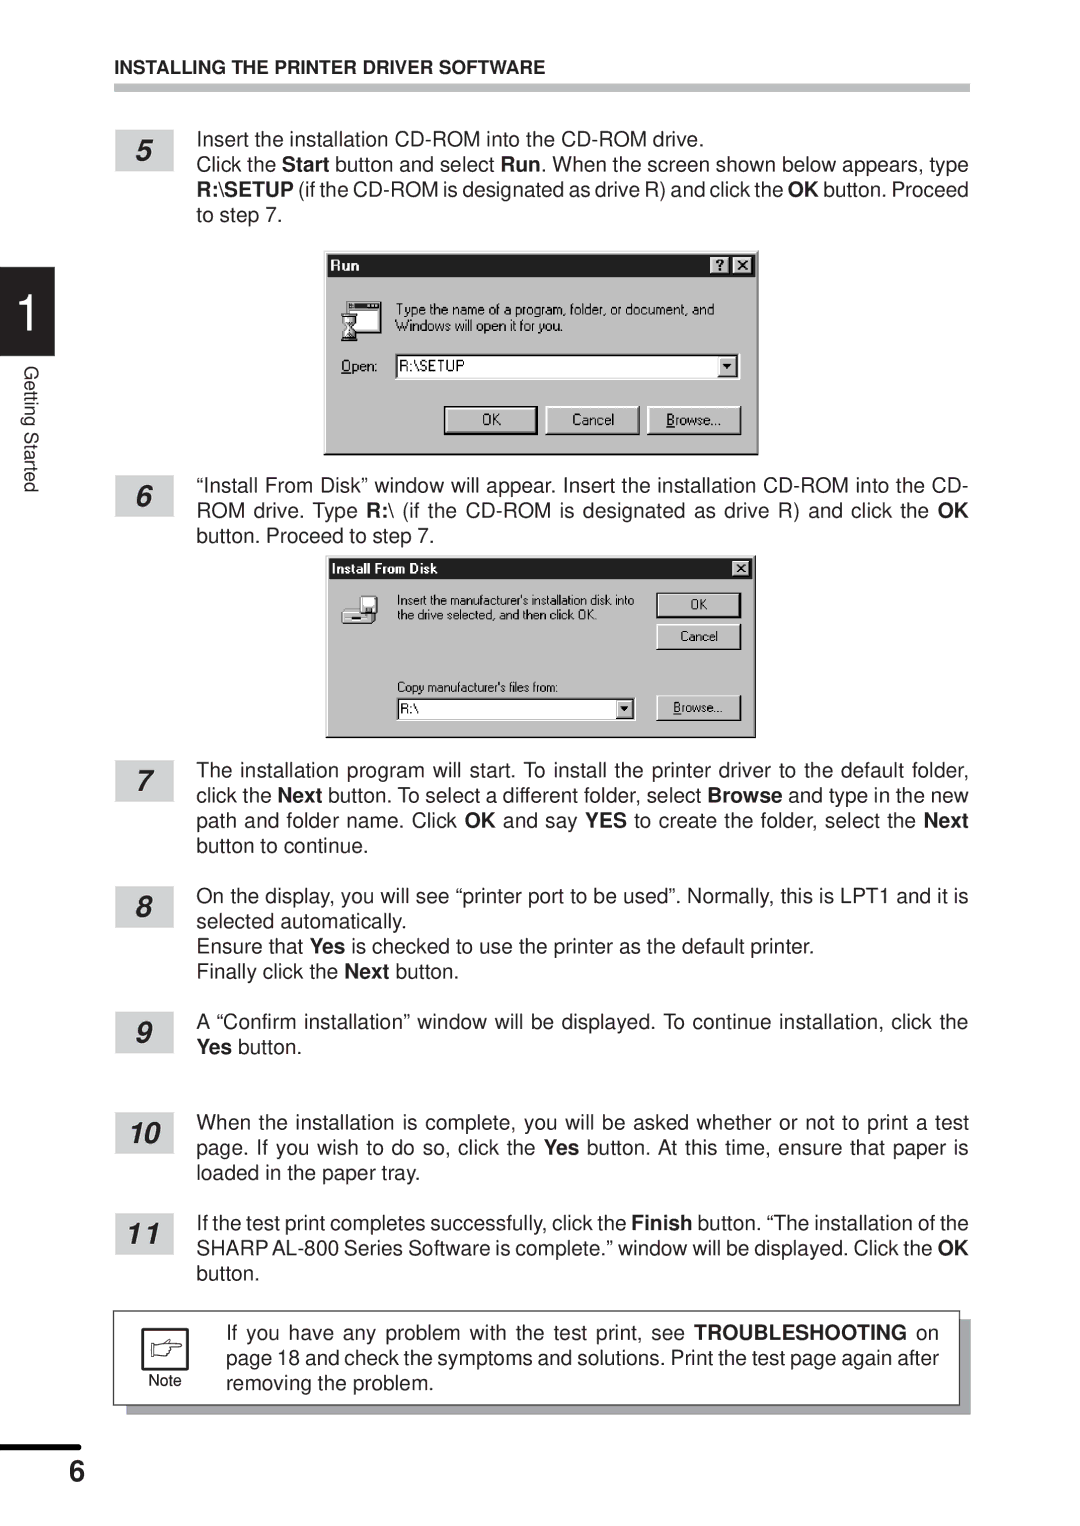
5 | Insert the installation | |
Click the Start button and select Run. When the screen shown below appears, type | ||
| ||
| R:\SETUP (if the | |
| to step 7. |
6 | “Install From Disk” window will appear. Insert the installation | |
ROM drive. Type R:\ (if the | ||
| ||
| button. Proceed to step 7. |
| 7 | The installation program will start. To install the printer driver to the default folder, | ||
| click the Next button. To select a different folder, select Browse and type in the new | |||
|
|
| ||
|
|
| path and folder name. Click OK and say YES to create the folder, select the Next | |
|
|
| button to continue. | |
|
|
| On the display, you will see “printer port to be used”. Normally, this is LPT1 and it is | |
| 8 | |||
| selected automatically. | |||
|
|
| ||
|
|
| Ensure that Yes is checked to use the printer as the default printer. | |
|
|
| Finally click the Next button. | |
|
|
| A “Confirm installation” window will be displayed. To continue installation, click the | |
| 9 | |||
| Yes button. | |||
|
|
| ||
|
|
| When the installation is complete, you will be asked whether or not to print a test | |
| 10 | |||
| page. If you wish to do so, click the Yes button. At this time, ensure that paper is | |||
|
|
| ||
|
|
| loaded in the paper tray. | |
|
|
| If the test print completes successfully, click the Finish button. “The installation of the | |
| 11 | |||
| SHARP | |||
|
|
| ||
|
|
| button. | |
|
|
|
|
|
|
|
| If you have any problem with the test print, see TROUBLESHOOTING on |
|
|
|
|
| |
|
|
| page 18 and check the symptoms and solutions. Print the test page again after |
|
|
|
| removing the problem. |
|
|
|
|
|
|
|
|
|
|
|
6
