Adjusting the screen display and speaker volume
Adjusting the speaker volume
1.Without the OSD Menu being displayed, press the ![]() or the
or the ![]() button.
button.
2.Check that [VOLUME] is selected.
If it is not selected, press the ![]() / MODE button and select [VOLUME].
/ MODE button and select [VOLUME].
VOLUME
BRIGHT
SELECT ![]()
3.Adjust by pressing the ![]() button (decrease) or
button (decrease) or ![]() button (increase).
button (increase).
Note:
-On Screen display for adjustment disappears several seconds after the last operation.
Setting display mode
Color tone or brightness can be changed with one command.
STD
Displays an image at the brightness level set in "Adjusting the backlight" (p.16).
OFFICE
Displays an image at a brightness level of at least half the maximum brightness by setting the value of the backlight to "10". (This setting saves power.)
VIVID
Displays an image with dynamic and vivid primary colors.
How to set
Press the ![]() / MODE button when the OSD Menu is not displayed.
/ MODE button when the OSD Menu is not displayed.
Each time the button is pressed the next menu item appears. (STD → OFFICE → VIVID → STD)
On Screen display for adjustment disappears several seconds after the last operation.
Note:
-If [DISPLAY MODE] is set to [VIVID], [WHITE BALANCE] is set to [STD].
Automatic screen adjustment
Options in the ADJUSTMENT Menu can be adjusted automatically (CLOCK, PHASE,
Note:
-When setting up this monitor for the first time or after having changed an aspect of the current system, perform an automatic screen adjustment before use.
Automatic adjustment screen display
To perform an automatic adjustment, first display an image that makes the entire screen very bright. If you are using Windows, you can also use the Adjustment Pattern on the accompanying Utility Disk.
Displaying the Adjustment Pattern (for Windows) This explanation is for Windows 95/98/2000/Me/XP, and assumes that the floppy disk drive is "A drive".
Note:
- If the floppy disk drive of your computer is not "A drive", please read the below substituting the floppy disk drive you are using in place of
"A drive" or "A".
1.Place the Utility Disk (provided) into the computer's A drive.
2.Open [My Computer] and select [3 ½ Floppy (A:)]. If using Windows 3.1, open [File Manager] and choose "A drive".
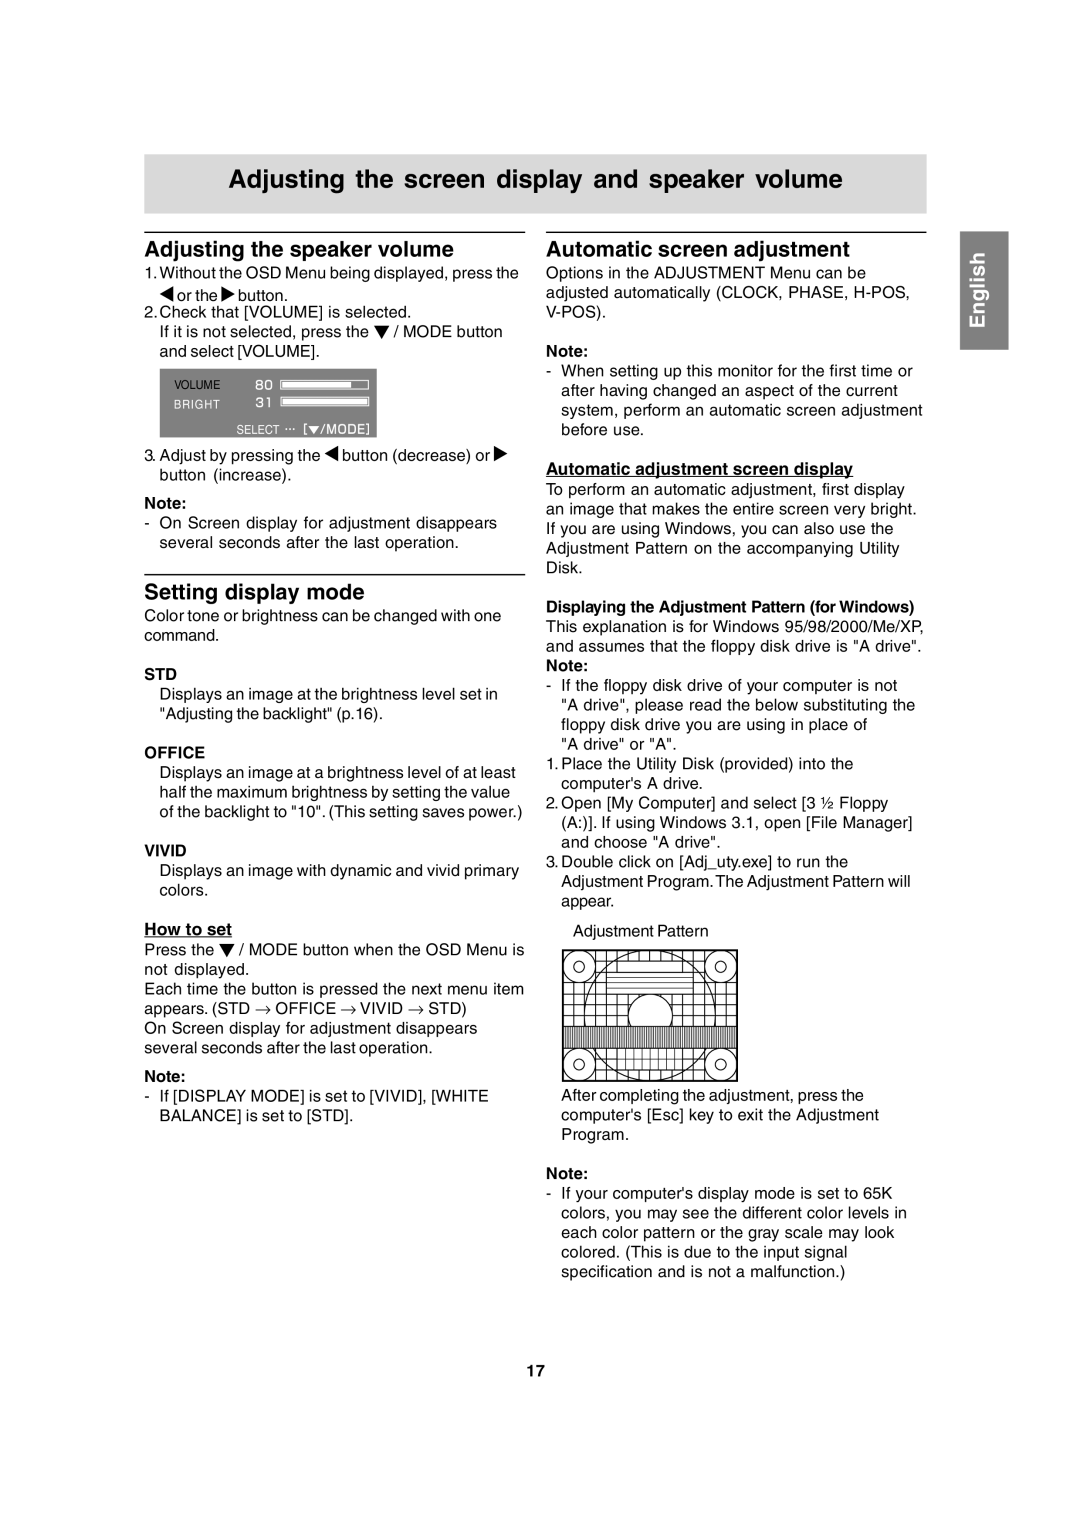
3.Double click on [Adj_uty.exe] to run the Adjustment Program.The Adjustment Pattern will appear.
Adjustment Pattern
After completing the adjustment, press the computer's [Esc] key to exit the Adjustment Program.
Note:
-If your computer's display mode is set to 65K colors, you may see the different color levels in each color pattern or the gray scale may look colored. (This is due to the input signal specification and is not a malfunction.)
English
17