
MD-MT888H specifications
The Sharp MD-MT888H is a remarkable portable MiniDisc player that captures the essence of audio technology from the early 2000s. This innovative device integrates several advanced features and technologies, making it a standout model for audiophiles and casual listeners alike.One of the most notable aspects of the MD-MT888H is its MiniDisc format, which offers a unique blend of digital and analog qualities. The MiniDisc technology provides near-CD audio quality with the versatility of recording and re-recording. Users can create their own playlists and customize their listening experience, an appealing feature that surpasses traditional cassette tapes and CDs.
The MD-MT888H is designed with a sleek and compact form factor, making it easy to transport for on-the-go listening. Weighing around 220 grams, it fits comfortably in a pocket or bag, allowing users to enjoy music wherever they are. The rugged construction ensures that it can withstand the rigors of daily use, appealing to those with active lifestyles.
In terms of sound quality, the Sharp MD-MT888H utilizes high-performance audio technologies. It includes a 20-bit A/D conversion, resulting in clear and rich sound reproduction. The built-in equalizer offers multiple preset modes, enabling users to tailor the audio output to match their personal preferences or the genre of music being played. Additionally, the dynamic range and minimal distortion contribute to a superior listening experience.
Another key feature of the MD-MT888H is its long battery life. Equipped with a rechargeable battery, it provides hours of continuous playback, making it ideal for extended listening sessions. The device also supports various audio formats, including PCM and ATRAC, allowing users flexibility in how they manage their music libraries.
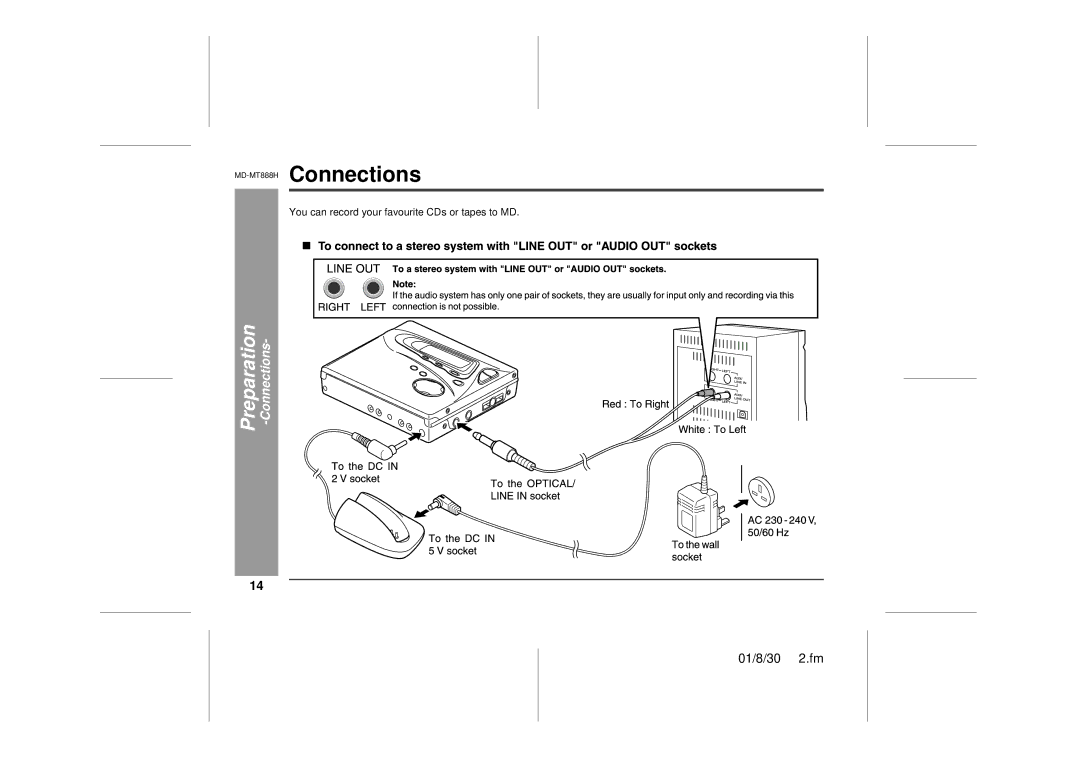
Connectivity is another strong point of this model. It includes line-in and line-out jacks, enabling users to connect the unit to external audio systems or transfer recordings from other devices easily. The included remote control adds convenience, allowing for easy navigation of tracks without needing to physically interact with the player.
Ultimately, the Sharp MD-MT888H stands out for its combination of portability, sound quality, and innovative features. Though it hails from a previous era of audio technology, it offers a compelling listening experience that continues to attract enthusiasts and collectors today. Whether it be for recording live performances or creating custom playlists, the MD-MT888H remains a cherished component of audio history.