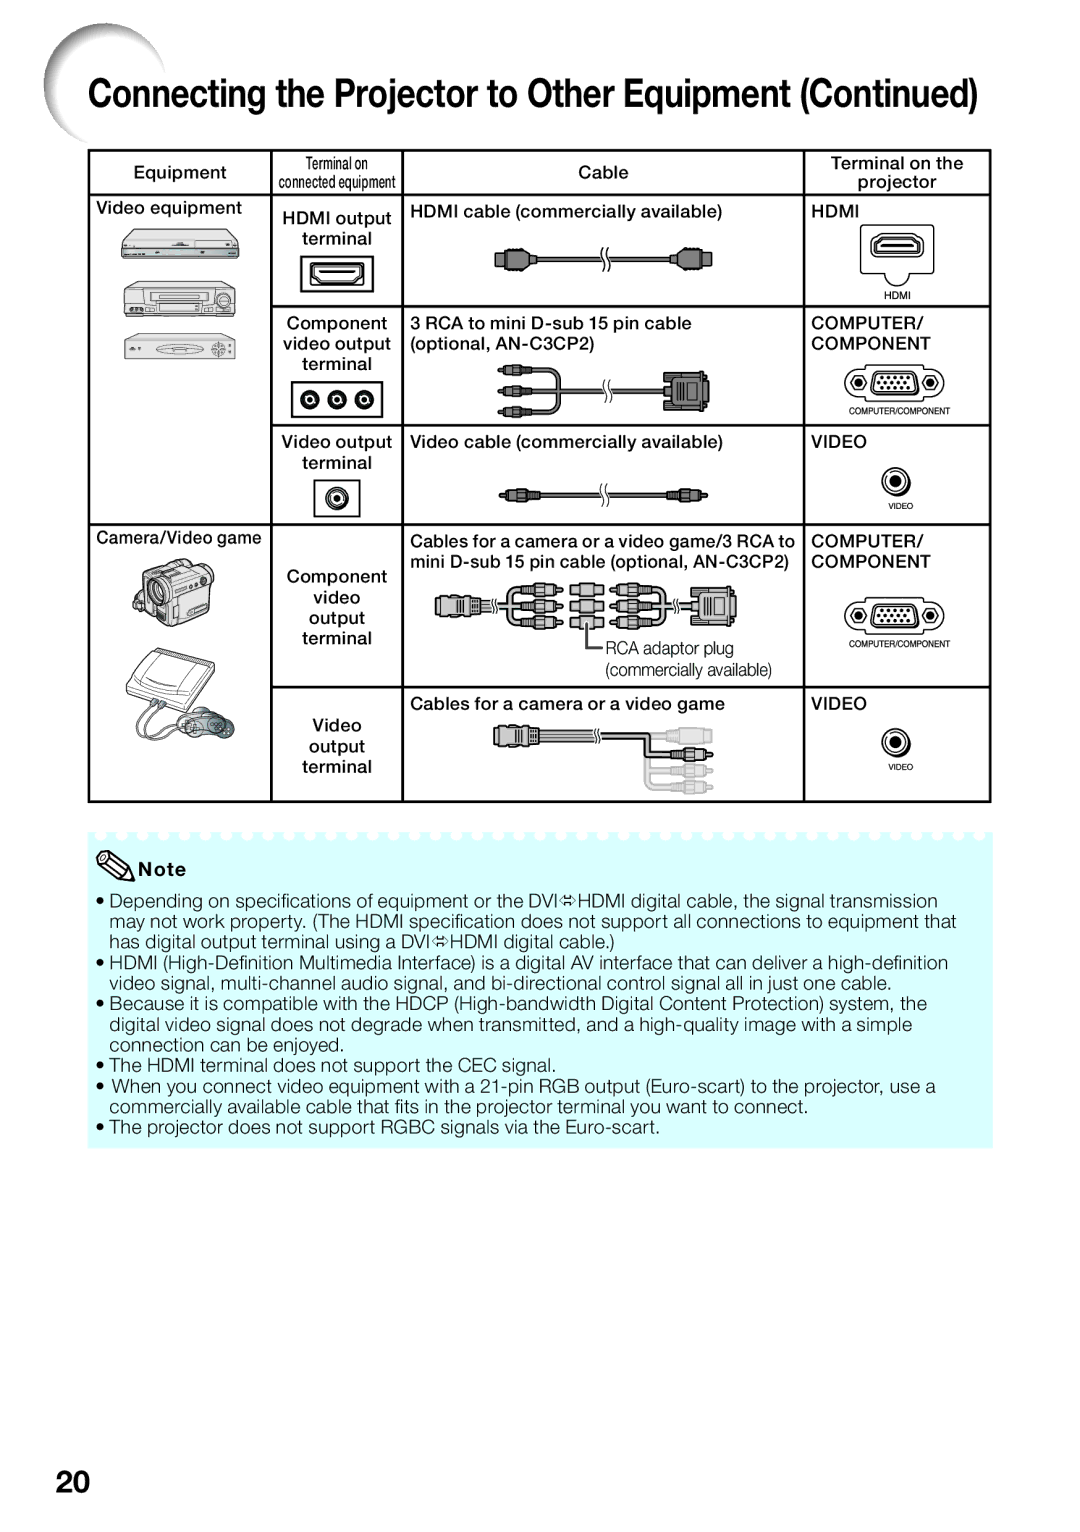
Connecting the Projector to Other Equipment (Continued)
Equipment | Terminal on | Cable | Terminal on the | |
connected equipment | projector | |||
|
| |||
Video equipment | HDMI output | HDMI cable (commercially available) | HDMI | |
| terminal |
|
| |
| Component | 3 RCA to mini | COMPUTER/ | |
| video output | (optional, | COMPONENT | |
| terminal |
|
|
Video output | Video cable (commercially available) | VIDEO |
terminal |
|
|
Camera/Video game | Cables for a camera or a video game/3 RCA to | COMPUTER/ |
Component | mini | COMPONENT |
|
| |
video |
|
|
output |
|
|
terminal | RCA adaptor plug |
|
|
| |
| (commercially available) |
|
Cables for a camera or a video game | VIDEO |
Video
output
terminal
![]() Note
Note
•Depending on specifi cations of equipment or the DVIÙHDMI digital cable, the signal transmission
may not work property. (The HDMI specifi cation does not support all connections to equipment that has digital output terminal using a DVIÙHDMI digital cable.)
•HDMI
•Because it is compatible with the HDCP
•The HDMI terminal does not support the CEC signal.
•When you connect video equipment with a
•The projector does not support RGBC signals via the
20