Signal Adjustment (“SIG-ADJ” Menu)
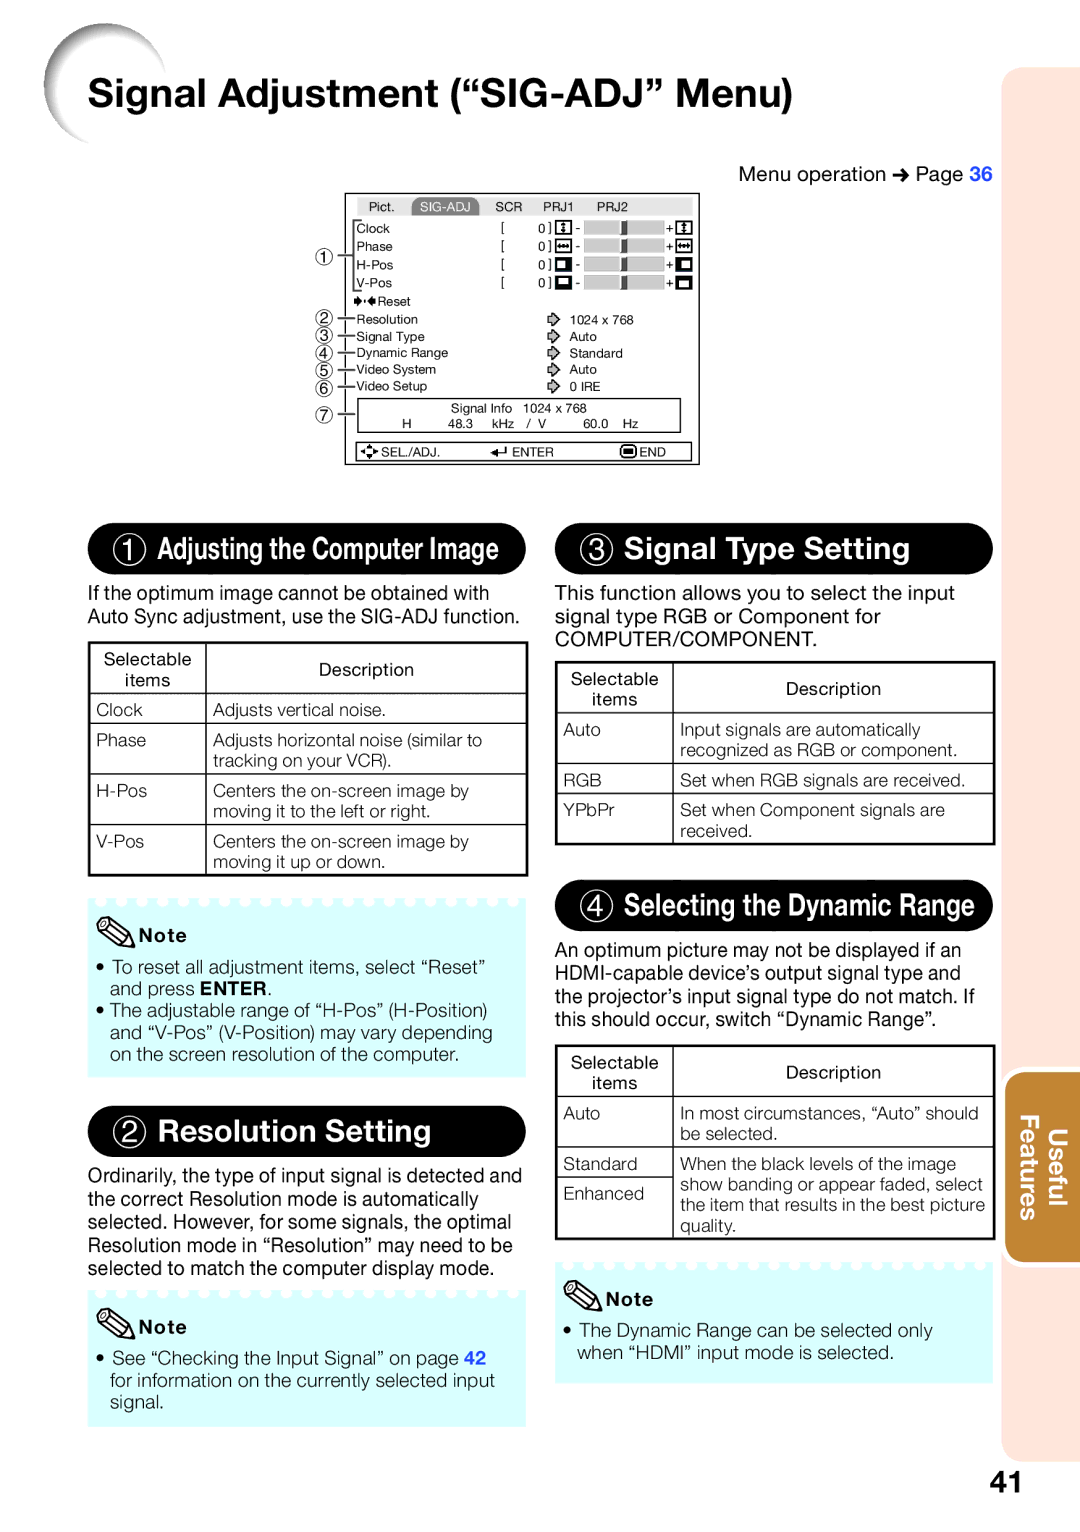
Menu operation n Page 36
|
| Pict. |
| SCR PRJ1 PRJ2 | ||||
|
| Clock |
| 0 |
|
|
|
|
|
|
|
|
|
|
| ||
1 |
| Phase |
| 0 |
|
|
|
|
|
|
|
|
|
| |||
|
| 0 |
|
|
|
| ||
|
|
| 0 |
|
|
|
| |
|
|
|
|
|
|
| ||
|
| Reset |
|
|
|
|
|
|
2 |
| Resolution |
| 1024 x 768 | ||||
|
| |||||||
3 |
| Signal Type | Auto | |||||
| ||||||||
4 |
| Dynamic Range | Standard | |||||
| ||||||||
5 |
| Video System | Auto | |||||
| ||||||||
6 |
| Video Setup | 0 IRE | |||||
| ||||||||
7Signal Info 1024 x 768
H | 48.3 kHz / V | 60.0 Hz |
|
|
|
|
|
SEL./ADJ. | ENTER | END |
|
1Adjusting the Computer Image
If the optimum image cannot be obtained with Auto Sync adjustment, use the
Selectable | Description | |
items | ||
| ||
Clock | Adjusts vertical noise. | |
|
| |
Phase | Adjusts horizontal noise (similar to | |
| tracking on your VCR). | |
Centers the | ||
| moving it to the left or right. | |
Centers the | ||
| moving it up or down. |
![]() Note
Note
•To reset all adjustment items, select “Reset” and press ENTER.
•The adjustable range of
2 Resolution Setting
Ordinarily, the type of input signal is detected and the correct Resolution mode is automatically selected. However, for some signals, the optimal Resolution mode in “Resolution” may need to be selected to match the computer display mode.
![]() Note
Note
•See “Checking the Input Signal” on page 42 for information on the currently selected input signal.
3 Signal Type Setting
This function allows you to select the input signal type RGB or Component for
COMPUTER/COMPONENT.
Selectable | Description | |
items | ||
| ||
Auto | Input signals are automatically | |
| recognized as RGB or component. | |
|
| |
RGB | Set when RGB signals are received. | |
YPbPr | Set when Component signals are | |
| received. |
4 Selecting the Dynamic Range
An optimum picture may not be displayed if an
Selectable | Description | |
items | ||
| ||
|
| |
Auto | In most circumstances, “Auto” should | |
| be selected. | |
Standard | When the black levels of the image | |
| show banding or appear faded, select | |
Enhanced | ||
the item that results in the best picture | ||
| ||
| quality. |
![]() Note
Note
•The Dynamic Range can be selected only when “HDMI” input mode is selected.
Features | Useful |
41