Setting up the Projector Network Environment
1.Connecting the Projector to a Computer
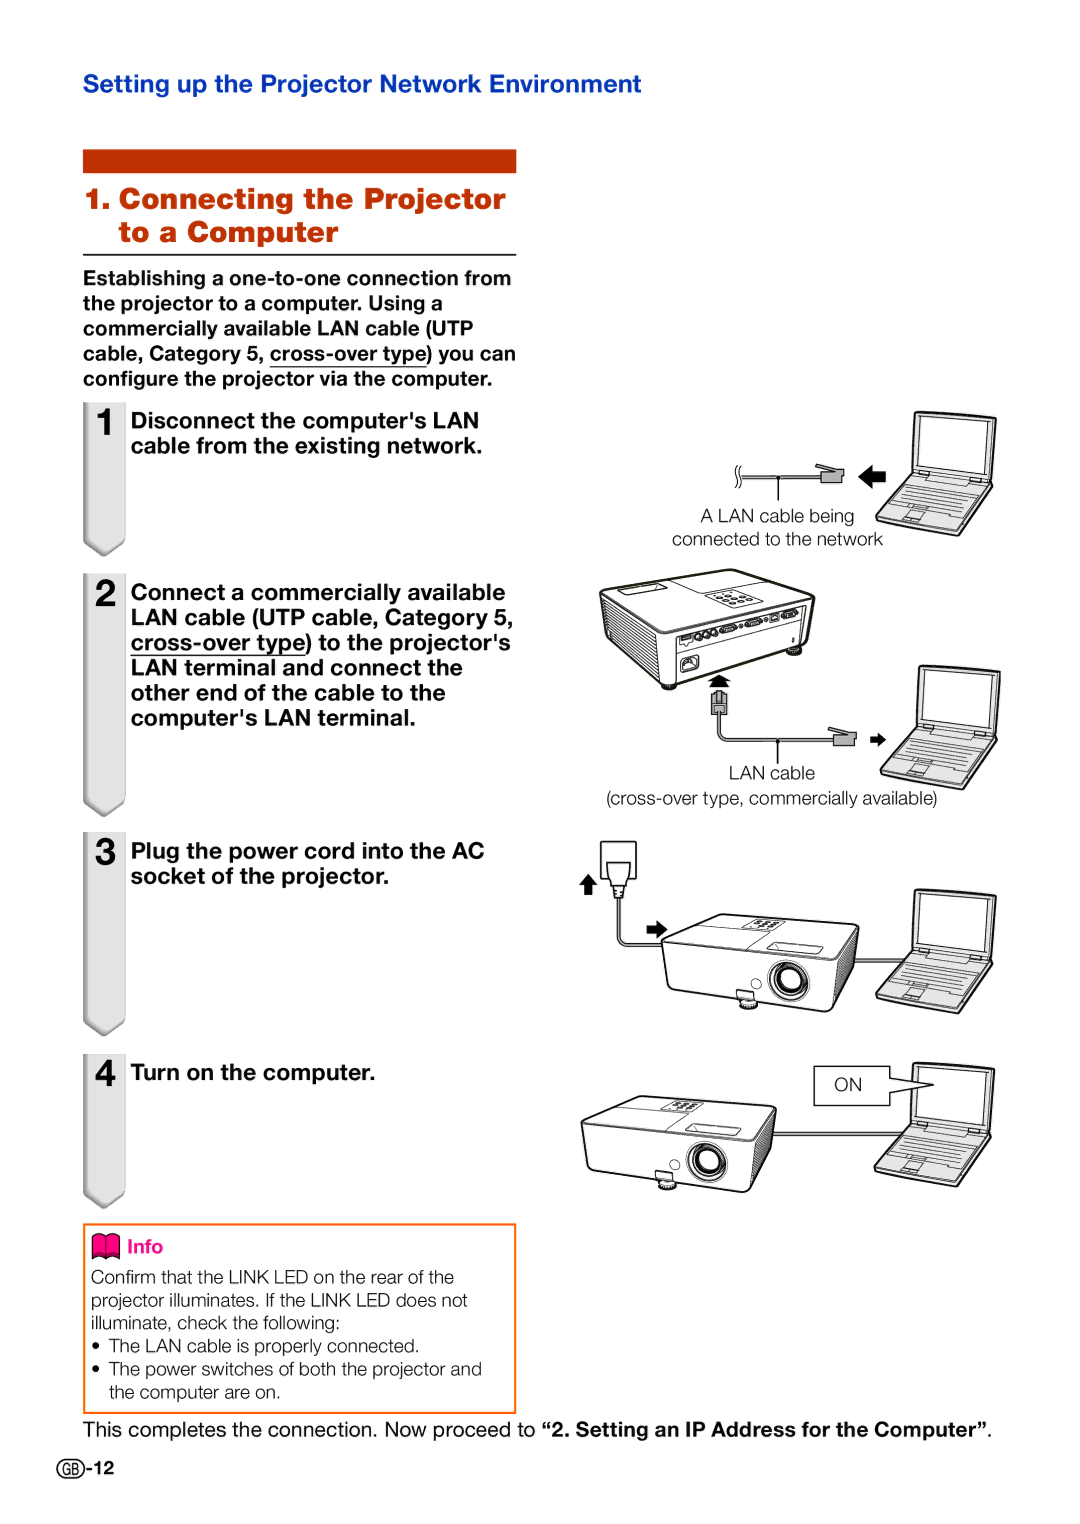
Establishing a
1 Disconnect the computer's LAN cable from the existing network.
A LAN cable being
connected to the network
2 Connect a commercially available LAN cable (UTP cable, Category 5,
3 Plug the power cord into the AC socket of the projector.
4 Turn on the computer.
 Info
Info
Confirm that the LINK LED on the rear of the projector illuminates. If the LINK LED does not illuminate, check the following:
•The LAN cable is properly connected.
•The power switches of both the projector and the computer are on.
LAN cable
ON
This completes the connection. Now proceed to “2. Setting an IP Address for the Computer”.
![]() -12
-12