TIPS
•The length of the signal cables or surrounding environment may affect the image quality.
•The screen may not display properly when using terminals other than PC
•When connecting monitors in a daisy chain set AUTO INPUT CHANGE to OFF.
•Video output is disabled in the following cases: When the power is turned off
When the monitor is in input signal waiting mode
10. LAN terminal
•You can control the monitor from a PC on a network by connecting a commercially available LAN cable between this terminal and a network.
11. External speaker terminals
•Be sure to use external speakers with an impedance of 6 Ω or greater and a rated input of at least 10 W.
1 | 2 | 3 |
| Approx. |
|
|
| |
| (10 cm) |
|
1.Attach a speaker cable core (included with the
2.While pushing the tab, insert the tip of the cable.
3.Release the tab.
TIPS
•Be sure to connect the + and - terminals and the left and right speakers properly.
•Avoid short circuiting the + and - terminals.
12.Audio1 input terminals
13.Audio2 input terminals
•Set the audio input terminal to be used in each input mode in AUDIO SELECT on the OPTION menu.
14. PC RGB input terminals
•Set BNC of INPUT SELECT on the OPTION menu to PC RGB when using the PC RGB input terminals.
•Select the audio input terminal to be used in PC RGB of AUDIO SELECT on the OPTION menu.
15. AV component input terminals
•Set BNC of INPUT SELECT on the OPTION menu to AV COMPONENT when using the AV component input terminals.
•Select the audio input terminal to be used in AV COMPONENT of AUDIO SELECT on the OPTION menu.
•Cannot be used when
16. AV video input terminal
•Select the audio input terminal to be used in AV VIDEO of AUDIO SELECT on the OPTION menu.
•Cannot be used when
17. AV
•Select the audio input terminal to be used in AV
Connecting Peripheral Equipment
Multiple monitor connection
The monitors can be aligned and used as a large screen.
[Example]
Remote control sensor box
(Supplied with the
Second monitor | First monitor |
Secondary | Primary |
(Expansion unit) | (Main unit) |
ID No.: 2 | ID No.: 1 |
|
|
Third monitor | Fourth monitor |
Secondary | Secondary |
(Expansion unit) | (Expansion unit) |
ID No.: 3 | ID No.: 4 |
|
|
TIPS
•Connect the
•Always install the remote control sensor box on the primary monitor.
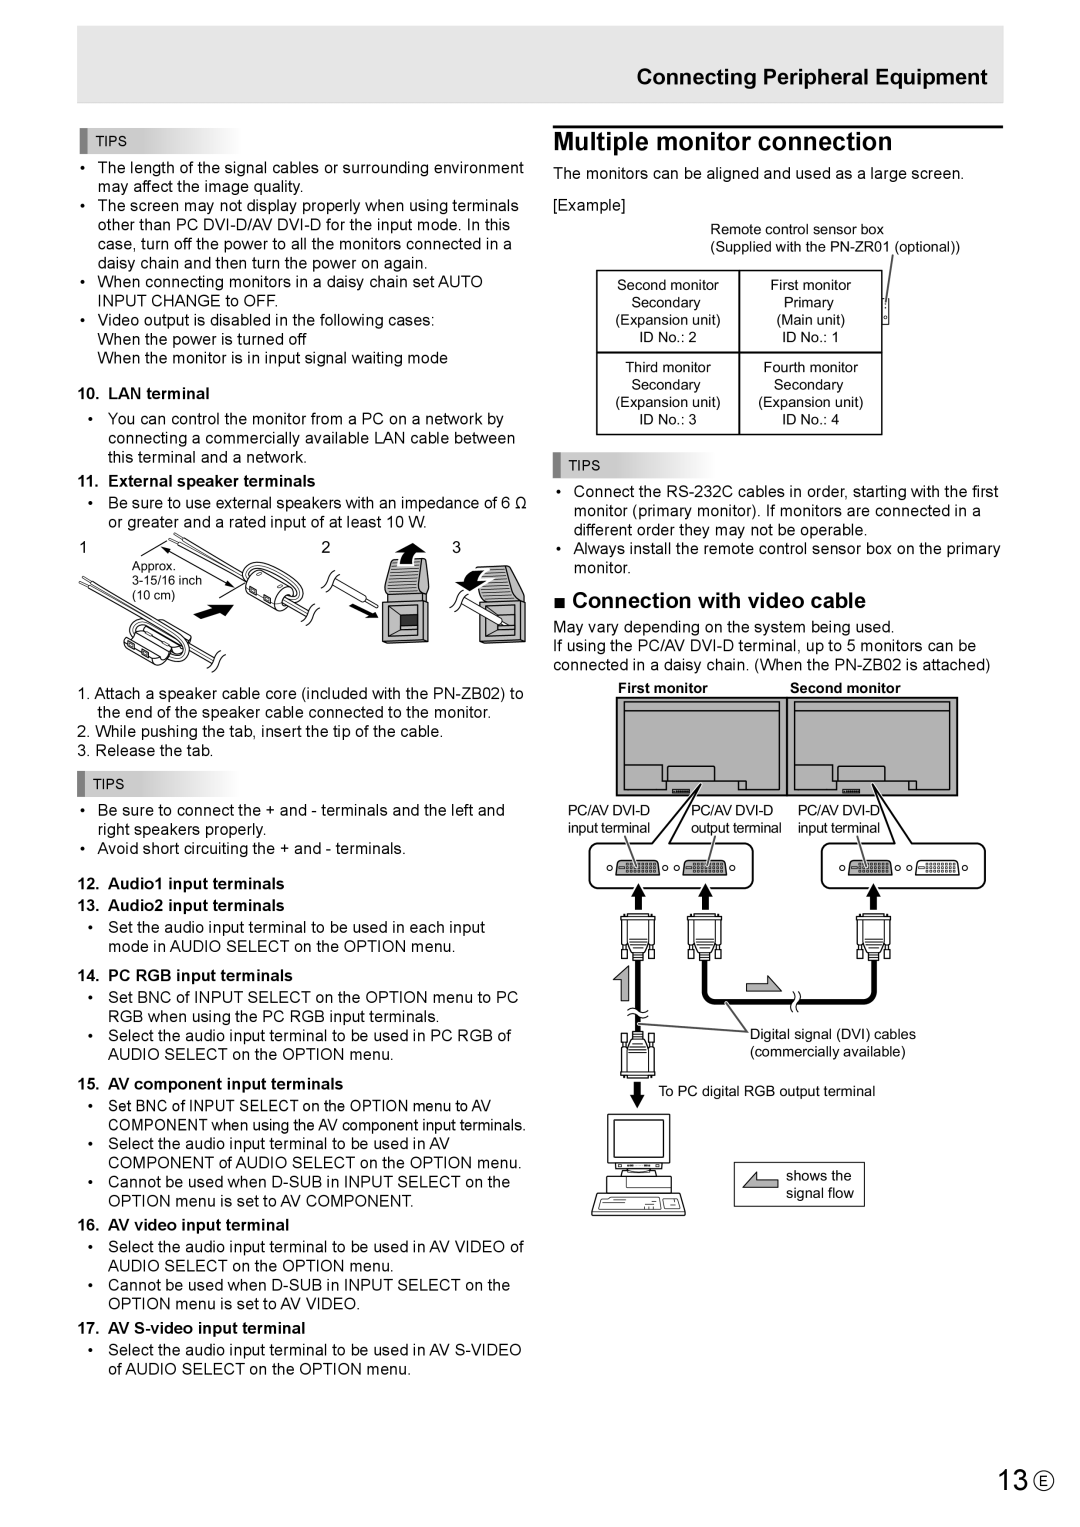
■ Connection with video cable
May vary depending on the system being used.
If using the PC/AV
First monitor | Second monitor | ||||||||
|
|
|
|
|
|
|
|
|
|
|
|
|
|
|
|
|
|
|
|
|
|
|
|
|
|
|
|
|
|
|
|
|
|
|
|
|
|
|
|
PC/AV | PC/AV | PC/AV |
input terminal | output terminal | input terminal |
![]() Digital signal (DVI) cables (commercially available)
Digital signal (DVI) cables (commercially available)
![]() To PC digital RGB output terminal
To PC digital RGB output terminal
shows the signal flow