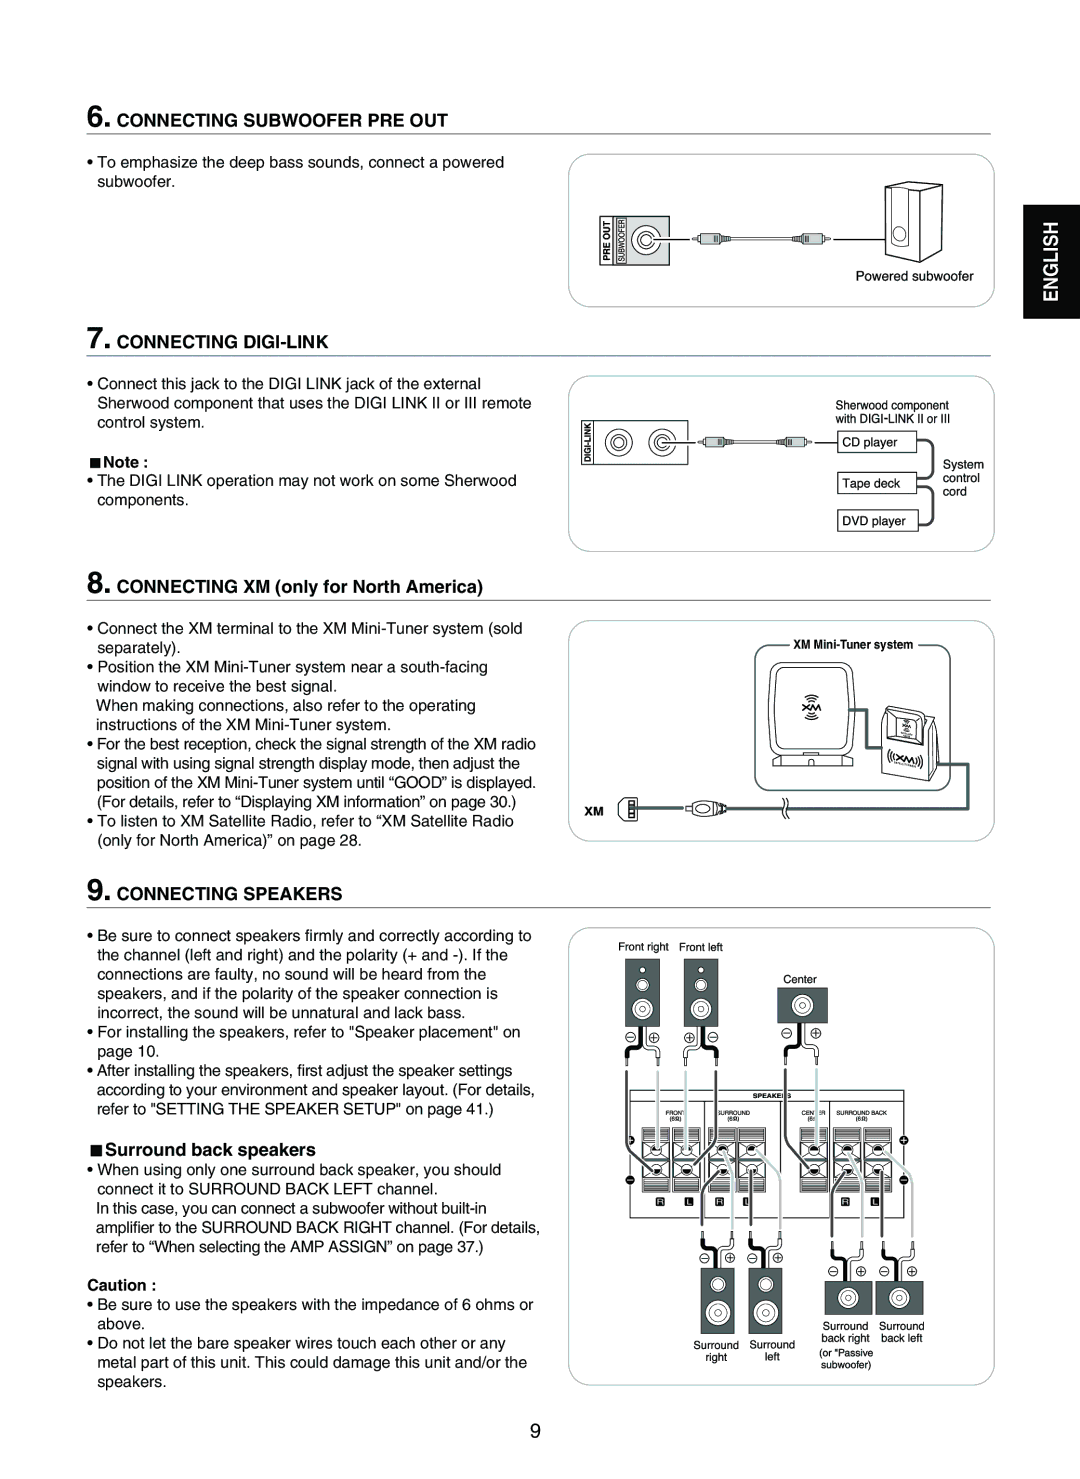
6. CONNECTING SUBWOOFER PRE OUT
•To emphasize the deep bass sounds, connect a powered subwoofer.
ENGLISH
7. CONNECTING DIGI-LINK
•Connect this jack to the DIGI LINK jack of the external Sherwood component that uses the DIGI LINK II or III remote control system.
Note :
•The DIGI LINK operation may not work on some Sherwood components.
8. CONNECTING XM (only for North America)
•Connect the XM terminal to the XM
separately). | XM |
•Position the XM
When making connections, also refer to the operating instructions of the XM
•For the best reception, check the signal strength of the XM radio signal with using signal strength display mode, then adjust the position of the XM
•To listen to XM Satellite Radio, refer to “XM Satellite Radio (only for North America)” on page 28.
9. CONNECTING SPEAKERS
•Be sure to connect speakers firmly and correctly according to the channel (left and right) and the polarity (+ and
•For installing the speakers, refer to "Speaker placement" on page 10.
•After installing the speakers, first adjust the speaker settings according to your environment and speaker layout. (For details, refer to "SETTING THE SPEAKER SETUP" on page 41.)
Surround back speakers
•When using only one surround back speaker, you should connect it to SURROUND BACK LEFT channel.
In this case, you can connect a subwoofer without
Caution :
•Be sure to use the speakers with the impedance of 6 ohms or above.
•Do not let the bare speaker wires touch each other or any metal part of this unit. This could damage this unit and/or the speakers.
R | L | R | L | R | L |
9
