INSERTING THE BOBBIN
To insert the bobbin, first remove the bobbin cover plate. Place the bobbin into the bobbin case.
Pull the thread tail to check that the bobbin turns in a
THREADING THE UPPER THREAD
Threading the upper thread is a simple process, but it must be done correctly in order to achieve the correct sewing results.
Turn the Power On/Off & Speed Control Switch to the “off” position before threading the machine.
Start by raising the needle to its highest position by turning the handwheel toward you
Raise the presser foot lifter, which will release the tension of the machine.
Note: This step is very important. If the presser foot is not raised so that the tension is released, the result will be a large thread jam on the underside of the fabric when you start to sew.
Turn the handwheel toward you until the needle and
![]() presser foot lifter
presser foot lifter
handwheel
OFF L H
15
THREADING THE UPPER THREAD
Place the spool base, thread and spool cap onto the spool pin.
If the thread spool is smaller in size, the spool pin can remain in a horizontal position. Note: If the thread spool has a slit on the end of it, put that end toward the right so that the thread doesn't get caught on it while sewing.
If the thread spool is larger in size, and therefore does not feed properly when it is placed onto the spool pin horizontally, move the spool pin to the vertical position. If the vertical position is used, loosen the spool cap slightly or completely remove it, so that it doesn't prevent the spool from turning while sewing.
or
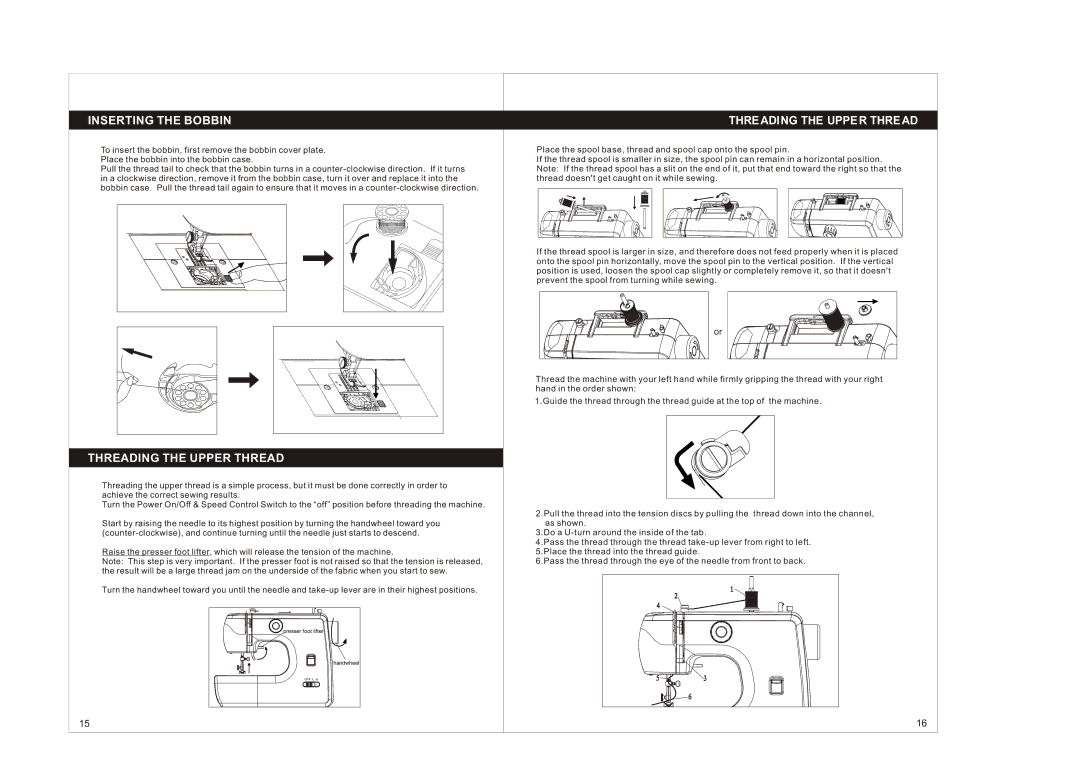
Thread the machine with your left hand while firmly gripping the thread with your right hand in the order shown:
1.Guide the thread through the thread guide at the top of the machine.
2.Pull the thread into the tension discs by pulling the thread down into the channel, as shown.
3.Do a
4.Pass the thread through the thread
6.Pass the thread through the eye of the needle from front to back.
1
2 4 ![]()
![]()
![]()
![]()
5![]()
![]()
![]()
![]() 3
3
6
16