Assembly and adjustments
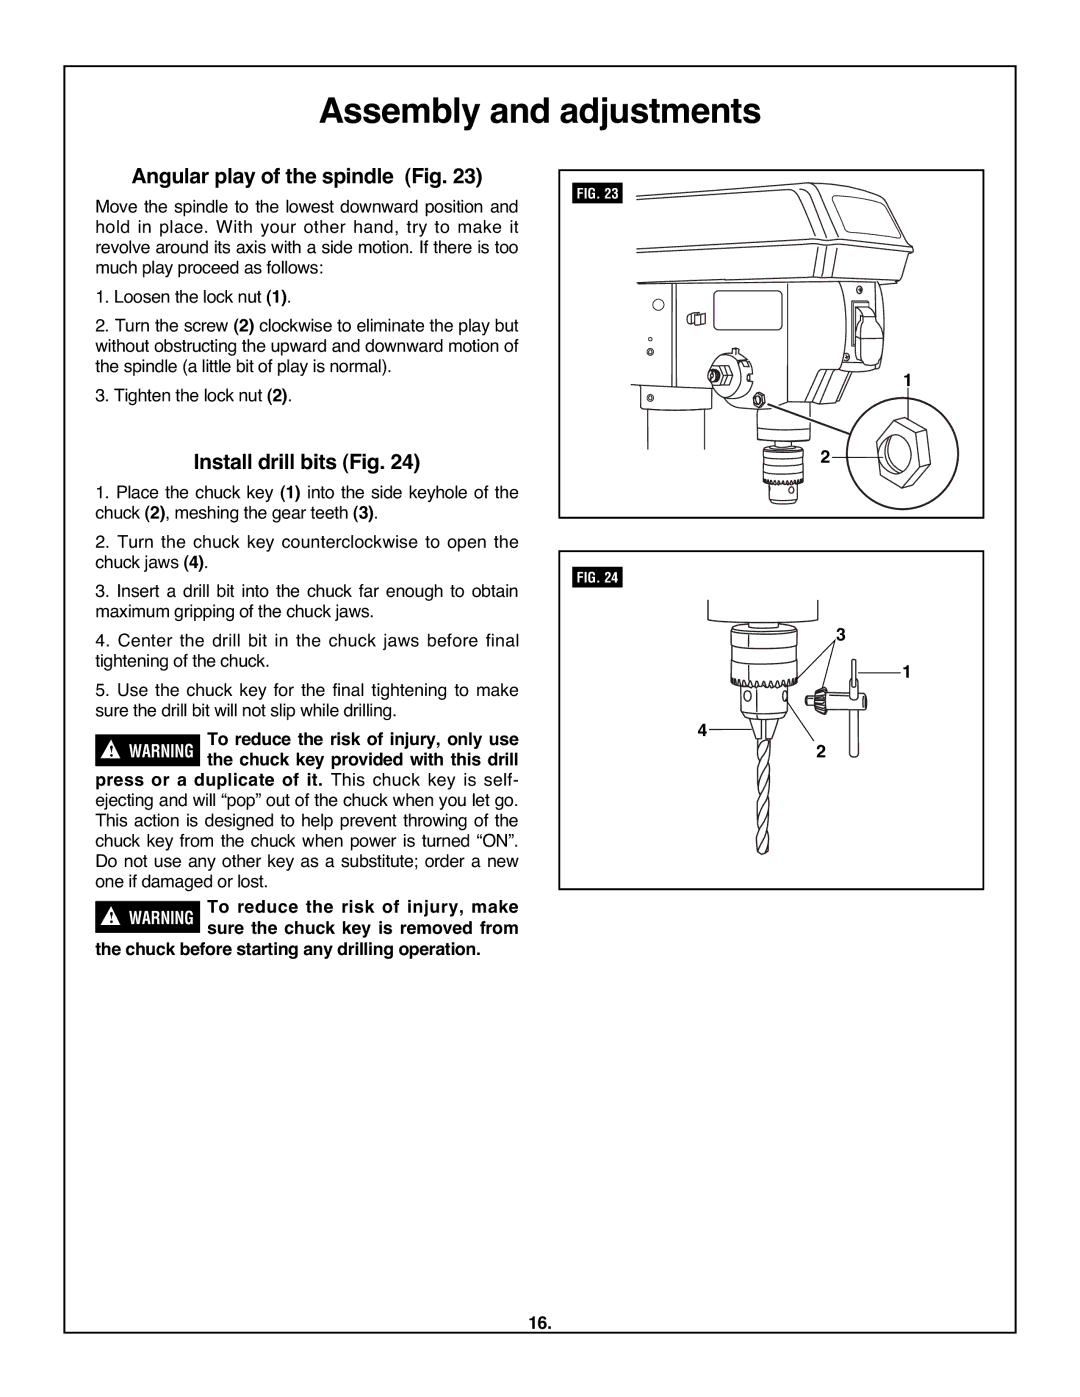
Angular play of the spindle (Fig. 23)
Move the spindle to the lowest downward position and hold in place. With your other hand, try to make it revolve around its axis with a side motion. If there is too much play proceed as follows:
1. Loosen the lock nut (1).
2. Turn the screw (2) clockwise to eliminate the play but without obstructing the upward and downward motion of the spindle (a little bit of play is normal).
3. Tighten the lock nut (2).
| Install drill bits (Fig. 24) | |
1. Place the chuck key (1) into the side keyhole of the | ||
chuck (2), meshing the gear teeth (3). | ||
2. Turn the chuck key counterclockwise to open the | ||
chuck jaws (4). | ||
3. Insert a drill bit into the chuck far enough to obtain | ||
maximum gripping of the chuck jaws. | ||
4. Center the drill bit in the chuck jaws before final | ||
tightening of the chuck. | ||
5. Use the chuck key for the final tightening to make | ||
sure the drill bit will not slip while drilling. | ||
! |
| To reduce the risk of injury, only use |
WARNING | the chuck key provided with this drill | |
press or a | duplicate of it. This chuck key is self- | |
ejecting and will “pop” out of the chuck when you let go. | ||
This action is designed to help prevent throwing of the | ||
chuck key from the chuck when power is turned “ON”. | ||
Do not use any other key as a substitute; order a new | ||
one if damaged or lost. | ||
|
| To reduce the risk of injury, make |
! | WARNING | |
| sure the chuck key is removed from | |
the chuck before starting any drilling operation.
FIG. 23
 1
1 ![]() 2
2
FIG. 24
| 3 | 1 |
4 |
| |
2 |
| |
|
|
16.