Installation
|
| FIG. 13 | |
| Mounting Applications |
| |
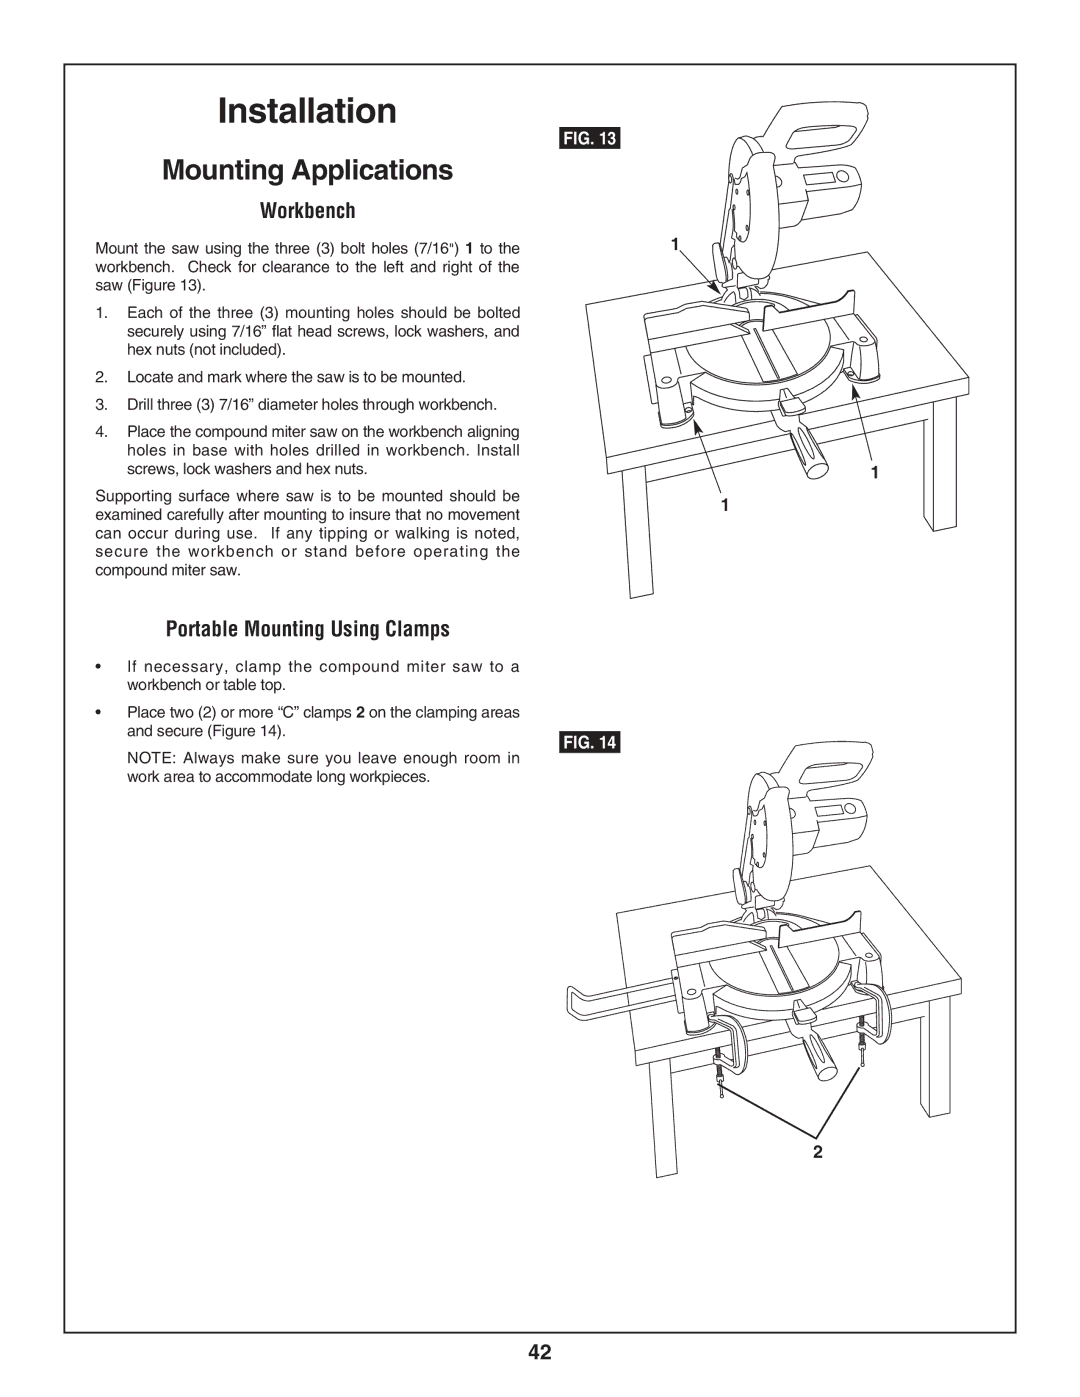
| Workbench |
| |
Mount the saw using the three (3) bolt holes (7/16") 1 to the | 1 | ||
workbench. Check for clearance to the left and right of the |
| ||
saw (Figure 13). |
| ||
1. | Each of the three (3) mounting holes should be bolted |
| |
| securely using 7/16” flat head screws, lock washers, and |
| |
| hex nuts (not included). |
| |
2. | Locate and mark where the saw is to be mounted. |
| |
3. | Drill three (3) 7/16” diameter holes through workbench. |
| |
4. | Place the compound miter saw on the workbench aligning |
| |
| holes in base with holes drilled in workbench. Install |
| |
| screws, lock washers and hex nuts. | 1 | |
Supporting surface where saw is to be mounted should be | 1 | ||
examined carefully after mounting to insure that no movement | |||
| |||
can occur during use. If any tipping or walking is noted, |
| ||
secure the workbench or stand before operating the |
| ||
compound miter saw. |
| ||
| Portable Mounting Using Clamps |
| |
• | If necessary, clamp the compound miter saw to a |
| |
| workbench or table top. |
| |
• | Place two (2) or more “C” clamps 2 on the clamping areas |
| |
| and secure (Figure 14). | FIG. 14 | |
|
| ||
NOTE: Always make sure you leave enough room in work area to accommodate long workpieces.
2
42