Troubleshooting, Adjustments, & Service
Lift Adjustment
In the fully raised position the attachment should be
NOTE: Always adjust the lift height before and after adjusting the downward pressure.
LIFT HEIGHT ADJUSTMENT
1.Fully raise the attachment lift. The snowthrower should be approximately
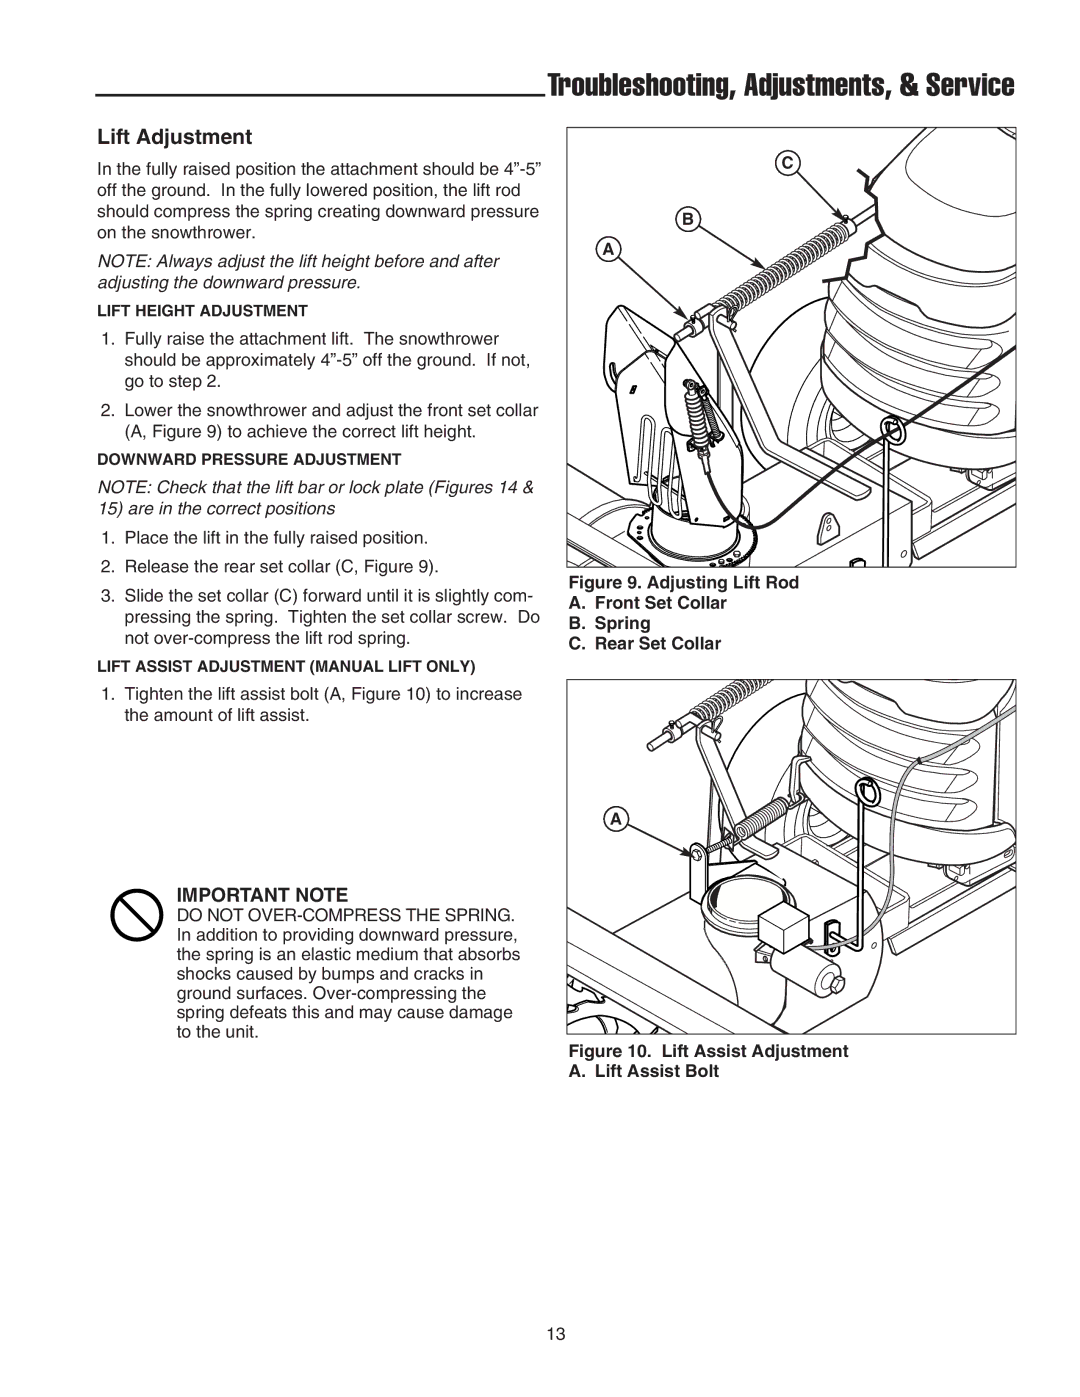
2.Lower the snowthrower and adjust the front set collar (A, Figure 9) to achieve the correct lift height.
DOWNWARD PRESSURE ADJUSTMENT
NOTE: Check that the lift bar or lock plate (Figures 14 & 15) are in the correct positions
1.Place the lift in the fully raised position.
2.Release the rear set collar (C, Figure 9).
3.Slide the set collar (C) forward until it is slightly com- pressing the spring. Tighten the set collar screw. Do not
LIFT ASSIST ADJUSTMENT (MANUAL LIFT ONLY)
C |
B |
A |
Figure 9. Adjusting Lift Rod
A.Front Set Collar
B.Spring
C.Rear Set Collar
1.Tighten the lift assist bolt (A, Figure 10) to increase the amount of lift assist.
IMPORTANT NOTE
DO NOT
A |
Figure 10. Lift Assist Adjustment
A. Lift Assist Bolt
13