Mulching Operation |
|
| Installing the Discharge |
| |||
For best mulching results, cut up to a maximum of 1/3 | Deflector |
|
| ||||
of grass blade length and recycle ONLY when grass is |
|
| |||||
dry. |
|
|
|
| ! | WARNING | ! |
1. Set all wheels in the highest cutting position (Notch |
| ||||||
7). Refer to the Section entitled “Cutting Height | DO NOT attempt any maintenance, adjustments or | ||||||
Adjustment”. |
|
|
| service with engine and blade running. STOP engine | |||
2. Move the engine speed control to the fast (Rabbit) | and blade. Disconnect spark plug wire and secure | ||||||
position. |
|
|
| away from spark plug. Engine and components are | |||
3. Move the ground speed control to the slowest |
| HOT. Avoid serious burns, allow sufficient time for all | |||||
speed setting. |
|
|
| components to cool. |
| ||
4. Proceed mowing slowly. If the grass is very dense, | 1. Remove the mulching cover. Refer to the Section | ||||||
lower each rear wheel latch one notch lower than | |||||||
the front wheel latches to improve mulching perfor- | 2. | entitled “Removing the Mulching Cover”. |
| ||||
mance. |
|
|
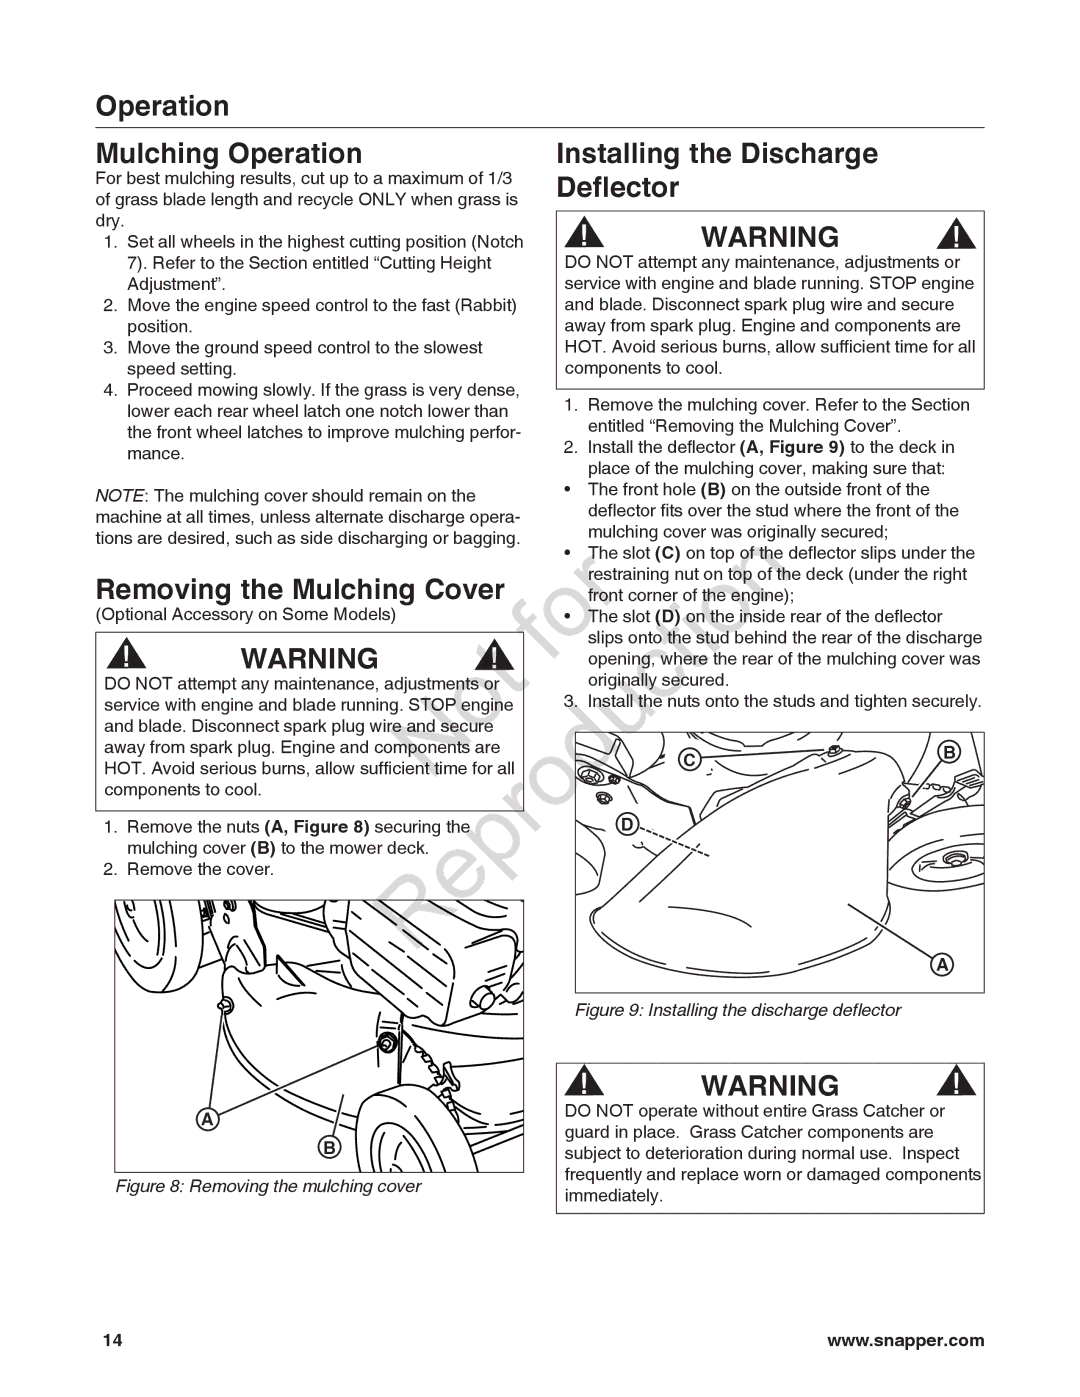
| Install the deflector (A, Figure 9) to the deck in | |||
|
|
|
|
| place of the mulching cover, making sure that: | ||
NOTE: The mulching cover should remain on the |
| • The front hole (B) on the outside front of the |
| ||||
machine at all times, unless alternate discharge opera- |
| deflector fits over the stud where the front of the | |||||
tions are desired, such as side discharging or bagging. |
| mulching cover was originally secured; |
| ||||
|
|
|
| • The slot (C) on top of the deflector slips under the | |||
Removing the Mulching Cover |
| est aining nut on top of the deck (under the right | |||||
• | ont corner | f the e gi e); |
| ||||
(Optional Accessory on Some Models) |
| The slot (D) n the inside rear of the deflector | |||||
! | WARNING |
|
| slips on o he s ud behind the rear of the discharge | |||
! foropening, where the rear of the mulching cover was | |||||||
DO NOT attempt any maintenance, adjustmen s |
| 3. | originally se ured. |
| |||
service with engine and blade running. STOP engine | Install the nuts onto the studs and tighten securely. | ||||||
and blade. Disconnect spark plug wire and secure |
|
|
|
| |||
away from spark plug. Engine and components are |
|
| C | B | |||
HOT. Avoid serious burns, allow sufficient time for all |
|
| |||||
components to cool. |
|
|
|
|
|
| |
1. Remove the nuts (A, Figure 8) securing the |
|
| D |
|
| ||
mulching cover (B) to the mower deck. |
|
|
|
|
| ||
2. Remove the cover. | Reproduction |
| |||||
|
| A | |||||
|
|
|
| Figure 9: Installing the discharge deflector |
| ||
| ! | WARNING | ! |
A | DO NOT operate without entire Grass Catcher or |
| |
guard in place. Grass Catcher components are |
| ||
B |
| ||
subject to deterioration during normal use. Inspect | |||
Figure 8: Removing the mulching cover | frequently and replace worn or damaged components | ||
immediately. |
|
| |
|
|
| |
14 | www.snapper.com |