Maintenance
2. Remove the driven disc spring (A, Figure 26) from |
| |
A | ||
the driven disc assembly (B). Also remove the | ||
pin and washer (C) from the transfer rod (D), and | B | |
remove the end of the transfer rod from the hole in | ||
the driven disc assembly. |
|
B |
A |
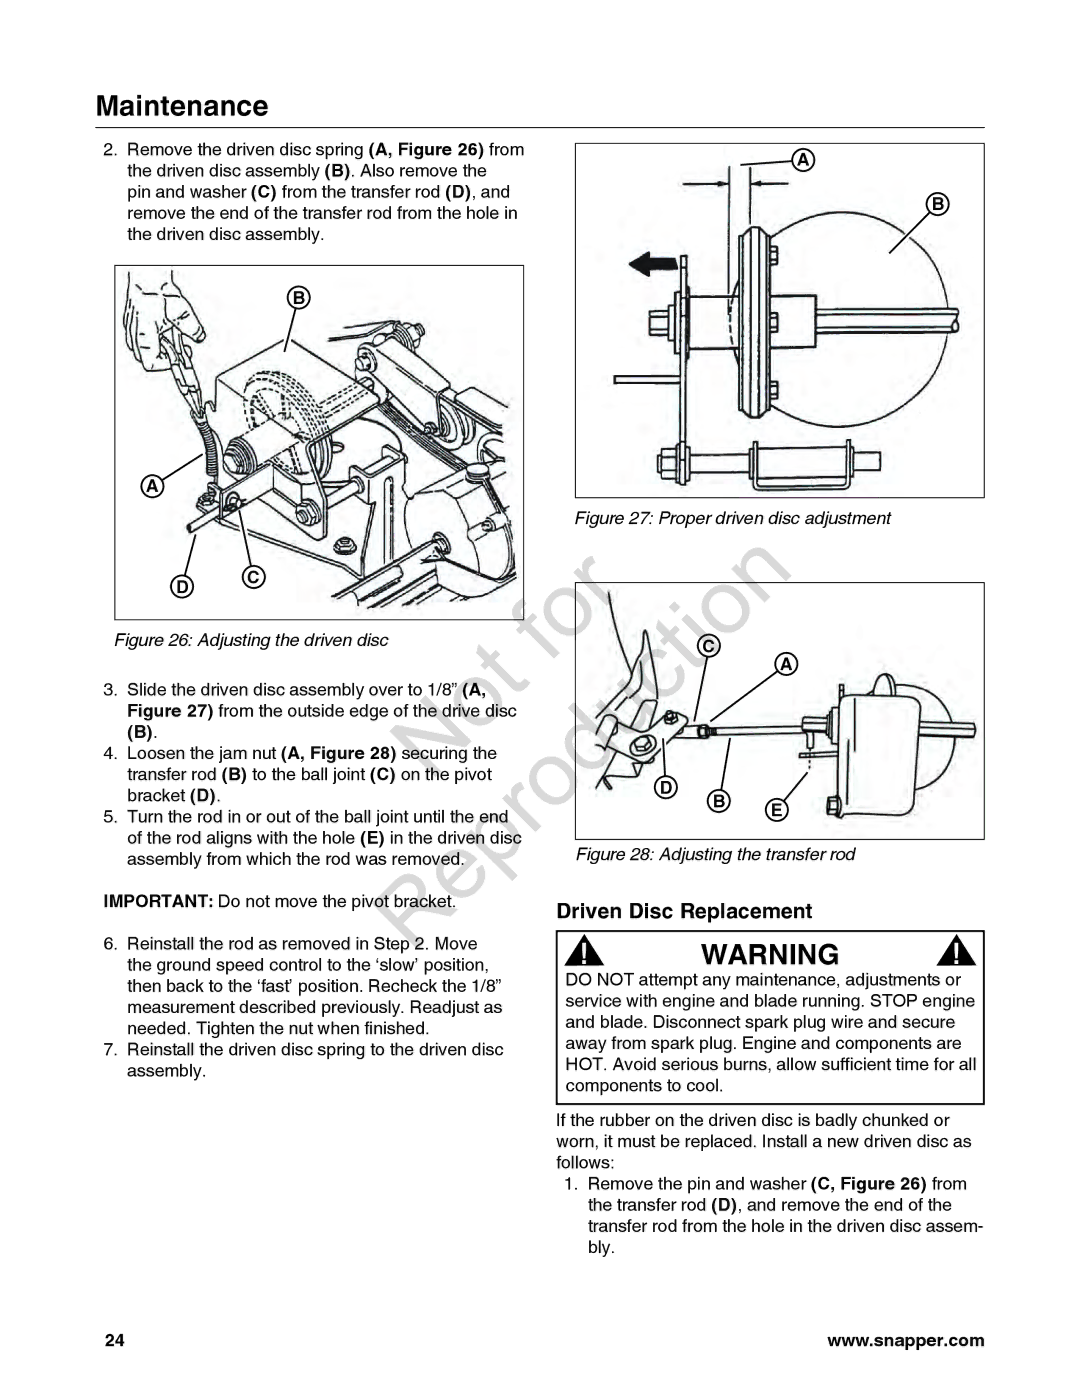
Figure 27: Proper driven disc adjustment
| D | C | Reproduction |
|
| ||||
|
|
|
|
|
|
|
| ||
|
|
|
|
|
|
|
|
| |
|
|
|
|
|
|
|
| ||
Figure 26: Adjusting the driven disc |
|
|
| C | A |
| |||
3. Slide the driven disc assembly over to 1/8” (A, |
|
|
|
|
| ||||
|
|
|
|
|
| ||||
| Figure 27) from the outside edge of the drive disc |
|
|
|
|
|
| ||
| (B). |
|
|
|
|
|
|
|
|
4. Loosen the jam nut (A, Figure 28) securing the |
|
|
|
|
|
| |||
| transfer rod (B) to the ball joint (C) the pivot |
|
| D | B |
|
| ||
| bracket (D). |
|
|
|
| E |
| ||
5. Turn the rod in or out of the ball joint until the end |
|
|
|
|
| ||||
| of the rod aligns with the hole (E) in the driven disc |
|
|
|
|
|
| ||
|
|
| Figure 28: Adjusting the transfer rod |
| |||||
| assembly from which the rod was r mov d. |
|
|
| |||||
IMPORTANT: Do not move the pivot brack . | Driven Disc Replacement |
| |||||||
6. Reinstall the rod as removed in Step 2. Move |
| ! | WARNING | ! | |||||
| the ground speed control to the ‘slow’ position, |
| |||||||
| then back to the ‘fast’ position. Recheck the 1/8” |
| DO NOT attempt any maintenance, adjustments or | ||||||
| measurement described previously. Readjust as |
| service with engine and blade running. STOP engine | ||||||
| needed. Tighten the nut when finished. |
| and blade. Disconnect spark plug wire and secure | ||||||
7. Reinstall the driven disc spring to the driven disc |
| away from spark plug. Engine and components are | |||||||
| assembly. |
|
|
| HOT. Avoid serious burns, allow sufficient time for all | ||||
|
|
|
|
| components to cool. |
|
| ||
|
|
|
| If the rubber on the driven disc is badly chunked or |
| ||||
|
|
|
| worn, it must be replaced. Install a new driven disc as | |||||
|
|
|
| follows: |
|
|
| ||
|
|
|
|
| 1. Remove the pin and washer (C, Figure 26) from | ||||
|
|
|
|
|
| the transfer rod (D), and remove the end of the |
| ||
|
|
|
|
|
| transfer rod from the hole in the driven disc assem- | |||
|
|
|
|
|
| bly. |
|
|
|
24 | www.snapper.com |