Operation
Installing the Grass Bag |
| Emptying the Grass Bag | ||
(Optional Accessory on Some Models) |
| 1. | Grasp the bag connector and bag handle. Lift up | |
|
|
|
| on the bag handle, removing it from the mower |
! | WARNING | ! |
| |
| handle. Then lift up on the bag connector, remov- | |||
DO NOT attempt any maintenance, adjustments or | 2. | ing it from the adapter flange. | ||
service with engine and blade running. STOP engine | Open the bag by pulling the bag slider (A, Figure | |||
and blade. Disconnect spark plug wire and secure | 3. | 13) off of the | ||
away from spark plug. Engine and components are | To close the bag, fold the rear of the bag into the | |||
HOT. Avoid serious burns, allow sufficient time for all |
| former | ||
components to cool. |
|
| the edge of the | |
|
|
|
| pull the |
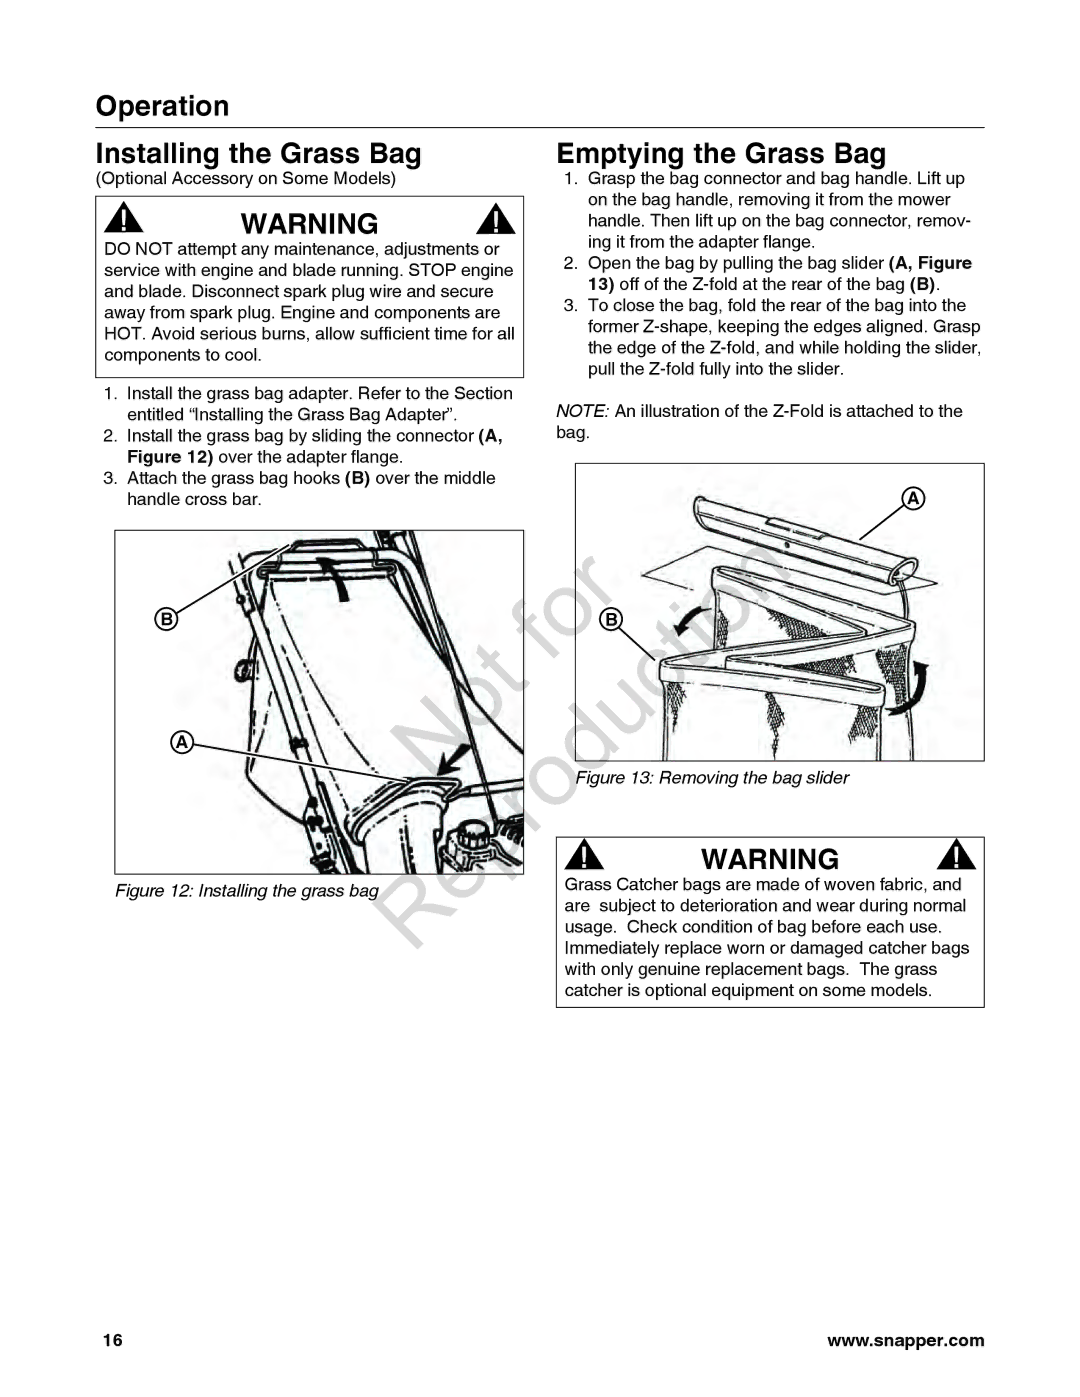
1. Install the grass bag adapter. Refer to the Section | NOTE: An illustration of the | ||||
2. | entitled “Installing the Grass Bag Adapter”. | ||||
Install the grass bag by sliding the connector (A, | bag. |
|
| ||
| Figure 12) over the adapter flange. |
|
|
| |
3. Attach the grass bag hooks (B) over the middle |
| A |
| ||
| handle cross bar. |
|
|
| |
|
| Reproduction |
| ||
| B | Not | for | B |
|
| A |
|
|
|
|
|
|
| Figure 13: Removing the bag slider |
| |
|
|
| ! | WARNING | ! |
Figure 12: Installing the grass bag |
| Grass Catcher bags are made of woven fabric, and | |||
|
|
| are | subject to deterioration and wear during normal | |
|
|
| usage. Check condition of bag before each use. |
| |
|
|
| Immediately replace worn or damaged catcher bags | ||
|
|
| with only genuine replacement bags. The grass |
| |
|
|
| catcher is optional equipment on some models. |
| |
16 | www.snapper.com |
