Maintenance
Engine Drive Belt Replacement (Stretch |
|
|
|
|
| ||||
|
|
|
|
| |||||
Type Belts - Continued) |
|
|
|
|
|
|
| A | |
IMPORTANT: Drain the fuel tank before tipping the |
|
|
|
|
| ||||
|
|
|
|
|
| ||||
mower. DO NOT tip the machine with the carburetor or |
| B |
|
| |||||
spark plug down. Oil from the crankcase will saturate |
|
|
| ||||||
the air filter and cause the engine to be hard to start or |
|
|
|
|
| ||||
not start at all. If contamination does occur, the air filter |
|
| C |
|
| ||||
will have to be replaced. |
|
|
|
|
|
|
| ||
3. Remove the driven disc. Refer to the Section |
|
|
|
|
| D | |||
| entitled “Driven Disc Replacement” for driven disc |
|
|
|
| ||||
4. | removal procedure. |
|
|
|
| E |
|
| |
Drain the fuel tank before tipping the mower. Do |
|
|
| ||||||
| not tilt the mower with the spark plug or carbure- |
|
|
|
| F | |||
| tor down. Tilt the mower up on its rear wheels |
|
|
| G |
| |||
| and remove the blade and blade hub. Assistance |
|
|
|
| ||||
| from another person may be necessary to hold the |
|
|
|
|
| |||
5. | mower in the tilted position. |
|
|
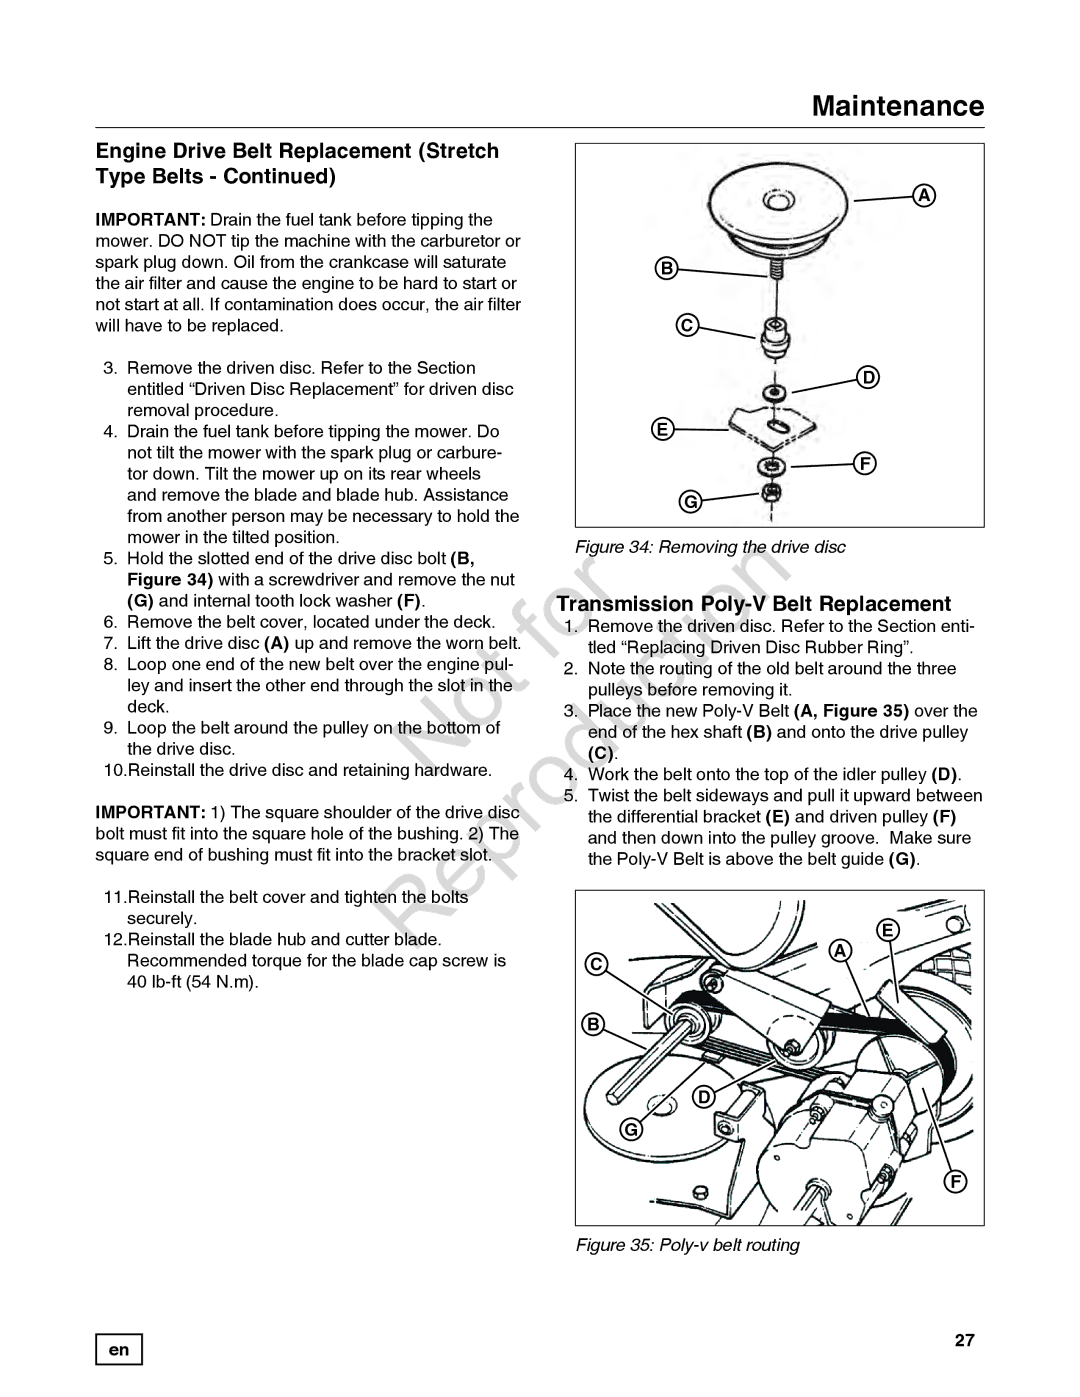
| Figure 34: Removing the drive disc |
| |||
Hold the slotted end of the drive disc bolt (B, |
|
| |||||||
| 40 | Reproduction |
|
| |||||
| Figure 34) with a screwdriver and remove the nut | T ansmiss | n P | ||||||
| (G) and internal tooth lock washer (F). |
|
| ||||||
6. Remove the belt cover, located under the deck. | 1. Remove | he dr ven disc. Refer to the Section enti- | |||||||
7. Lift the drive disc (A) up and remove the worn belt. |
| tled “Replac ng Driven Disc Rubber Ring”. | |||||||
8. Loop one end of the new belt over the engine pul- | 2. Note he rou ing of the old belt around the three | ||||||||
| ley and insert the other end through the sl | in | he |
| p lleys before removing it. |
|
| ||
9. | deck. |
| m | f | 3. Place the new | ||||
Loop the belt around the pulley on the b tt |
| end of the hex shaft (B) and onto the drive pulley | |||||||
| the drive disc. |
|
|
|
| (C). |
|
|
|
10.Reinstall the drive disc and retaining hardware. |
| 4. Work the belt onto the top of the idler pulley (D). | |||||||
IMPORTANT: 1) The square shoulder of the drive disc | 5. Twist the belt sideways and pull it upward between | ||||||||
| the differential bracket (E) and driven pulley (F) | ||||||||
bolt must fit into the square hole of the bushing. 2) The |
| and then down into the pulley groove. Make sure | |||||||
square end of bushing must fit into the brack | slot. |
|
| the | |||||
11.Reinstall the belt cover and tighten the bolts |
|
|
|
|
|
| |||
|
|
|
|
|
| ||||
| securely. |
|
|
|
|
|
|
| E |
12.Reinstall the blade hub and cutter blade. |
|
|
|
|
| A | |||
| Recommended torque for the blade cap screw is |
| C |
|
| ||||
|
|
|
|
| |||||
|
|
|
|
|
|
|
|
| |
B |
D |
G |
F |
Figure 35: Poly-v belt routing
en
27