Section 4 - REPAIR & ADJUSTMENTS
! | WARNING | ! |
DO NOT attempt any maintenance, adjustments or service with engine and blade running. STOP engine and blade. Disconnect spark plug wire and secure away from spark plug. Engine and components are HOT. Avoid serious burns, allow sufficient time for all components to cool. Wear heavy leather gloves when handling or working around cutting blades. Blades are extremely sharp and can cause severe injury.
4.1MOWER BLADE REPLACEMENT 4.1.1. STANDARD BLADE WEAR LIMIT
1.Inspect blade frequently for signs of excessive wear or damage. See Figure 4.1.
NEW BLADE
WEAR LIMIT (NOTCH STARTS)
DANGEROUS CONDITION!
DO NOT USE ON MOWER!
REPLACE WITH NEW
BLADE.
FIGURE 4.1
! | WARNING | ! |
DO NOT use a cutting blade that shows signs of excessive wear or damage. Refer to Section “MOWER BLADE REPLACEMENT” for proper blade inspection and service procedures.
4.1.2. BLADE SHARPENING
1.Disconnect spark plug wire and secure end away from plug.
IMPORTANT: Drain fuel tank before tipping mower. DO NOT tip machine with carburetor or spark plug down. Oil from crankcase will saturate the air filter and cause the engine to be hard to start or not start at all. If contamination does occur, the air filter will have to be replaced.
2.Tilt mower up on its rear wheels. Do not tilt mower with spark plug or carburetor down.
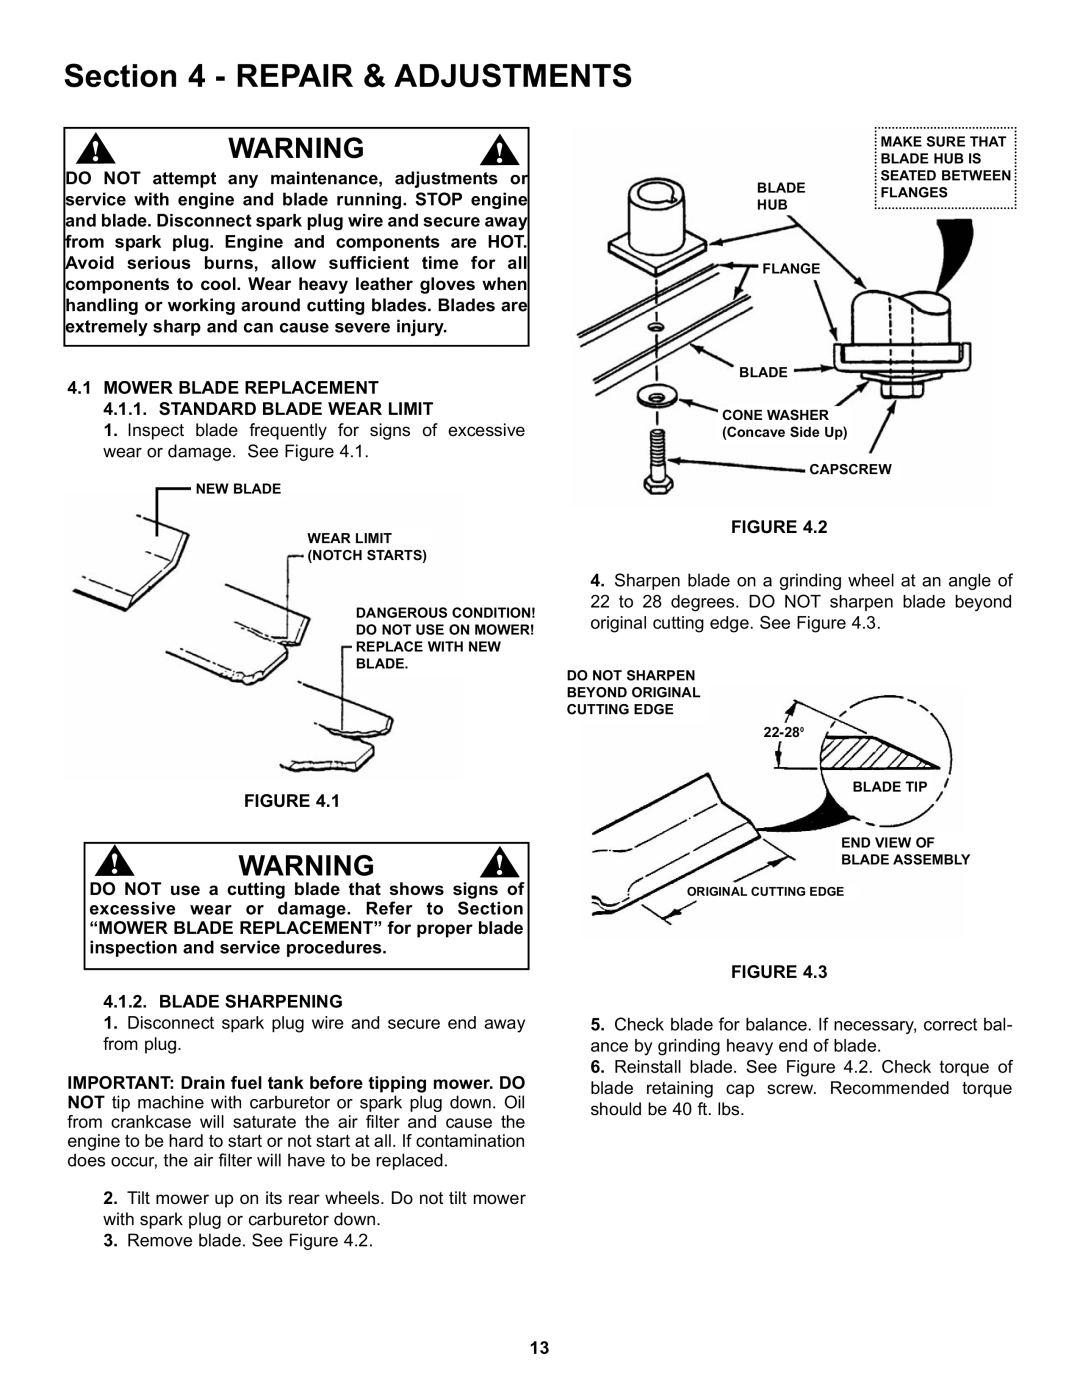
3.Remove blade. See Figure 4.2.
MAKE SURE THAT
BLADE HUB IS
SEATED BETWEEN
BLADE FLANGES
HUB
FLANGE
BLADE
CONE WASHER (Concave Side Up)
CAPSCREW
FIGURE 4.2
4.Sharpen blade on a grinding wheel at an angle of
22to 28 degrees. DO NOT sharpen blade beyond original cutting edge. See Figure 4.3.
DO NOT SHARPEN
BEYOND ORIGINAL
CUTTING EDGE
BLADE TIP
END VIEW OF
BLADE ASSEMBLY
ORIGINAL CUTTING EDGE
FIGURE 4.3
5.Check blade for balance. If necessary, correct bal- ance by grinding heavy end of blade.
6.Reinstall blade. See Figure 4.2. Check torque of blade retaining cap screw. Recommended torque should be 40 ft. lbs.
13