Reviewing pictures
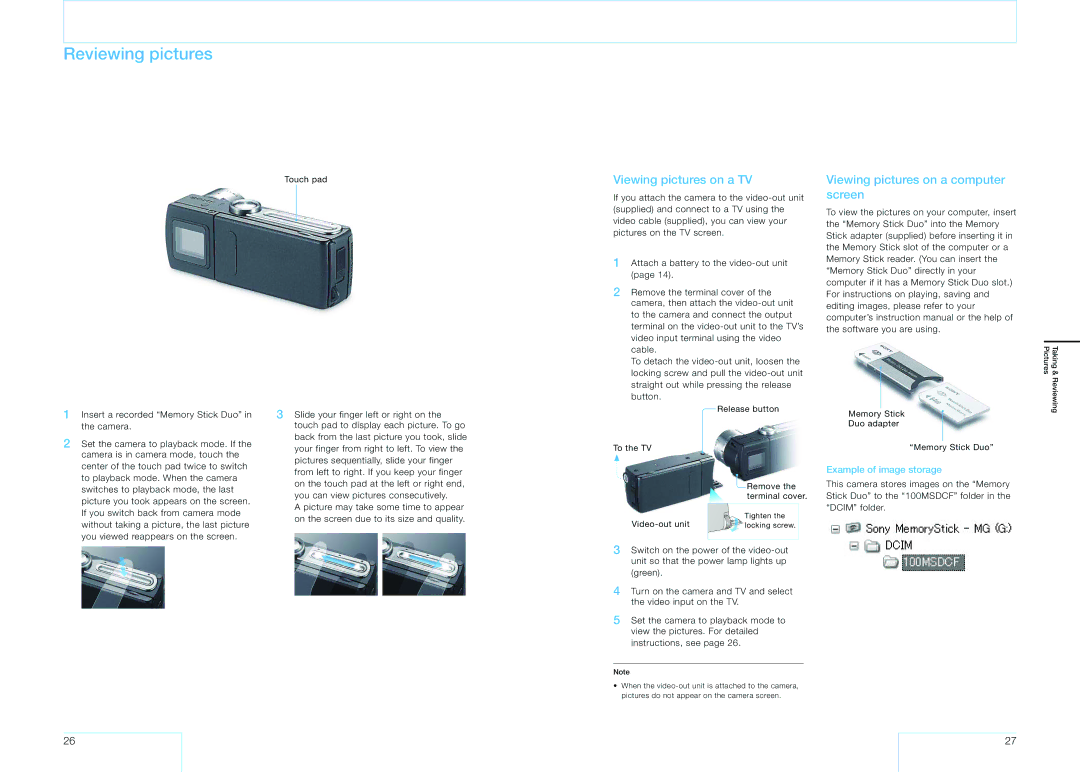
Touch pad
1 Insert a recorded “Memory Stick Duo” in | 3 Slide your finger left or right on the | |
the camera. | touch pad to display each picture. To go | |
2 Set the camera to playback mode. If the | back from the last picture you took, slide | |
your finger from right to left. To view the | ||
camera is in camera mode, touch the | ||
pictures sequentially, slide your finger | ||
center of the touch pad twice to switch | ||
from left to right. If you keep your finger | ||
to playback mode. When the camera | ||
on the touch pad at the left or right end, | ||
switches to playback mode, the last | ||
you can view pictures consecutively. | ||
picture you took appears on the screen. | ||
A picture may take some time to appear | ||
If you switch back from camera mode | ||
on the screen due to its size and quality. | ||
without taking a picture, the last picture | ||
| ||
you viewed reappears on the screen. |
|
Viewing pictures on a TV
If you attach the camera to the
1Attach a battery to the
2Remove the terminal cover of the camera, then attach the
To detach the
Release button
To the TV
![]() Remove the terminal cover.
Remove the terminal cover.
Tighten the | |
locking screw. |
3Switch on the power of the
4Turn on the camera and TV and select the video input on the TV.
5Set the camera to playback mode to view the pictures. For detailed instructions, see page 26.
Note
•When the
Viewing pictures on a computer screen
To view the pictures on your computer, insert the “Memory Stick Duo” into the Memory Stick adapter (supplied) before inserting it in the Memory Stick slot of the computer or a Memory Stick reader. (You can insert the “Memory Stick Duo” directly in your computer if it has a Memory Stick Duo slot.) For instructions on playing, saving and editing images, please refer to your computer’s instruction manual or the help of the software you are using.
Memory Stick
Duo adapter
“Memory Stick Duo”
Example of image storage
This camera stores images on the “Memory Stick Duo” to the “100MSDCF” folder in the “DCIM” folder.
Taking & Reviewing Pictures
26
27
